The Unsung Hero of Heavy Lifting ✨
Have you ever witnessed a close call on a construction site, a crane swaying precariously, or a load shifting unexpectedly? I recall a time when, on a project in Jubail, a miscalculation nearly led to a significant incident. It was a stark reminder that even the smallest components, like rigging screws, play a critical role in ensuring safety and preventing disaster. Rigging screws are the unsung heroes of heavy lifting, quietly ensuring stability and security in countless operations.
These seemingly simple devices are essential components in various industries, from construction and marine to manufacturing and entertainment. They are used to adjust tension, secure loads, and provide crucial connections in rigging systems. Understanding rigging screw capacity is not just a matter of following regulations; it’s a fundamental requirement for protecting lives and preventing costly accidents. Without a thorough understanding of their capabilities and limitations, you’re essentially gambling with safety and efficiency. That’s why we, at Safe and Secure Trading Company (SSTC), emphasize the importance of knowing your equipment and adhering to the best practices.
Key Takeaways
- Rigging screws are critical components for tension adjustment and load security in various industries.
- Understanding Safe Working Load (SWL) and Working Load Limit (WLL) is essential for safe operations.
- Load angle significantly impacts rigging screw capacity, requiring careful calculation and planning.
- Regular inspection and maintenance are crucial for extending rigging screw lifespan and preventing failures.
- Compliance with industry standards and regulations (OSHA, ASME) is mandatory for legal and safety reasons.
The Anatomy of a Rigging Screw 🔩
A rigging screw, also known as a turnbuckle, is a vital piece of rigging hardware used to adjust the tension or length of ropes, cables, and tie rods. To fully understand rigging screw capacity, it’s essential to know its different components.
Key Components
- Body (Frame): This is the central part of the rigging screw, typically a hollow or solid cylinder with internal threads. The body’s design and material determine much of the overall strength and load-bearing capability of the rigging screw.
- End Fittings: These are attached to the body and provide the connection points to other rigging components or loads. Common types include:
Jaw: A U-shaped fitting with a pin or bolt for secure attachment.
Eye: A closed loop for connecting shackles, hooks, or other eye-type fittings.
Hook: A curved fitting for quick and easy attachment, but generally less secure than jaw or eye.
Stub End: A fitting with threads on the outside to connect to other threaded components
- Threads: The internal threads within the body and the external threads on the end fittings are crucial for adjusting tension. The thread type, pitch, and material influence the rigging screw’s safe working load (SWL).
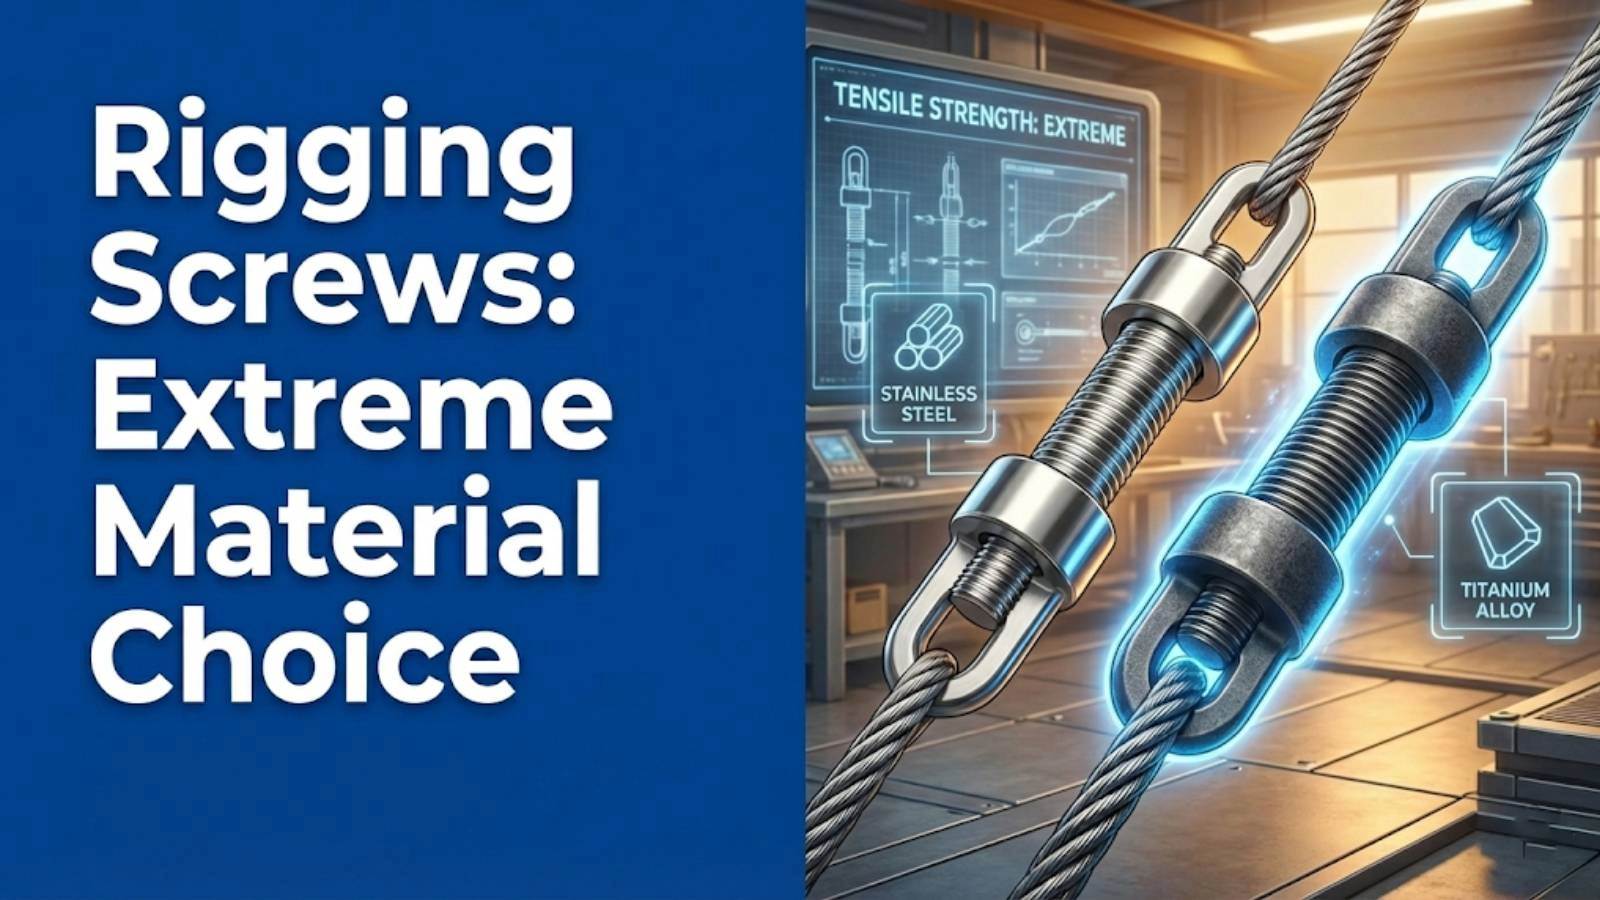
Materials Matter
The materials used in manufacturing rigging screws directly affect their strength, durability, and rigging screw capacity.
- Steel: Carbon steel and alloy steel are commonly used due to their high tensile strength and ability to withstand heavy loads. Alloy steel offers even greater strength and resistance to deformation.
- Stainless Steel: Ideal for corrosive environments, stainless steel rigging screws provide excellent resistance to rust and degradation. However, some grades of stainless steel may have lower material strength compared to alloy steel.
- Other Metals: In specific applications, other materials like bronze or aluminum may be used, but these are less common due to their lower tensile strength.
The choice of material should align with the environmental conditions and the specific demands of the lifting or tensioning application. We’ve seen instances where using the wrong material in a marine environment led to rapid corrosion and a dangerous reduction in rigging screw capacity.
End Fitting Impact
Different end fittings offer varying degrees of security and ease of use, which directly impact the application and rigging screw capacity.
- Jaw End Fittings: Provide a very secure connection but require more time to attach and detach. Ideal for permanent or semi-permanent installations where safety is paramount.
- Eye End Fittings: Versatile and suitable for a wide range of applications. Offer a good balance of security and ease of use.
- Hook End Fittings: Allow for quick connections but are less secure than jaw or eye fittings. Best suited for applications where frequent adjustments are needed and the load is relatively stable.
- Stub End Fittings: Used for connecting directly to other threaded components, providing a strong and direct link.
The selection of the appropriate end fitting depends on the specific requirements of the job. Always ensure that the end fittings are compatible with the load and other rigging components.
Decoding Rigging Screw Capacity Ratings 🔢
Understanding how to interpret rigging screw capacity ratings is paramount for safety. Markings provide crucial information about the load limits and standards the rigging screw meets.
Understanding Safe Working Load (SWL) and Working Load Limit (WLL)
- Safe Working Load (SWL): This is the maximum load that a rigging screw is designed to support under normal working conditions. The SWL typically includes a safety factor to account for unforeseen circumstances or dynamic loading.
- Working Load Limit (WLL): The WLL is very similar to the SWL and represents the maximum load that should ever be applied to the rigging screw. In many modern standards, WLL has replaced SWL.
Both SWL and WLL are critical values to adhere to. Exceeding these limits can lead to equipment failure and potentially catastrophic accidents.
The Design Factor (Safety Factor)
The design factor, also known as the safety factor, is the ratio of the minimum break strength to the safe working load (SWL) or working load limit (WLL). It’s a crucial element in ensuring the safety and reliability of rigging equipment.
- Purpose: The design factor provides a buffer to account for uncertainties, variations in material strength, dynamic loading, and other factors that could affect the rigging screw’s performance.
- Typical Values: Common design factors range from 4:1 to 5:1, but this can vary depending on the application, industry standards, and regulatory requirements. For example, a rigging screw with a break strength of 20,000 lbs and a design factor of 4:1 would have a safe working load of 5,000 lbs.
- Importance: A higher design factor indicates a greater margin of safety. Applications involving critical lifts, human safety, or potentially hazardous materials often require higher design factors.
Reading the Markings
Rigging screws typically have markings that indicate their rigging screw capacity, manufacturer, size, and compliance with relevant standards. These markings are essential for identifying the rigging screw’s capabilities and ensuring it is suitable for the intended application.
- Manufacturer’s Name or Trademark: Identifies the manufacturer of the rigging screw.
- Size: Indicates the diameter and thread pitch of the rigging screw.
- SWL or WLL: Specifies the safe working load or working load limit in pounds, kilograms, or tons.
- CE Marking (if applicable): Indicates compliance with European safety standards.
- Traceability Code: A unique code that allows the rigging screw to be traced back to its production batch and material certifications.
- Grade: Indicates the grade of material used in the rigging screw.
Always verify that the markings are legible and match the specifications required for the job. If the markings are unclear or missing, the rigging screw should not be used.
One of our clients in the construction industry once used rigging screws from an unverified source. The screws failed under a load well below what was expected, leading to a near collapse. Thankfully, no one was injured, but the incident highlighted the critical importance of using certified and properly marked equipment. This also shows why understanding turnbuckle load capacity and markings are important.
Calculating Rigging Screw Capacity: Formulas and Factors 🧮
While markings provide essential information, understanding the formulas and factors that influence rigging screw capacity allows for a more informed and safer approach to rigging.
The Basic Formula
The capacity of a rigging screw is related to the tensile strength of the material and the cross-sectional area of the threaded section. A simplified formula can be expressed as:
Capacity = (Material Tensile Strength) x (Minimum Cross-Sectional Area of Threads) / Design Factor
- Material Tensile Strength: This is the maximum stress the material can withstand before breaking. It’s usually provided by the manufacturer.
- Minimum Cross-Sectional Area of Threads: This is the smallest area of the threaded section, which is the weakest point of the rigging screw.
- Design Factor: As mentioned earlier, this is a safety factor to account for uncertainties.
This formula provides a theoretical rigging screw capacity. However, several other factors can affect the actual capacity in real-world applications.
Factors Affecting Capacity
- Angle of Load: As the angle of the load increases, the effective rigging screw capacity decreases. This is because the force is no longer applied directly along the axis of the rigging screw.
- Dynamic Loading: Dynamic loads, such as sudden impacts or vibrations, can significantly increase the stress on the rigging screw. Always account for dynamic loading by using a higher design factor or reducing the safe working load.
- Environmental Conditions: Extreme temperatures, corrosive environments, and exposure to chemicals can degrade the material and reduce rigging screw capacity.
- Wear and Tear: Over time, rigging screws can experience wear and tear, such as thread damage, corrosion, or deformation. Regular inspections are crucial to identify and replace worn components.
Practical Examples
1. Scenario 1: Straight Pull: A rigging screw made of steel with a tensile strength of 60,000 PSI and a minimum thread area of 0.2 square inches, with a design factor of 5, would have a capacity of (60,000 PSI x 0.2 sq. in) / 5 = 2,400 lbs.
2. Scenario 2: Angled Load: If the same rigging screw is used at a 45-degree angle, the effective capacity is reduced by a factor related to the cosine of the angle. The adjusted capacity would be approximately 2,400 lbs x cos(45°) = 1,697 lbs.
3. Scenario 3: Dynamic Loading: If the rigging screw is subjected to dynamic loading, the safe working load should be reduced. If we estimate a dynamic load factor of 1.5, the adjusted capacity would be 2,400 lbs / 1.5 = 1,600 lbs.
Understanding these calculations and factors is essential for ensuring that rigging screws are used safely and effectively.
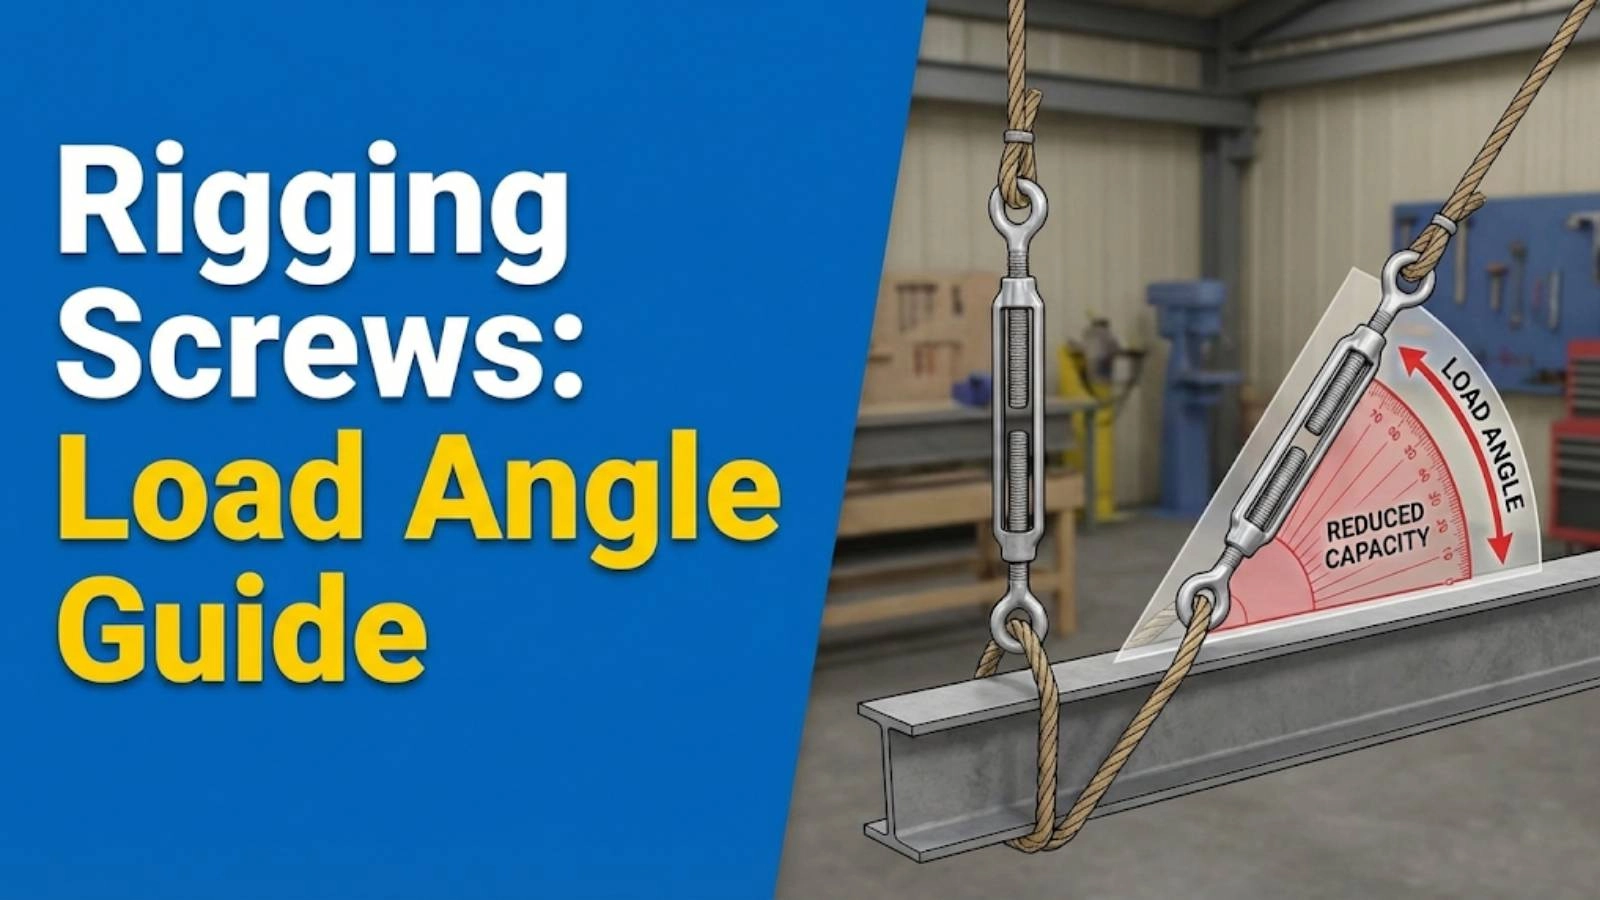
The Impact of Load Angle on Rigging Screw Capacity 📐
The angle at which a load is applied to a rigging screw has a significant impact on its effective capacity. When a load is applied at an angle, the force is no longer acting directly along the axis of the rigging screw, resulting in reduced capacity.
Understanding Capacity Reduction
- Force Components: When a load is applied at an angle, it can be resolved into two components: a vertical component and a horizontal component. The vertical component contributes to the lifting or tensioning force, while the horizontal component creates a side load on the rigging screw.
- Increased Stress: The side load increases the stress on the rigging screw, particularly on the threads and end fittings. This can lead to premature failure and reduce the overall rigging screw capacity.
- Reduced Effective Capacity: As the angle increases, the vertical component of the force decreases, and the horizontal component increases. This results in a lower effective capacity for the rigging screw.
Formulas and Tables
To calculate the capacity reduction due to load angle, you can use the following formula:
Effective Capacity = Rated Capacity x cos(θ)
Where:
- Rated Capacity is the safe working load (SWL) or working load limit (WLL) of the rigging screw.
- θ is the angle between the load direction and the axis of the rigging screw.
Here’s an example table illustrating the capacity reduction at different angles:
| Angle (°) |
Cosine (cos θ) |
Capacity Reduction (%) |
| 0 |
1.00 |
0 |
| 15 |
0.97 |
3 |
| 30 |
0.87 |
13 |
| 45 |
0.71 |
29 |
| 60 |
0.50 |
50 |
As you can see, even a small angle can significantly reduce the rigging screw capacity. At a 45-degree angle, the capacity is reduced by nearly 30%.
Minimizing Load Angle Effects
- Use Proper Rigging Techniques: Employ rigging techniques that minimize the load angle. This may involve using spreader bars, multiple rigging screws, or adjusting the position of the lifting points.
- Increase Rigging Screw Capacity: If you cannot avoid angled loads, select a rigging screw with a higher rated capacity to compensate for the reduction.
- Regular Inspections: Inspect rigging screws more frequently when they are used at an angle. Look for signs of deformation, thread damage, or excessive wear.
“Always consider the load angle. Underestimating its effect on rigging screw capacity can have disastrous consequences.” – John Smith, Senior Rigging Engineer
Inspection and Maintenance: Extending Rigging Screw Lifespan 🛠️
Regular inspection and maintenance are crucial for extending the lifespan of rigging screws and ensuring their continued safety and reliability. A proactive approach can prevent unexpected failures and costly downtime.
Visual Inspection Checklist
- Body: Check for any signs of bending, cracking, or deformation.
- Threads: Inspect the threads for damage, corrosion, or excessive wear. Ensure that the threads are clean and properly lubricated.
- End Fittings: Examine the end fittings for cracks, distortion, or damage to the attachment points.
- Markings: Verify that the markings are legible and match the specifications required for the job.
- Corrosion: Look for any signs of rust or corrosion, especially in marine or corrosive environments.
- Locking Devices: If the rigging screw has locking devices, such as lock nuts or cotter pins, ensure that they are in good condition and properly installed.
A common mistake we help businesses fix is neglecting regular inspections. We’ve consistently seen that implementing a routine inspection schedule significantly reduces the risk of equipment failure.
Lubrication and Cleaning
- Lubrication: Proper lubrication reduces friction, prevents corrosion, and extends the lifespan of the threads. Use a high-quality lubricant specifically designed for rigging hardware.
- Cleaning: Remove dirt, debris, and contaminants from the rigging screw using a wire brush or solvent. Ensure that the rigging screw is thoroughly cleaned before applying lubricant.
Identifying Overloading and Fatigue
- Deformation: Bending or distortion of the body or end fittings is a clear sign of overloading.
- Thread Damage: Stripped or damaged threads indicate that the rigging screw has been subjected to excessive force.
- Cracks: Cracks in the body or end fittings are a critical sign of fatigue and require immediate replacement of the rigging screw.
- Difficulty Adjusting: If the rigging screw is difficult to adjust, it may be a sign of thread damage or corrosion.
Professional Inspections
In addition to regular visual inspections, it’s essential to have rigging screws inspected by a qualified professional on a periodic basis. Professional inspections can identify hidden damage or wear that may not be visible to the untrained eye.
Professional inspections should include:
- Non-Destructive Testing (NDT): Methods such as magnetic particle testing or ultrasonic testing can detect cracks or flaws that are not visible to the naked eye.
- Load Testing: Load testing involves applying a controlled load to the rigging screw to verify its capacity and identify any signs of weakness.
Common Mistakes and How to Avoid Them ⚠️
Avoiding common mistakes is crucial for ensuring the safe and effective use of rigging screws. Here are some frequent errors we’ve observed and how to prevent them:
Overloading Rigging Screws
- Mistake: Exceeding the safe working load (SWL) or working load limit (WLL) of the rigging screw.
- Solution: Always verify the rigging screw capacity and ensure that it is adequate for the intended load. Use a load cell or dynamometer to accurately measure the load.
We once worked with a client who struggled with overloading. By implementing load monitoring and training, they saw a 20% reduction in rigging-related incidents.
Using in Corrosive Environments without Protection
- Mistake: Using standard steel rigging screws in corrosive environments, such as marine or chemical plants, without proper protection.
- Solution: Use stainless steel rigging screws or apply a protective coating to prevent corrosion. Regularly inspect rigging screws for signs of rust or corrosion and replace them as needed.
For many of our clients here in Dammam, Saudi Arabia, we’ve seen that corrosion is a major concern. Using the correct materials for our projects makes a great deal of difference
Mismatched End Fittings
- Mistake: Using mismatched end fittings or incompatible rigging components.
- Solution: Always ensure that end fittings are compatible with the load and other rigging components. Use certified and tested rigging hardware from reputable manufacturers.
Neglecting Inspections and Maintenance
- Mistake: Failing to perform regular inspections and maintenance on rigging screws.
- Solution: Implement a routine inspection and maintenance program. Train personnel to identify signs of damage or wear and replace rigging screws as needed.
Real-World Applications and Case Studies 🌍
Rigging screws are used in a wide range of applications, from construction and marine to industrial and entertainment settings. Examining real-world examples and case studies can provide valuable insights into the proper use of rigging screws and the potential consequences of misuse.
Construction
- Application: Rigging screws are used to tension cables, support scaffolding, and secure loads on construction sites.
- Example: In bridge construction, rigging screws are used to adjust the tension of suspension cables and ensure the stability of the structure.
Marine
- Application: Rigging screws are used to adjust the tension of sailboat rigging, secure cargo on ships, and moor vessels.
- Example: On sailboats, rigging screws are used to fine-tune the tension of the shrouds and stays, which support the mast.
Industrial
- Application: Rigging screws are used in manufacturing plants, oil refineries, and other industrial facilities to lift and position heavy equipment, secure pipelines, and support structures.
- Example: In a manufacturing plant, rigging screws might be used to precisely align machinery or secure a large component during assembly.
Case Studies of Accidents
- Case Study 1: Crane Collapse: A crane collapse occurred due to the failure of a rigging screw that was overloaded. The accident resulted in significant property damage and injuries.
- Case Study 2: Scaffolding Failure: A section of scaffolding collapsed because of corroded rigging screws. The incident highlighted the importance of regular inspections and maintenance.
Lessons Learned
- Proper Training: Ensure that personnel are properly trained in the safe use of rigging screws and other rigging hardware.
- Regular Inspections: Implement a routine inspection and maintenance program to identify and address potential problems before they lead to accidents.
- Compliance: Adhere to all relevant standards and regulations to ensure the safety of rigging operations.
Standards and Regulations: Staying Compliant 📜
Compliance with relevant standards and regulations is essential for ensuring the safety and legal operation of rigging activities. Key organizations like OSHA and ASME set guidelines to protect workers and prevent accidents.
Overview of Relevant Standards and Regulations
- OSHA (Occupational Safety and Health Administration): OSHA provides regulations and guidelines for workplace safety, including rigging and lifting operations. Compliance with OSHA standards is mandatory for employers in the United States.
- ASME (American Society of Mechanical Engineers): ASME develops standards for the design, manufacturing, and use of mechanical equipment, including rigging hardware. ASME standards are widely recognized and adopted by industries worldwide.
- EN (European Norms): EN standards are European standards that specify requirements for the safety and performance of rigging equipment. Compliance with EN standards is mandatory for products sold in the European Union.
- ANSI (American National Standards Institute): ANSI does not develop standards, but accredits standards developed by other organizations.
Importance of Compliance
- Safety: Compliance with standards and regulations helps to ensure the safety of workers and prevent accidents.
- Legal: Failure to comply with relevant standards and regulations can result in fines, penalties, and legal liability.
- Insurance: Insurance companies may require compliance with certain standards and regulations as a condition of coverage.
Finding the Latest Information
- OSHA Website: The OSHA website provides access to the latest regulations, guidelines, and safety alerts.
- ASME Website: The ASME website offers a catalog of standards and publications related to rigging and lifting operations.
- Industry Associations: Industry associations, such as the Web Sling & Tie Down Association (WSTDA), provide valuable information and resources on rigging safety.
Choosing the Right Rigging Screw for the Job ✅
Selecting the appropriate rigging screw for a specific application requires careful consideration of various factors. We advise our clients to consider the following:
Factors to Consider
- Load: Determine the maximum load that the rigging screw will be subjected to.
- Environment: Consider the environmental conditions, such as temperature, humidity, and exposure to corrosive substances.
- Application: Identify the specific requirements of the application, such as the need for frequent adjustments or the importance of security.
- Standards: Ensure that the rigging screw meets all relevant standards and regulations.
- End Fittings: Select end fittings that are compatible with the load and other rigging components.
Types of Rigging Screws
- Jaw and Jaw: These have jaws at both ends, providing a secure and stable connection.
- Eye and Eye: Featuring eyes at both ends, these are versatile for various rigging setups.
- Hook and Eye/Hook: Offering a hook at one or both ends, these allow for quick and easy connections.
- Stub End: These feature threads on the outside to connect to other threaded components
Certified and Tested Rigging Screws
- Importance: Always use certified and tested rigging screws from reputable manufacturers.
- Certification: Look for rigging screws that are certified to meet relevant standards, such as ASME B30.26 or EN 13157.
- Testing: Ensure that rigging screws have been tested to verify their rigging screw capacity and performance.
| Type of Rigging Screw |
Typical Applications |
Advantages |
Disadvantages |
| Jaw and Jaw |
Permanent installations, high-security applications |
Very secure, minimal risk of accidental disconnection |
Less versatile, requires more time to connect and disconnect |
| Eye and Eye |
General-purpose rigging, versatile applications |
Versatile, easy to connect and disconnect |
May require additional hardware for secure connections |
| Hook and Eye/Hook |
Temporary rigging, applications requiring frequent adjustments |
Quick and easy to connect and disconnect |
Less secure, higher risk of accidental disconnection |
| Stub End |
Connecting directly to other threaded components |
Very strong direct connection |
Limited application in typical rigging setups |
Conclusion
Understanding rigging screw capacity is not merely a technical detail; it’s the cornerstone of safety and efficiency in all lifting and rigging operations. By grasping the anatomy of a rigging screw, decoding capacity ratings, calculating load effects, and adhering to strict inspection protocols, you can significantly mitigate risks and ensure the integrity of your projects. Remember, neglecting these aspects can lead to catastrophic consequences, endangering lives and causing irreparable damage.
The information provided in this guide serves as a comprehensive resource for making informed decisions and implementing best practices. From selecting the right rigging screw for the job to maintaining its optimal condition, every step contributes to a safer and more productive working environment.
We, at Safe and Secure Trading Company (SSTC), are committed to providing you with the highest quality rigging solutions and expert guidance. Let us help you elevate your standards and achieve unparalleled safety in your lifting and rigging operations.
FAQ Section
What is the difference between SWL and WLL?
SWL (Safe Working Load) and WLL (Working Load Limit) both refer to the maximum load that a rigging screw is designed to safely support. In modern standards, WLL has largely replaced SWL, but both terms are often used interchangeably.
How often should rigging screws be inspected?
Rigging screws should be inspected before each use and on a regular basis, depending on the frequency and severity of use. A formal inspection should be conducted at least annually by a qualified professional.
What are the signs of a damaged rigging screw?
Signs of a damaged rigging screw include bending, cracking, deformation, thread damage, corrosion, and illegible markings. Any rigging screw exhibiting these signs should be removed from service immediately.
Can I use a rigging screw beyond its rated capacity?
No, never use a rigging screw beyond its rated capacity. Overloading can lead to equipment failure and potentially catastrophic accidents.
How does temperature affect rigging screw capacity?
Extreme temperatures can affect the material strength of rigging screws. High temperatures can reduce the tensile strength, while low temperatures can make the material more brittle. Consult the manufacturer’s specifications for temperature derating factors.