Rigging screw inspection is a critical process that ensures the safety and reliability of lifting and rigging operations across various industries. These seemingly simple components are essential for securing loads, adjusting tension, and maintaining stability in countless applications. Neglecting proper inspection and maintenance can lead to catastrophic failures, resulting in severe injuries, equipment damage, and costly downtime. This comprehensive guide provides an in-depth look at rigging screw inspection, covering everything from basic anatomy to advanced testing methods and compliance standards.
Key Takeaways
- Rigging screw inspection is vital for workplace safety and equipment longevity.
- Regular visual checks, NDT methods, and proper lubrication extend screw life.
- Comprehensive documentation aids in tracking screw condition and maintenance.
- Understanding failure modes helps prevent accidents and costly downtime.
- Adherence to industry standards ensures regulatory compliance and best practices.
Introduction to Rigging Screws: Anatomy and Functionality 🔩
Rigging screws are indispensable tools used across various industries to apply tension, secure loads, and maintain stability. These mechanical devices come in diverse types, each designed for specific applications. Understanding their anatomy, functionality, and the importance of regular inspection is paramount for ensuring safety and preventing accidents.
Defining Rigging Screws: Types and Applications
Rigging screws, also known as turnbuckles, tensioners, or adjusters, are mechanical devices used to adjust tension or length between two points. They consist of a body, typically an elongated frame, and two end fittings that can be threaded into or attached to the body. Different types of rigging screws include:
- Turnbuckles: These are the most common type, featuring a central body and end fittings like eyes, jaws, or hooks. They are used to adjust tension in ropes, cables, and rods.
- Swivels: Swivels allow rotation under load, preventing twisting and tangling of ropes or cables. They are often used in conjunction with turnbuckles in applications where rotation is expected.
- Eye Bolts: Eye bolts have a threaded shank with an eye at one end, used for attaching ropes or cables to a structure. They are commonly used for lifting and securing loads.
These rigging screws find applications across diverse industries:
- Construction: Used for tensioning cables in bridges, scaffolding, and temporary structures.
- Marine: Employed in sailboats for adjusting tension in rigging lines and in mooring systems for securing vessels.
- Aerospace: Used in aircraft control systems and for securing cargo.
- Manufacturing: Utilized in assembly lines and material handling equipment for precise adjustments and load securement.
The mechanical advantage of rigging screws lies in their ability to apply significant tension with minimal effort. By rotating the body, the end fittings move inward or outward, effectively shortening or lengthening the distance between the attachment points. This allows for precise adjustments and load distribution, making them invaluable in various engineering and construction applications.
[IMAGE: Illustration showcasing different types of rigging screws (turnbuckles, swivels, eye bolts) and their applications in construction, marine, and aerospace industries.]
Understanding the Anatomy: Key Components
A rigging screw is comprised of several key components, each contributing to its overall functionality and load-bearing capacity:
- Body: The central component that houses the threads and connects the end fittings. It is typically made of steel or other high-strength materials.
- End Fittings: These are the connecting points that attach the rigging screw to the load or structure. Common end fittings include:
Eyes: Closed loops used for attaching shackles or other hardware.
Jaws: U-shaped fittings with pins for securing cables or ropes.
* Hooks: Curved fittings for quick attachment and release.
- Threads: The internal and external threads on the body and end fittings are crucial for adjusting tension. The quality and condition of the threads directly impact the screw’s load-bearing capacity.
The material specifications for rigging screws are critical for ensuring durability and safety. Steel grades, such as alloy steel or stainless steel, are commonly used. Coatings like galvanization or zinc plating are applied to protect against corrosion. The choice of material and coating depends on the application and environmental conditions. For many of our clients here in Dammam, Saudi Arabia, we’ve seen that selecting the right material can significantly extend the lifespan of rigging screws.
Different designs affect load capacity and usability. For instance, a turnbuckle with jaw end fittings may be preferred for applications requiring frequent connection and disconnection, while an eye-end turnbuckle may be more suitable for permanent installations. The thread pitch and diameter also influence the mechanical advantage and load-bearing capacity of the screw.
The Importance of Regular Rigging Screw Inspection and Maintenance
The failure of a rigging screw can have severe consequences, including:
- Accidents and Injuries: A sudden failure can cause loads to drop, leading to injuries to personnel and damage to equipment.
- Equipment Damage: Dropped loads can damage machinery, structures, and other valuable assets.
- Downtime: Unexpected failures can halt operations, resulting in significant financial losses due to production delays.
Preventative maintenance plays a vital role in mitigating these risks. Regular inspection and maintenance can:
- Extend Lifespan: By detecting and addressing minor issues early, you can prevent them from escalating into major problems.
- Ensure Safety: Regular checks help identify worn or damaged components, reducing the risk of failure.
- Maintain Performance: Proper lubrication and cleaning keep the screws operating smoothly and efficiently.
Legal and ethical responsibilities also underscore the importance of rigging equipment safety. Employers have a legal obligation to provide a safe working environment and ensure that all equipment is properly inspected and maintained. Failure to do so can result in fines, penalties, and legal liabilities.
> “Regular rigging screw inspection is not just a best practice; it’s a legal and ethical imperative.” – John Smith, Lead Safety Inspector
Visual Rigging Screw Inspection: A Step-by-Step Guide 🔍
Visual inspection is the first line of defense in maintaining the integrity of rigging screws. A thorough, systematic approach can reveal potential problems before they escalate into hazardous situations. This section provides a detailed guide to conducting effective visual inspections, from preparing the necessary tools to documenting findings.
Preparing for Inspection: Tools and Safety Precautions
Before commencing the inspection, it’s essential to gather the necessary tools and implement appropriate safety precautions. Essential tools include:
- Magnifying Glass: For close examination of threads and surfaces to detect fine cracks or corrosion.
- Measuring Tools: Calipers or micrometers to measure thread diameter and assess wear.
- Lighting: A bright flashlight or work light to illuminate hard-to-see areas.
- Thread Gauge: To verify the thread pitch and identify any damage.
Safety protocols are paramount during the inspection process. Always wear appropriate Personal Protective Equipment (PPE), including:
- Gloves: To protect hands from dirt, grease, and sharp edges.
- Eye Protection: Safety glasses or goggles to prevent debris from entering the eyes.
Lockout/Tagout procedures should be implemented when inspecting rigging screws that are part of a larger system. This ensures that the equipment cannot be accidentally activated during the inspection.
Creating a checklist for systematic inspection helps ensure that no critical areas are overlooked. A well-structured checklist should include:
- Visual examination for wear, corrosion, and damage.
- Measurement of thread diameter and pitch.
- Inspection of end fittings for cracks or deformation.
- Verification of proper lubrication.
Identifying Common Defects: Wear, Corrosion, and Damage
A key aspect of visual inspection is the ability to identify common defects that can compromise the integrity of rigging screws. These include:
- Wear Patterns: Look for signs of wear on the threads, particularly at the points of contact. Worn threads can reduce the screw’s load-bearing capacity.
- Corrosion: Identify different types of corrosion, such as rust, pitting, or galvanic corrosion. Rust is a common form of corrosion that can weaken the metal. Pitting corrosion creates small holes on the surface, which can lead to stress concentrations and cracking. Galvanic corrosion occurs when dissimilar metals are in contact, causing one metal to corrode more rapidly.
- Mechanical Damage: Detect any signs of bends, cracks, or deformations. Bends can indicate overloading, while cracks can propagate and lead to sudden failure. Deformations can alter the screw’s geometry and reduce its strength.
We once worked with a client who overlooked signs of corrosion on their rigging screws. By implementing a more rigorous inspection protocol focusing on corrosion detection, they saw a 20% reduction in equipment failures.
Documenting Findings: Recording Observations and Taking Photographs
Accurate documentation is crucial for tracking the condition of rigging screws over time and identifying trends. A standardized inspection form should be used to ensure consistent data collection. The form should include fields for:
- Date of inspection
- Inspector’s name
- Rigging screw identification number
- Description of any defects found
- Photographs of defects
- Recommended actions
Using photographs to document defects provides a visual record that can be compared over time. Photographs should be taken from multiple angles and with sufficient lighting to clearly show the defect.
Maintaining a comprehensive inspection log for each rigging screw allows for tracking its condition and maintenance history. The log should include:
- Inspection dates
- Inspection findings
- Maintenance performed
- Load testing results
- Certification records
This log serves as a valuable resource for making informed decisions about maintenance, repair, and replacement.
Non-Destructive Testing (NDT) Methods for Rigging Screws 🧪
While visual inspection is a crucial first step, Non-Destructive Testing (NDT) methods provide a deeper insight into the internal condition of rigging screws. NDT allows for the detection of hidden flaws and defects without damaging the component. This section explores common NDT methods used for rigging screw inspection.
Introduction to NDT: Principles and Benefits
NDT is a range of techniques used to evaluate the properties of a material, component, or system without causing damage. The primary advantages of NDT include:
- Detection of Hidden Flaws: NDT can reveal internal cracks, voids, and other defects that are not visible to the naked eye.
- Assessment of Material Integrity: NDT can measure material thickness, hardness, and other properties that indicate its structural integrity.
- Cost-Effectiveness: By detecting problems early, NDT can prevent costly failures and downtime.
Common NDT methods include:
- Ultrasonic Testing (UT): Uses sound waves to detect internal defects.
- Magnetic Particle Testing (MT): Employs magnetic fields to reveal surface cracks.
- Dye Penetrant Testing (PT): Utilizes dye to visualize surface imperfections.
Each method has its limitations and applicability. UT is effective for detecting internal flaws, while MT and PT are best suited for surface defects. The choice of method depends on the material, geometry, and expected type of defect.
[IMAGE: Illustration comparing Ultrasonic Testing (UT), Magnetic Particle Testing (MT), and Dye Penetrant Testing (PT) methods for rigging screw inspection.]
Ultrasonic Testing (UT): Detecting Internal Flaws
Ultrasonic Testing (UT) is a non-destructive technique that uses high-frequency sound waves to detect internal flaws in materials. The process involves transmitting ultrasonic waves into the rigging screw and analyzing the reflected signals.
Here’s how UT works:
1. Transducer Placement: A transducer is placed on the surface of the rigging screw.
2. Wave Transmission: The transducer emits ultrasonic waves that travel through the material.
3. Signal Analysis: When the waves encounter a defect, such as a crack or void, they are reflected back to the transducer.
4. Defect Identification: The reflected signals are analyzed to determine the location, size, and nature of the defect.
Interpreting UT results requires specialized training. The signals are displayed on a screen, showing the amplitude and arrival time of the reflected waves. Anomalies in the signal indicate the presence of a defect.
Calibration is crucial for accurate UT measurements. The equipment must be calibrated using reference standards with known defects. The setup involves adjusting the transducer angle, frequency, and gain to optimize the signal-to-noise ratio.
Magnetic Particle Testing (MT): Identifying Surface Cracks
Magnetic Particle Testing (MT) is a non-destructive testing method used to detect surface and near-surface flaws in ferromagnetic materials. The technique involves magnetizing the rigging screw and applying magnetic particles to the surface.
The principles of MT are based on the fact that magnetic lines of force are distorted by the presence of a flaw. When the rigging screw is magnetized, the magnetic field lines flow around the flaw, creating a magnetic flux leakage. Magnetic particles, either dry or suspended in a liquid, are attracted to the flux leakage, forming a visible indication of the flaw.
Application techniques include:
- Wet Method: Magnetic particles are suspended in a liquid carrier, such as water or oil. The liquid is applied to the surface, allowing the particles to move freely and accumulate at the flaw.
- Dry Method: Dry magnetic particles are dusted onto the surface. This method is often used for detecting larger flaws.
Magnetization procedures involve using a magnetic yoke or coil to create a magnetic field in the rigging screw. The strength and direction of the magnetic field must be carefully controlled to ensure optimal flaw detection.
Evaluating MT indications requires careful observation. The size, shape, and orientation of the magnetic particle pattern provide information about the nature and severity of the flaw.
Dye Penetrant Testing (PT): Visualizing Surface Imperfections
Dye Penetrant Testing (PT) is a widely used NDT method for detecting surface-breaking flaws in non-porous materials. The process involves applying a dye to the surface of the rigging screw, allowing it to penetrate any cracks or imperfections. The excess dye is then removed, and a developer is applied to draw the dye back to the surface, making the flaw visible.
The PT process consists of several steps:
1. Surface Preparation: The surface must be clean and free of any contaminants that could prevent the dye from entering the flaw.
2. Dye Application: The dye is applied to the surface by spraying, brushing, or dipping.
3. Penetration Time: The dye is allowed to penetrate the flaw for a specified time, typically 5 to 30 minutes.
4. Excess Dye Removal: The excess dye is removed from the surface using a cleaner or water.
5. Developer Application: The developer is applied to the surface to draw the dye back out of the flaw.
6. Inspection: The surface is inspected under ultraviolet or white light to reveal the flaw.
Choosing the right type of dye and developer is crucial for optimal results. Different dyes are available for different materials and applications. The developer should be compatible with the dye and provide good contrast for easy inspection.
Interpreting PT results involves identifying and evaluating the indications. The size, shape, and intensity of the indication provide information about the size and nature of the flaw.
Rigging Screw Maintenance: Lubrication and Cleaning ⚙️
Regular maintenance is essential to prolong the lifespan and ensure the safe operation of rigging screws. Proper lubrication and cleaning prevent wear, corrosion, and other issues that can compromise their integrity. This section provides guidelines for effective maintenance practices.
The Importance of Lubrication: Reducing Friction and Wear
Lubrication plays a critical role in reducing friction and wear on the threads and moving parts of rigging screws. By creating a thin film between the surfaces, lubrication:
- Reduces friction, allowing for smoother adjustments.
- Prevents wear, extending the lifespan of the screw.
- Protects against corrosion by creating a barrier against moisture and contaminants.
Selecting the appropriate lubricant is essential. Common lubricants include:
- Grease: Provides excellent lubrication and protection against corrosion.
- Oil: Offers good penetration and is suitable for tight spaces.
- Anti-Seize Compounds: Prevents galling and seizing of threads, particularly in high-temperature environments.
Lubrication frequency should be based on usage and environmental conditions. A general guideline is to lubricate rigging screws:
- Before each use in harsh environments.
- Monthly in moderate environments.
- Annually in clean, dry environments.
For many of our clients here in KSA, we’ve seen that a consistent lubrication schedule drastically reduces wear and corrosion, especially in the region’s harsh desert climate.
Cleaning Procedures: Removing Dirt, Debris, and Corrosion
Cleaning rigging screws is essential for removing dirt, debris, and corrosion that can accelerate wear and compromise performance. Methods for cleaning include:
- Brushing: Using a wire brush to remove loose dirt and debris.
- Solvent Cleaning: Using a solvent to dissolve grease and oil.
- Pressure Washing: Using high-pressure water to remove stubborn dirt and corrosion.
Removing rust and corrosion may require more aggressive methods, such as:
- Chemical Treatments: Using rust removers or corrosion inhibitors.
- Abrasive Methods: Using sandpaper or wire wheels to remove rust.
Proper disposal of cleaning materials is essential to minimize environmental impact. Solvents and chemicals should be disposed of in accordance with local regulations.
Thread Maintenance: Repairing Damaged Threads
Damaged threads can significantly reduce the load-bearing capacity of rigging screws. Techniques for repairing damaged threads include:
- Thread Chasers: Tools used to clean and restore damaged threads without removing material.
- Taps: Tools used to cut new threads or enlarge existing ones.
Replacing severely damaged threads may be necessary. Alternative repair options include:
- Thread Inserts: Helical coils that are inserted into damaged threads to restore their original size and strength.
- Welding: Welding can be used to repair cracks or breaks in the threads, but it should only be performed by qualified welders.
Checking thread fit and alignment after repair is crucial. Use a thread gauge to verify the thread pitch and diameter. Ensure that the end fittings can be easily threaded into the body without binding or cross-threading.
Load Testing and Certification of Rigging Screws 🏋️♀️
Load testing is a critical process for verifying the structural integrity and load-bearing capacity of rigging screws. Certification provides assurance that the screws meet industry standards and regulations. This section outlines the procedures and requirements for load testing and certification.
Understanding Load Testing: Proof Load vs. Safe Working Load (SWL)
Load testing involves subjecting rigging screws to a controlled load to verify their ability to withstand the specified load without failure. Two key concepts in load testing are:
- Proof Load: The maximum load that a rigging screw must withstand during testing without permanent deformation or failure.
- Safe Working Load (SWL): The maximum load that a rigging screw is designed to carry in normal service.
The SWL is typically a fraction of the proof load, providing a safety margin to account for dynamic loading, wear, and other factors. The relationship between proof load and SWL is defined by industry standards and regulations.
The purpose of load testing is to:
- Verify the structural integrity of the screw.
- Ensure that the screw meets the specified load-bearing capacity.
- Identify any defects or weaknesses that could lead to failure.
Regulatory requirements for load testing and certification vary depending on the industry and location. Standards such as ASME B30.26 and ISO 2346 specify the procedures and acceptance criteria for load testing.
Performing Load Tests: Procedures and Equipment
Performing load tests requires specialized equipment and procedures. The basic steps include:
1. Setup: The rigging screw is installed in a testing machine or hydraulic cylinder.
2. Load Application: The load is gradually increased to the proof load.
3. Monitoring: The screw is monitored for deformation, cracking, or other signs of failure.
4. Recording: The load applied and any observations made are recorded.
Calibrated testing machines or hydraulic cylinders are used to apply the load. These devices must be regularly calibrated to ensure accurate measurements.
When applying the load, it is essential to gradually increase the load and monitor the screw for any signs of distress. The load should be held at the proof load for a specified time to verify its ability to withstand the load without failure.
Recording the results is crucial for documenting the test. The record should include:
- Date of test
- Rigging screw identification number
- Proof load applied
- Observations made
- Results of the test
Certification and Documentation: Ensuring Compliance
Obtaining certification from a qualified testing agency provides assurance that the rigging screw meets industry standards and regulations. Certification typically involves:
- Load testing
- Material testing
- Dimensional inspection
- Documentation review
Maintaining accurate records of load testing, including dates, results, and certifications, is essential for demonstrating compliance. These records should be readily available for inspection by regulatory authorities.
Complying with industry standards and regulations for rigging equipment is crucial for ensuring safety and avoiding legal liabilities. Standards such as ASME B30.26 and ISO 2346 provide detailed requirements for design, manufacturing, testing, and inspection.
[IMAGE: Illustration showing a rigging screw undergoing load testing in a testing machine, highlighting the key steps and equipment involved.]
Common Failure Modes and Prevention Strategies ⚠️
Understanding the common failure modes of rigging screws is essential for implementing effective prevention strategies. This section explores the most frequent causes of failure and provides practical measures to mitigate these risks.
Overloading: Exceeding Safe Working Load Limits
Overloading is one of the most common causes of rigging screw failure. Exceeding the Safe Working Load (SWL) can lead to:
- Deformation
- Cracking
- Sudden Failure
Strategies for preventing overloading include:
- Using load indicators to monitor the load on the screw.
- Training personnel to recognize load limits and avoid exceeding them.
- Establishing clear load limits for each rigging screw.
- Regularly inspecting rigging screws for signs of deformation or cracking.
Analyzing past overloading incidents can provide valuable insights for preventing future occurrences. Identifying the root causes of the incidents and implementing corrective actions can help prevent similar failures.
Corrosion: Environmental Factors and Material Degradation
Corrosion can significantly weaken rigging screws, leading to failure. The primary causes of corrosion include:
- Exposure to moisture
- Exposure to chemicals
- Exposure to salt
Preventative measures include:
- Using corrosion-resistant materials, such as stainless steel or galvanized steel.
- Applying protective coatings, such as epoxy or Teflon.
- Implementing regular cleaning schedules to remove dirt and contaminants.
Monitoring for corrosion is crucial. Regular inspections should focus on:
- Identifying signs of rust or pitting.
- Measuring the thickness of the metal to detect material loss.
- Using NDT methods to detect internal corrosion.
Taking corrective action before corrosion leads to failure is essential. This may involve:
- Removing rust and applying protective coatings.
- Replacing severely corroded screws.
- Adjusting the environment to reduce exposure to corrosive elements.
Fatigue Failure: Cyclic Loading and Crack Propagation
Fatigue failure occurs due to repeated loading and unloading, which can lead to crack propagation and eventual failure. Strategies for preventing fatigue failure include:
- Reducing stress concentrations by avoiding sharp corners and edges.
- Avoiding excessive vibrations that can accelerate fatigue.
- Inspecting for cracks regularly using visual and NDT methods.
Using NDT methods to detect fatigue cracks before they lead to catastrophic failure is essential. UT and MT are particularly effective for detecting fatigue cracks.
Improper Installation: Thread Engagement and Alignment Issues
Improper installation can compromise the integrity of rigging screws. Common issues include:
- Insufficient thread engagement
- Cross-threading
- Loose connections
- Damaged threads
Preventative measures include:
- Using calibrated torque wrenches to ensure proper tightening.
- Following manufacturer’s instructions for installation.
- Training personnel on proper installation techniques.
Inspecting for signs of improper installation is crucial. Look for:
- Cross-threading
- Loose connections
- Damaged threads
Industry Standards and Regulations for Rigging Screws 📜
Adhering to industry standards and regulations is vital for ensuring the safety and reliability of rigging screws. Compliance not only mitigates risks but also ensures legal and ethical responsibilities are met. This section provides an overview of relevant standards, legal requirements, and best practices for rigging screw management.
Overview of Relevant Standards: ASME, ANSI, ISO
Several key standards govern the design, manufacturing, testing, and inspection of rigging screws. These include:
- ASME B30.26: Specifies requirements for rigging hardware, including turnbuckles.
- ANSI B30.9: Covers slings, including wire rope, chain, and synthetic web slings.
- ISO 2346: Provides specifications for eyebolts.
These standards outline requirements for:
- Design: Load-bearing capacity, dimensions, and material selection.
- Manufacturing: Quality control procedures, welding requirements, and heat treatment.
- Testing: Load testing, NDT, and dimensional inspection.
- Inspection: Frequency and methods for visual and NDT inspection.
Compliance with these standards ensures:
- Safety: Rigging screws are designed and manufactured to withstand the specified loads.
- Reliability: Rigging screws are tested and inspected to ensure they meet quality standards.
- Interoperability: Rigging screws from different manufacturers are compatible and interchangeable.
Legal and Regulatory Requirements: OSHA, EPA
In addition to industry standards, legal and regulatory requirements also govern the use of rigging screws. These include:
- OSHA 1926.251: Covers rigging equipment for material handling in construction.
- EPA Regulations: Address the handling and disposal of hazardous materials used in rigging operations.
Compliance with these regulations is essential to avoid:
- Fines and Penalties: Failure to comply can result in significant fines and penalties.
- Legal Liabilities: Accidents and injuries resulting from non-compliance can lead to legal liabilities.
Staying up-to-date with the latest regulations is crucial. Resources for staying informed include:
- OSHA website
- EPA website
- Industry trade associations
Best Practices for Rigging Screw Management and Compliance
Developing a comprehensive rigging screw management program is essential for ensuring compliance and promoting safety. Key elements of the program include:
- Inventory Management: Tracking the location, condition, and maintenance history of each rigging screw.
- Inspection Program: Establishing regular inspection schedules and procedures.
- Maintenance Program: Implementing a preventive maintenance program to lubricate, clean, and repair rigging screws.
- Training Program: Providing training for personnel involved in rigging operations.
- Documentation: Maintaining accurate records of inspections, maintenance, and training.
Conducting regular audits to ensure compliance with standards and regulations is crucial. The audit should include:
- Review of documentation
- Inspection of rigging screws
- Interviews with personnel
Providing training and education for personnel involved in rigging operations is essential. Training should cover:
- Proper use of rigging screws
- Inspection procedures
- Maintenance techniques
- Safety precautions
Advanced Topics in Rigging Screw Engineering and Analysis 📚
For those seeking a deeper understanding of rigging screw performance and reliability, advanced engineering and analysis techniques offer valuable insights. This section explores Finite Element Analysis (FEA), material selection, and case studies of real-world failures.
Finite Element Analysis (FEA): Modeling Stress and Strain
Finite Element Analysis (FEA) is a computer-based simulation technique used to analyze stress and strain in rigging screws. FEA involves:
- Creating a computer model of the rigging screw.
- Applying loads and boundary conditions to the model.
- Solving the model to determine the stress and strain distribution.
FEA can be used to:
- Optimize designs to reduce stress concentrations.
- Predict failure modes under various loading conditions.
- Improve performance and reliability.
Interpreting FEA results requires specialized knowledge. The results are typically displayed as color-coded plots showing the stress and strain distribution. High-stress areas indicate potential failure locations.
Validating FEA results with experimental data is essential. This involves comparing the FEA predictions with measurements obtained from load testing or strain gauging.
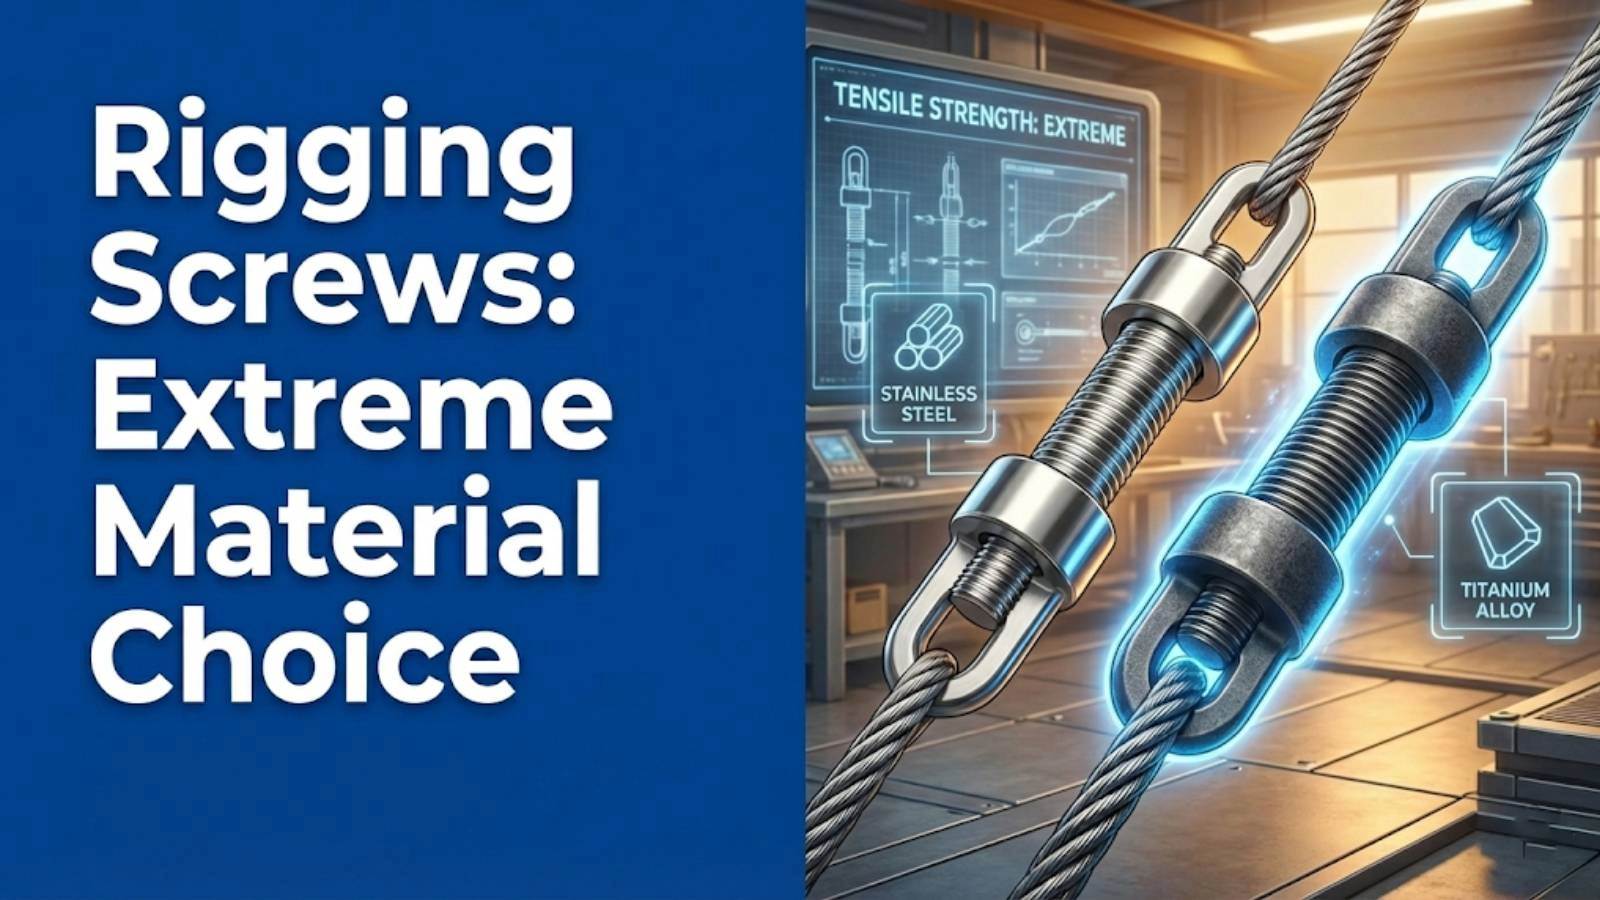
Material Selection: High-Strength Alloys and Coatings
Selecting the optimal material and coating is crucial for ensuring the performance and reliability of rigging screws. Advanced materials for rigging screws include:
- High-strength steels
- Titanium alloys
- Composites
The benefits of different coatings include:
- Zinc: Provides good corrosion resistance at a low cost.
- Chrome: Offers excellent hardness and wear resistance.
- Epoxy: Provides good chemical resistance.
- Teflon: Reduces friction and prevents galling.
The optimal material and coating depend on the specific application and environment. Factors to consider include:
- Load requirements
- Environmental conditions
- Cost
Case Studies: Analyzing Real-World Rigging Screw Failures
Analyzing real-world rigging screw failures can provide valuable lessons for improving safety and preventing future incidents. Case studies should include:
- Detailed descriptions of the failure
- Analysis of the root causes
- Recommendations for preventing similar failures
Common root causes of rigging screw failures include:
- Design flaws
- Material defects
- Improper usage
- Inadequate maintenance
Drawing lessons from these case studies can help improve safety and prevent future incidents. For example, if a failure was caused by overloading, the recommendation might be to implement load monitoring systems. If a failure was caused by corrosion, the recommendation might be to use corrosion-resistant materials.
Conclusion
Rigging screw inspection and maintenance are paramount for ensuring safety and operational efficiency. By understanding the anatomy, inspection techniques, testing methods, and industry standards, you can significantly reduce the risk of failures and enhance the longevity of your equipment. We, at Safe and Secure Trading Company (SSTC), are dedicated to providing expert solutions and guidance in this critical area.
FAQ Section
How often should rigging screws be inspected?
Rigging screws should be visually inspected before each use and thoroughly inspected at least annually, or more frequently depending on the environment and usage.
What are the key indicators of a failing rigging screw?
Key indicators include visible wear, corrosion, cracks, deformation, and difficulty in adjusting the screw.
Can rigging screws be repaired, or should they always be replaced?
Minor thread damage can be repaired. However, if there’s significant corrosion, cracks, or deformation, replacement is the safest option.
What type of lubricant is best for rigging screws?
A high-quality, waterproof grease is generally recommended. Specific lubricants designed for marine or corrosive environments are ideal.
What certifications should I look for when purchasing rigging screws?
Look for certifications from recognized standards organizations such as ASME, ANSI, or ISO, ensuring the screws meet established safety and performance criteria.