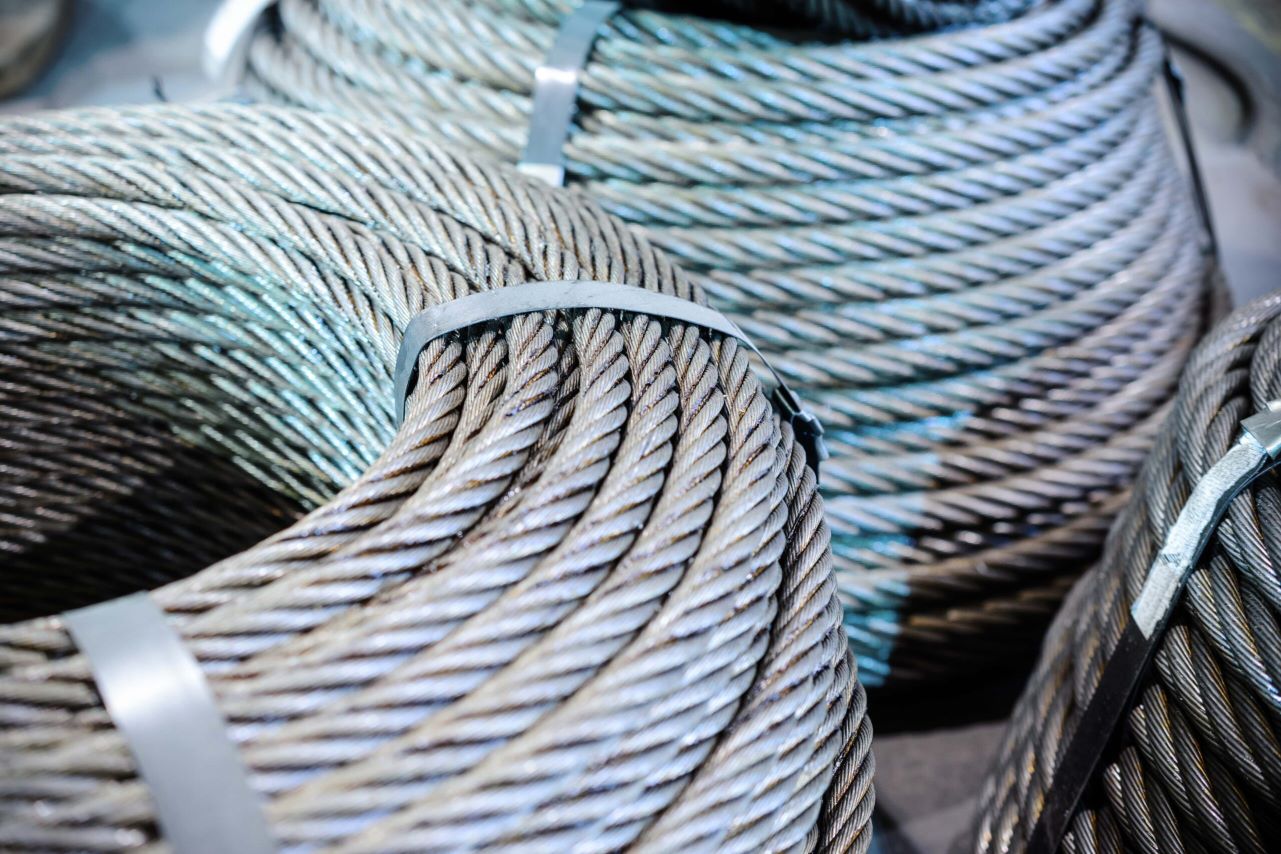
Wire rope is a critical component in countless industries, from construction and manufacturing to oil and gas. Its strength and reliability are essential for lifting, hoisting, and securing heavy loads. However, wire rope is subject to wear, corrosion, and damage over time, which can compromise its integrity and lead to catastrophic failures. Regular wire rope inspection is therefore paramount to ensuring safety, preventing accidents, and maintaining operational efficiency.
Why Wire Rope Inspection Matters: Preventing Catastrophes
The High Cost of Neglect
Neglecting wire rope inspection can have devastating consequences. The potential for serious injury or even death is a stark reality. Equipment damage, operational downtime, and legal liabilities add to the already heavy toll. A seemingly minor flaw in a steel cable inspection can quickly escalate into a major incident. Imagine a construction site where a crane’s wire rope snaps due to undetected corrosion. The falling load could cause significant structural damage, injure workers, and halt operations for weeks.
The financial implications can also be substantial. Repairs, replacements, and investigations can cost tens of thousands of dollars, not to mention the potential for lawsuits and fines. A proactive approach to wire rope safety through regular inspections is a far more cost-effective strategy than dealing with the aftermath of a failure. We at Safe and Secure Trading Company (SSTC) believe in prioritizing safety, and regular inspections are a cornerstone of that philosophy.
“A comprehensive wire rope inspection program is not just a best practice, it’s a moral imperative.” – John Miller, Safety Engineering Consultant
Common Wire Rope Failure Modes: A Visual Guide
Understanding the common failure modes of wire rope is crucial for effective visual inspection wire rope. Here’s a breakdown of what to look for:
- Abrasion: Caused by friction against sheaves, drums, or other surfaces. Look for flattened or worn wires on the outer strands.
- Corrosion: A chemical reaction that weakens the steel cable. It’s often visible as rust or pitting on the wire rope surface.
- Fatigue: Repeated bending and flexing can cause wires to break. This is particularly common near end terminations and points of high stress.
- Overload: Exceeding the wire rope’s rated capacity can lead to permanent deformation or breakage.
- Kinking: Sharp bends that permanently damage the wire rope structure.
- Crushing: Deformation of the wire rope caused by excessive pressure.
- Unstranding: Separation of the strands, indicating internal damage.
- Core Failure: Deterioration or breakage of the core, which supports the strands.
2026 statistics show that nearly 30% of all wire rope failures are directly attributable to inadequate corrosion inspection practices. Our team in Dubai has seen firsthand the devastating effects of neglecting these critical inspections.
Regulatory Compliance: Meeting Safety Standards
Numerous regulations and standards govern the use of wire rope in various industries. These standards, set by organizations such as OSHA, ANSI, and ISO, outline the requirements for wire rope inspection, maintenance, and replacement. Compliance with these regulations is not only a legal obligation but also a crucial step in ensuring wire rope safety. Failing to meet these standards can result in hefty fines, legal action, and, most importantly, increased risk of accidents.
Regular crane inspection and hoist inspection, including thorough examination of the wire rope, are often mandated by these regulations. Documenting these inspections and maintaining accurate records is also essential for demonstrating compliance. SSTC can help you navigate the complex landscape of safety regulations and implement a comprehensive wire rope inspection program that meets all applicable requirements.
Preparing for Your Wire Rope Inspection
Gathering the Right Tools: A Checklist
Before you begin a wire rope inspection, it’s essential to gather the right tools. Having the necessary equipment on hand will ensure a thorough and efficient inspection process. Here’s a basic checklist:
- ✅ Visual Aids: A bright flashlight or headlamp for illuminating the wire rope, especially in dimly lit areas. A magnifying glass or loupe for close-up examination of individual wires.
- ✅ Measuring Tools: Calipers for measuring wire rope diameter. A ruler or tape measure for assessing lay length and broken wire distribution.
- ✅ Cleaning Supplies: A wire brush for removing dirt, grease, and debris from the wire rope surface. A clean cloth for wiping down the wire rope to improve visibility.
- ✅ Inspection Tools: A pick or awl for probing between strands to check for corrosion or damage.
- ✅ Documentation Supplies: A notebook and pen for recording observations. A camera or smartphone for taking photos of any defects. Wire rope checklist to ensure all inspection points are covered.
- ✅ Safety Gear: Gloves to protect your hands from sharp wires and grease. Safety glasses or goggles to protect your eyes from debris.
- ✅ Diameter Tape: For accurately measuring the diameter of the wire rope.
Understanding Wire Rope Construction: Lay and Core Types
Understanding the construction of wire rope is crucial for performing a proper visual inspection wire rope. The lay and core type significantly affect the wire rope’s properties and how it wears over time.
- Lay: The lay refers to the direction in which the wires and strands are twisted.
Right Lay: The strands are twisted to the right, like a standard screw thread.
Left Lay: The strands are twisted to the left.
Regular Lay: The wires in each strand are twisted in one direction, and the strands are twisted in the opposite direction around the core. This provides good abrasion resistance.
Lang Lay: The wires in each strand and the strands around the core are twisted in the same direction. This offers greater flexibility and fatigue resistance but is more prone to crushing.
- Core: The core provides support for the strands and maintains their position.
Fiber Core (FC): Typically made of natural or synthetic fibers. It provides good flexibility and cushions the strands but is more susceptible to corrosion and crushing.
Wire Strand Core (WSC): Consists of a single wire strand. It offers greater strength and resistance to crushing than a fiber core.
* Independent Wire Rope Core (IWRC): A small wire rope that serves as the core. It provides the highest strength and resistance to crushing and heat.
Knowing the specific lay and core type of your wire rope will help you identify potential problems and assess its overall condition during wire rope inspection. For instance, if a wire rope with a fiber core shows signs of drying or rotting, it may be necessary to replace the wire rope even if the wires appear to be in good condition.
Establishing a Safe Inspection Zone
Safety should always be the top priority when performing a wire rope inspection. Before you begin, establish a safe inspection zone to protect yourself and others from potential hazards.
- Clear the Area: Ensure that the area around the wire rope is clear of obstructions and personnel.
- Lockout/Tagout: If the wire rope is part of a powered system, implement lockout/tagout procedures to prevent accidental operation during the inspection.
- Proper Lighting: Ensure adequate lighting to clearly see the wire rope surface.
- Fall Protection: If the wire rope is located at a height, use appropriate fall protection equipment, such as harnesses and lifelines.
- Communication: Establish clear communication protocols with other workers in the area to avoid misunderstandings and potential accidents.
- Emergency Plan: Have an emergency plan in place in case of an accident or unexpected event.
- PPE: Always use proper personal protective equipment, including gloves, safety glasses, and appropriate footwear.
By taking these precautions, you can minimize the risk of accidents and ensure a safe wire rope inspection.
The 9-Step Wire Rope Inspection Checklist
Step 1: Visual Inspection for Obvious Damage
The first step in any wire rope inspection is a thorough visual examination. Look for any signs of obvious damage, such as:
- Broken wires
- Corrosion
- Kinks
- Crushes
- Unstranding
- Deformation
- Birdcaging
Pay close attention to areas where the wire rope is subject to high stress, such as near end terminations and points of contact with sheaves or drums. Use a bright flashlight or headlamp to illuminate the wire rope surface and a magnifying glass for close-up examination of individual wires.
If you observe any of these defects, document them carefully and assess their severity. Minor damage may be acceptable, but significant damage may require immediate replacement of the wire rope. We had a client in the shipping industry who ignored several instances of broken wires highlighted during a visual inspection wire rope of their crane cable, which ultimately led to complete breakage during a routine lifting operation.
Step 2: Checking for Corrosion and Rust
Corrosion is a major cause of wire rope failure. It weakens the steel cable and reduces its load-bearing capacity. Carefully inspect the wire rope for signs of corrosion, such as:
- Rust-colored deposits
- Pitting or surface irregularities
- Scaling or flaking
- Weakened or broken wires
Corrosion often occurs in areas where moisture and contaminants can accumulate, such as inside the strands or under fittings. Use a pick or awl to probe between the strands and check for hidden corrosion. Pay particular attention to areas near end terminations, where moisture can become trapped. If you find significant corrosion, the wire rope should be removed from service.
“Early detection of corrosion is key to preventing catastrophic wire rope failure.” – Sarah Chen, Materials Scientist
Step 3: Evaluating Wire Rope Wear and Abrasion
Wire rope wear and abrasion are inevitable consequences of regular use. As the wire rope passes over sheaves and drums, the outer wires are subjected to friction, which can cause them to wear down over time. Look for signs of wire rope wear, such as:
- Flattened wires
- Reduced wire diameter
- Shiny or polished surfaces
- Broken wires
The amount of allowable wire rope wear depends on the specific application and the applicable standards. Consult the manufacturer’s recommendations and relevant regulations to determine the acceptable limits.
Step 4: Assessing Core Condition and Lubrication
The core of the wire rope provides support for the strands and helps to maintain their position. The core also often serves as a reservoir for lubricant, which helps to reduce friction and corrosion. Assessing the core condition and lubrication is an important part of wire rope inspection.
- Fiber Core: Check for signs of drying, rotting, or crushing. If the fiber core is damaged, it can compromise the wire rope’s strength and stability.
- Wire Rope Core: Inspect for broken wires, corrosion, or deformation.
- Lubrication: The wire rope should be adequately lubricated to prevent friction and corrosion. If the wire rope appears dry or rusty, it needs to be relubricated.
Proper lubrication is essential for extending the life of the wire rope. Refer to the manufacturer’s recommendations for the appropriate type of lubricant and the recommended lubrication frequency.
Step 5: Measuring Wire Rope Diameter and Reduction
Measuring the wire rope diameter is an important way to assess its overall condition. As the wire rope wears, its diameter will gradually decrease. A significant reduction in diameter indicates that the wire rope has lost strength and may need to be replaced.
Use calipers to measure the wire rope diameter at several points along its length. Compare the measured diameter to the original diameter specified by the manufacturer. A reduction in diameter of more than a certain percentage (e.g., 5% or 10%) may indicate that the wire rope should be removed from service.
It’s crucial to consult the manufacturer’s specifications and relevant standards to determine the allowable diameter reduction for your specific wire rope type and application. Accurately measuring wire rope diameter is paramount for safe operations.
Step 6: Examining End Attachments and Terminations
End attachments and terminations are critical components of the wire rope system. They connect the wire rope to the load or lifting device. Inspect these components carefully for any signs of damage, such as:
- Corrosion
- Cracks
- Deformation
- Loose or missing parts
- Wear
Pay particular attention to the areas where the end attachments are connected to the wire rope. These areas are subject to high stress and are prone to failure. Ensure that all end attachments are properly secured and that they are the correct type and size for the wire rope.
Step 7: Identifying Kinks, Crushes, and Unstranding
Kinks, crushes, and unstranding are all signs of severe wire rope damage. These defects can significantly reduce the wire rope’s strength and increase the risk of failure.
- Kinks: Sharp bends that permanently damage the wire rope structure.
- Crushes: Deformation of the wire rope caused by excessive pressure.
- Unstranding: Separation of the strands, indicating internal damage.
If you find any of these defects, the wire rope should be removed from service immediately. These types of damage are often caused by improper handling or overloading.
Step 8: Documenting Your Findings with Photos and Notes
Accurate documentation is an essential part of the wire rope inspection process. Record all of your findings in a notebook or on a wire rope checklist. Include the following information:
- Date and time of the inspection
- Location of the wire rope
- Wire rope identification number or description
- Type of wire rope
- Diameter of wire rope
- Description of any defects found
- Severity of the defects
- Photographs of the defects
- Recommendations for repair or replacement
The photos can be invaluable for future reference and for demonstrating the condition of the wire rope to others. Detailed notes provide a clear record of the inspection findings and help to track the wire rope’s condition over time. This is particularly important for NDT wire rope inspections.
Step 9: Reporting and Acting on Deficiencies
After completing the wire rope inspection, it’s essential to report your findings to the appropriate personnel. This may include the site supervisor, safety manager, or equipment maintenance team.
Clearly communicate the severity of any defects found and recommend appropriate actions. Minor defects may only require monitoring, while severe defects may require immediate replacement of the wire rope.
Ensure that all recommended actions are carried out promptly and that the wire rope is properly repaired or replaced as needed. Document all actions taken and keep a record of the wire rope’s history.
Interpreting Inspection Results: Severity Levels and Actions
Defining Severity Levels: Minor, Moderate, Severe
Interpreting wire rope inspection results requires a clear understanding of the severity levels of different types of defects. Establishing defined severity levels helps to ensure consistent decision-making and appropriate action. Here’s a common framework:
- Minor: Defects that do not significantly affect the wire rope’s strength or safety. These may include minor corrosion, slight wear, or a few broken wires. Action: Monitor the defect and reinspect the wire rope at the next scheduled inspection.
- Moderate: Defects that moderately affect the wire rope’s strength or safety. These may include moderate corrosion, moderate wear, or a moderate number of broken wires. Action: Increase the frequency of inspections and consider repairing or replacing the wire rope if the defect worsens.
- Severe: Defects that significantly affect the wire rope’s strength or safety. These may include severe corrosion, severe wear, kinks, crushes, unstranding, or a large number of broken wires. Action: Remove the wire rope from service immediately and replace it with a new one.
Immediate Actions for Critical Defects
Certain defects require immediate action to prevent accidents and ensure safety. These critical defects include:
- Kinks
- Crushes
- Unstranding
- Severe corrosion
- A large number of broken wires in a short section of the wire rope
- Broken wires near end terminations
- Any damage that compromises the structural integrity of the wire rope
If you observe any of these defects, remove the wire rope from service immediately and replace it with a new one. Do not attempt to repair a wire rope with critical defects, as this can be dangerous and unreliable.
Repair vs. Replacement: Making the Right Call
In some cases, it may be possible to repair a damaged wire rope. However, repair is not always the best option. The decision to repair or replace a wire rope should be based on several factors, including:
- The severity of the damage
- The type of wire rope
- The application of the wire rope
- The cost of repair versus replacement
- The availability of qualified repair personnel
- The manufacturer’s recommendations
- Relevant regulations and standards
In general, it’s best to replace a wire rope if it has suffered significant damage or if there is any doubt about its structural integrity. Repair should only be considered for minor damage and should be performed by qualified personnel using appropriate techniques and materials. SSTC always advises erring on the side of caution.
Wire Rope Maintenance: Extending Lifespan and Reducing Risk
Proper Lubrication Techniques: Choosing the Right Lubricant
Proper lubrication is essential for extending the lifespan of wire rope and reducing the risk of failure. Lubrication reduces friction between the wires and strands, which prevents wear and corrosion. It also helps to keep the wire rope flexible and prevents it from becoming brittle.
- Choosing the Right Lubricant: Select a lubricant that is specifically designed for wire rope. The lubricant should be compatible with the wire rope material and the operating environment. Consider factors such as temperature, humidity, and exposure to chemicals.
- Lubrication Techniques: Apply the lubricant evenly over the entire wire rope surface. Use a brush, spray, or drip applicator to ensure thorough coverage. Pay particular attention to areas where the wire rope is subject to high stress, such as near end terminations and points of contact with sheaves or drums.
- Lubrication Frequency: Lubricate the wire rope regularly, according to the manufacturer’s recommendations. The lubrication frequency will depend on the operating environment and the severity of the application.
Storage and Handling Best Practices
Proper storage and handling are also important for maintaining the condition of wire rope.
- Storage: Store wire rope in a clean, dry place. Protect it from moisture, corrosion, and physical damage.
- Handling: Avoid dragging wire rope on the ground or over sharp edges. Use appropriate lifting equipment to move wire rope safely.
- Spooling: When spooling wire rope onto a drum, ensure that it is properly aligned and that the tension is even. Avoid kinking or twisting the wire rope.
Following these best practices will help to prevent damage to the wire rope and extend its service life.
Scheduled Maintenance Programs: Proactive Prevention
Implementing a scheduled maintenance program is a proactive way to prevent wire rope failure and ensure safety. A scheduled maintenance program should include:
- Regular wire rope inspection
- Lubrication
- Cleaning
- Repair or replacement of damaged wire rope
- Record-keeping
The frequency of maintenance activities should be based on the operating environment, the severity of the application, and the manufacturer’s recommendations. A well-designed scheduled maintenance program can significantly reduce the risk of wire rope failure and improve the overall safety of your operations.
Troubleshooting Common Wire Rope Inspection Challenges
Difficulty Accessing the Entire Wire Rope
One common challenge in wire rope inspection is difficulty accessing the entire length of the wire rope. This can be due to the wire rope’s location, the presence of obstructions, or the limited availability of equipment.
- Solutions: Use appropriate access equipment, such as ladders, scaffolding, or aerial lifts. Enlist the help of a second person to assist with the inspection. Break the inspection into smaller sections and inspect each section separately.
Identifying Subtle Forms of Corrosion
Corrosion can sometimes be difficult to detect, especially in its early stages. Subtle forms of corrosion may appear as a slight discoloration or a fine powder on the wire rope surface.
- Solutions: Use a magnifying glass to examine the wire rope surface closely. Clean the wire rope with a wire brush to remove dirt and debris. Probe between the strands with a pick or awl to check for hidden corrosion. Consider using NDT wire rope techniques, such as magnetic particle testing or ultrasonic testing, to detect internal corrosion.
Accurately Measuring Wire Rope Diameter
Accurately measuring wire rope diameter is essential for assessing its condition. However, it can be challenging to obtain accurate measurements, especially if the wire rope is worn or deformed.
- Solutions: Use calibrated calipers to measure the wire rope diameter. Measure the diameter at several points along the wire rope’s length. Take measurements over the crown (the widest point) of the wire rope. Consult the manufacturer’s recommendations for the correct measurement technique.
Advanced Inspection Techniques: NDT Methods
Magnetic Particle Testing (MPT) for Surface Cracks
Magnetic particle testing (MPT) is a NDT wire rope method used to detect surface cracks and other discontinuities in ferromagnetic materials, such as steel cable. The process involves magnetizing the wire rope and then applying magnetic particles to the surface. The particles will be attracted to any cracks or discontinuities, making them visible to the inspector.
MPT is a relatively simple and cost-effective NDT wire rope method that can be used to detect a wide range of surface defects. However, it is not effective for detecting internal flaws.
Ultrasonic Testing (UT) for Internal Flaws
Ultrasonic testing (UT) is a NDT wire rope method used to detect internal flaws in wire rope. The process involves transmitting high-frequency sound waves into the wire rope and then measuring the reflected sound waves. Any flaws or discontinuities will reflect the sound waves differently, allowing the inspector to detect them.
UT is a more complex and expensive NDT wire rope method than MPT, but it can detect internal flaws that would not be visible with other methods.
Choosing the Right NDT Method
The choice of NDT wire rope method depends on the specific application and the type of defects that are being sought. MPT is generally used to detect surface cracks, while UT is used to detect internal flaws. In some cases, a combination of both methods may be used to provide a more comprehensive inspection.
It’s important to consult with qualified NDT wire rope personnel to determine the appropriate inspection method for your specific needs.
Case Studies: Learning from Real-World Wire Rope Failures
Case Study 1: Crane Collapse Due to Corrosion
A construction crane collapsed due to severe corrosion of the wire rope. The corrosion had weakened the steel cable to the point where it could no longer support the load. The collapse resulted in significant property damage and injuries to several workers.
The investigation revealed that the wire rope had not been properly inspected or maintained. The corrosion had been present for some time, but it had not been detected due to inadequate visual inspection wire rope practices. This case highlights the importance of regular wire rope inspection and proper maintenance.
Case Study 2: Hoist Failure from Overloading
A hoist failed due to overloading. The operator had exceeded the hoist’s rated capacity, causing the wire rope to break. The falling load damaged equipment and injured a worker.
The investigation revealed that the operator had not been properly trained on the hoist’s operating procedures. This case highlights the importance of proper training and adherence to safety regulations. Always consult the documentation to ensure the load is within the equipment’s limitations.
Lessons Learned and Preventative Measures
These case studies illustrate the importance of regular wire rope inspection, proper maintenance, and adherence to safety regulations. By learning from these real-world wire rope failures, we can take steps to prevent similar incidents from occurring in the future.
Key Preventative Measures:
- Implement a comprehensive wire rope inspection program.
- Perform regular lubrication.
- Provide proper training to operators.
- Adhere to safety regulations.
- Replace damaged wire rope promptly.
- Maintain accurate records.
The Future of Wire Rope Inspection: Technology and Innovation
AI-Powered Visual Inspection Systems
AI-powered visual inspection systems are emerging as a promising technology for automating and improving the accuracy of wire rope inspection. These systems use cameras and artificial intelligence algorithms to automatically detect defects in wire rope, such as broken wires, corrosion, and wear.
AI-powered visual inspection systems can significantly reduce the time and cost of wire rope inspection, while also improving the accuracy and consistency of the results. These systems can be deployed in the field or in a laboratory setting.
Remote Monitoring and Sensor Technology
Remote monitoring and sensor technology are also being developed for wire rope inspection. These technologies use sensors to continuously monitor the condition of wire rope and to detect any signs of damage or failure. The data from the sensors can be transmitted wirelessly to a remote monitoring station, where it can be analyzed by experts.
Remote monitoring and sensor technology can provide early warning of potential wire rope failures, allowing for proactive maintenance and preventing accidents. This technology is particularly useful for applications where wire rope is difficult to access or where continuous monitoring is required.
The Impact on Safety and Efficiency
The future of wire rope inspection is likely to be driven by technology and innovation. AI-powered visual inspection systems and remote monitoring and sensor technology have the potential to significantly improve the safety and efficiency of wire rope inspection, while also reducing costs. As these technologies continue to develop, they are likely to become increasingly widespread in various industries.
Conclusion
We’ve explored the critical importance of wire rope inspection in preventing accidents and ensuring safety across various industries. By following the detailed 9-step checklist, understanding severity levels, implementing proper maintenance techniques, and embracing advanced inspection methods, you can significantly extend the lifespan of your wire rope and minimize the risk of catastrophic failure. We at Safe and Secure Trading Company are committed to providing you with the knowledge and resources you need to maintain a safe and efficient operation. Now you can confidently assess your equipment, knowing you’re prioritizing safety and compliance.
FAQ Section
Q: How often should I inspect my wire rope?
A: The frequency of wire rope inspection depends on several factors, including the operating environment, the severity of the application, and the manufacturer’s recommendations. In general, wire rope should be inspected at least monthly, and more frequently in harsh environments or demanding applications.
Q: What is the most common cause of wire rope failure?
A: The most common causes of wire rope failure are corrosion, wear, and overloading. Regular wire rope inspection and proper maintenance can help to prevent these failures.
Q: Can I repair a damaged wire rope?
A: In some cases, it may be possible to repair a damaged wire rope. However, repair should only be considered for minor damage and should be performed by qualified personnel using appropriate techniques and materials. In general, it’s best to replace a wire rope if it has suffered significant damage or if there is any doubt about its structural integrity.
Q: What are the regulations for wire rope inspection?
A: Regulations for wire rope inspection vary depending on the industry and the location. Consult the applicable regulations and standards to ensure compliance. Organizations such as OSHA, ANSI, and ISO publish standards for wire rope inspection and maintenance.
Q: What is NDT wire rope inspection?
A: NDT wire rope inspection refers to non-destructive testing methods used to evaluate the condition of wire rope without causing damage. Common NDT wire rope methods include magnetic particle testing (MPT) and ultrasonic testing (UT).
Q: How can I extend the lifespan of my wire rope?
A: You can extend the lifespan of your wire rope by implementing proper lubrication techniques, following storage and handling best practices, and implementing a scheduled maintenance program. Regular wire rope inspection is also essential for identifying and addressing potential problems before they lead to failure.