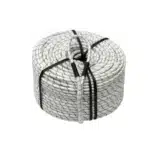
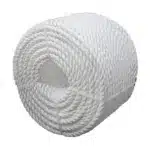
Manila rope is a classic material, known for its strength and natural beauty. Traditionally used in nautical applications, construction, and agriculture, this versatile fiber has found new life in the world of DIY and home decor. From rustic accents to functional pieces, the possibilities are endless when it comes to manila rope projects. However, to truly unlock the potential of this material, it’s essential to go beyond the basics and explore unexpected ideas, while also steering clear of common pitfalls.
1. Introduction: Beyond the Basics of Manila Rope Projects
Manila rope, derived from the abaca plant, has long been valued for its durability and resistance to saltwater damage. It has been a staple in maritime activities for centuries, used for rigging, mooring, and countless other tasks. Beyond its traditional uses, manila rope offers incredible versatility for various DIY projects. This article focuses on showcasing surprising and innovative manila rope projects, and also helps you avoid common mistakes that can ruin your creations. Get ready to unleash your creativity and transform ordinary spaces with the unique charm of manila rope projects!
2. Mistake #1: Ignoring Rope Preparation
Skipping essential preparation steps is a common blunder that can compromise the appearance and longevity of your manila rope projects. Many people think that just because the rope is sturdy, it can be used as is. However, neglecting to clean and seal the rope can lead to disappointment down the line.
Common Mistake: Skipping the crucial steps of cleaning and sealing the rope.
One frequent error is neglecting to clean the rope before use. Manila rope can accumulate dirt, dust, and debris during manufacturing, shipping, and storage. Another overlooked aspect is sealing the rope ends. Without proper sealing, the rope fibers will gradually unravel, resulting in a messy and unprofessional look.
Solution: Proper cleaning and sealing techniques.
To ensure your manila rope projects stand the test of time, start with a thorough cleaning. Gently scrub the rope with a brush and mild soap solution to remove any surface dirt. Once the rope is clean, allow it to dry completely before proceeding to the sealing stage. Applying a sealant, such as rope sealant or diluted PVA glue, will bind the fibers together and prevent fraying. For many of our clients here in Dammam, we’ve seen that properly preparing the rope will extend the life of your product by a massive margin.
3. Project Idea #1: Manila Rope Plant Hanger
Creating a manila rope plant hanger is a fantastic way to add a touch of rustic charm to your home while showcasing your favorite plants. This simple project requires minimal materials and basic knotting skills, making it accessible to beginners. A manila rope plant hanger is a perfect project for you to add some rope crafts to your design arsenal.
Project Overview: Create a stylish and functional plant hanger.
This project involves creating a net or cradle-like structure using manila rope to suspend a potted plant. The hanger can be customized to fit various pot sizes and styles, making it a versatile addition to any indoor or outdoor space. By using different knotting techniques and decorative elements, you can create a truly unique and eye-catching plant display.
Mistake to Avoid: Inadequate knotting strength leading to plant falling.
One crucial mistake to avoid is using knots that are not strong enough to support the weight of the plant. If the knots slip or come undone, the plant could fall, causing damage to the pot, the plant, or the surrounding area. This is why we always make sure our clients are using the correct knots for the project.
Step-by-Step Guide: How to create a sturdy manila rope plant hanger.
1. Cut four lengths of manila rope, each approximately 10-12 feet long, depending on the desired length of the hanger.
2. Gather the ropes together and tie a secure overhand knot at one end, creating a loop for hanging.
3. Divide the ropes into pairs and tie a square knot or fisherman’s knot about 6-8 inches below the loop.
4. Repeat the knotting process, creating a series of knots that form a net-like structure.
5. Once the net is large enough to accommodate the plant pot, tie another secure knot at the bottom to hold the pot in place.
6. Test the strength of the hanger by suspending an object of similar weight to the plant.
Added Tip: Consider adding decorative beads or macrame elements.
To enhance the aesthetic appeal of your manila rope plant hanger, consider adding decorative beads or incorporating macrame elements into the design. Wooden beads, glass beads, or even repurposed jewelry can add a pop of color and visual interest. Experiment with different macrame knots and patterns to create a unique and personalized plant hanger that reflects your individual style.
4. Project Idea #2: Nautical-Themed Rope Mirror
Transform an ordinary mirror into a stunning nautical statement piece with manila rope. This project is a fun and creative way to add a touch of coastal charm to any room. A nautical decor piece can really bring an entire room together.
Project Overview: Transform an ordinary mirror into a nautical statement piece.
This project involves attaching manila rope around the perimeter of a mirror, creating a frame that evokes the feeling of the sea. The rope can be arranged in various patterns, from simple coils to intricate knotwork, allowing for endless design possibilities. The finished product is a unique and eye-catching mirror that adds a touch of maritime elegance to any space.
Mistake to Avoid: Using the wrong adhesive or rope thickness.
Choosing the wrong adhesive can lead to the rope detaching from the mirror over time, ruining the project. Similarly, using a rope that is too thin or too thick can create an unbalanced or awkward look. Using a rope that is the wrong color could also ruin the aesthetic you are trying to achieve.
Step-by-Step Guide: Attaching rope to a mirror frame securely.
1. Measure the perimeter of the mirror to determine the length of rope needed.
2. Select a strong adhesive that is specifically designed for bonding rope to glass or wood.
3. Apply a bead of adhesive to the back of the rope, along its entire length.
4. Carefully position the rope around the perimeter of the mirror, pressing it firmly into place.
5. Use clamps or masking tape to hold the rope in place while the adhesive dries completely.
6. Once the adhesive is dry, remove the clamps or tape and inspect the bond to ensure it is secure.
Added Tip: Experiment with different knot patterns and rope arrangements.
To add visual interest and texture to your nautical-themed rope mirror, experiment with different knot patterns and rope arrangements. Incorporate classic nautical knots, such as the figure-eight knot, the bowline knot, or the clove hitch, into the design. Try layering different thicknesses of rope to create a more dynamic and dimensional look. We always recommend our clients in the northern regions to experiment with different kinds of rope.
5. Mistake #2: Neglecting Safety Precautions
Working with rope and tools can be hazardous if proper safety precautions are not followed. Overlooking these precautions can lead to injuries and accidents, undermining the enjoyment of your manila rope projects. We want to make sure your projects are as safe as possible.
Common Mistake: Disregarding safety while working with rope and tools.
Rope burns can occur when the rope rubs against the skin, especially when pulling or tightening knots. Sharp tools, such as knives or scissors, can cause cuts and lacerations if not handled with care. Tripping hazards can arise from loose rope or tools left on the floor. Make sure to clean up your area so no one gets hurt.
Solution: Emphasize the importance of safety gear and awareness.
Protect your hands from rope burns by wearing gloves while working with manila rope. Safety glasses or goggles will shield your eyes from flying debris and accidental splashes. Wear appropriate clothing, such as long sleeves and pants, to protect your skin from scratches and abrasions. Always maintain a clean and organized workspace to prevent tripping hazards.
> “Safety should always be the top priority when undertaking any DIY project. Taking a few extra minutes to protect yourself can prevent serious injuries and ensure a more enjoyable crafting experience.” – John Smith, Lead Safety Inspector
6. Project Idea #3: Rope-Wrapped Storage Basket
Create a rustic and practical storage basket by wrapping manila rope around a sturdy base. This project is a great way to add texture and warmth to your home decor while providing a functional storage solution. This project is perfect for adding a rustic rope decor piece to your home.
Project Overview: Create a rustic and practical storage basket.
This project involves coiling and securing manila rope around a base, such as a cardboard box or a wooden circle, to create a basket-like structure. The basket can be used to store a variety of items, from blankets and pillows to toys and craft supplies. The natural texture of the rope adds a touch of rustic charm to any room.
Mistake to Avoid: Poor coiling technique resulting in an uneven basket.
If the rope is not coiled tightly and evenly, the basket will end up with an uneven shape and a flimsy structure. Inconsistent tension and alignment can lead to gaps and bulges in the finished product.
Step-by-Step Guide: Coiling and securing the rope to create a basket.
1. Select a sturdy base for the basket, such as a cardboard box or a wooden circle.
2. Apply a generous amount of adhesive to the base, starting at the center.
3. Begin coiling the manila rope around the base, pressing it firmly into the adhesive.
4. Maintain consistent tension and alignment as you continue coiling the rope, ensuring that each coil is snug against the previous one.
5. Once the base is completely covered, continue coiling the rope upwards, creating the walls of the basket.
6. Secure the rope coils together with adhesive or by stitching them together with twine or yarn.
7. Allow the adhesive to dry completely before using the basket.
Added Tip: Personalize the basket with paint, fabric lining, or embellishments.
To personalize your rope-wrapped storage basket, consider adding paint, fabric lining, or embellishments. Paint the rope with acrylic paint in a color that complements your decor. Line the inside of the basket with fabric to protect delicate items and add a touch of softness. Embellish the basket with buttons, beads, or other decorative elements to create a unique and personalized storage solution.
7. Project Idea #4: Manila Rope Coasters
Crafting simple and stylish manila rope coasters is a quick and easy way to add a touch of nautical charm to your home. This project requires minimal materials and can be completed in just a few minutes. This simple project is also a great way to add rope crafts to your repertoire.
Project Overview: Craft simple and stylish coasters.
This project involves coiling manila rope into a circular shape and securing it with adhesive to create a coaster. The coaster can be used to protect furniture from water rings and heat damage while adding a decorative touch to your tabletop. The natural texture of the rope adds a rustic and coastal vibe to any setting.
Mistake to Avoid: Using an improper hot glue that melts with heat.
Not all hot glues are created equal. Some hot glues are not designed to withstand high temperatures and may melt or soften when exposed to hot mugs or cups. This can result in the coaster falling apart or leaving a sticky residue on your furniture.
Step-by-Step Guide: Crafting manila rope coasters.
1. Cut a length of manila rope, approximately 12-18 inches long, depending on the desired size of the coaster.
2. Apply a small amount of hot glue to one end of the rope.
3. Begin coiling the rope into a tight spiral, pressing it firmly into the hot glue.
4. Continue coiling the rope, adding more hot glue as needed to secure the coils together.
5. Once the coaster reaches the desired size, trim the end of the rope and secure it with hot glue.
6. Allow the hot glue to cool completely before using the coaster.
Added Tip: Adding extra grip to the bottom of the coaster.
To prevent the coaster from slipping on smooth surfaces, consider adding a non-slip backing. Apply a thin layer of silicone sealant or rubber cement to the bottom of the coaster. Alternatively, you can glue a piece of felt or cork to the bottom of the coaster for added grip.
8. Project Idea #5: A Decorative Rope Wall
Crafting a decorative rope wall is a fun and unique project that is sure to impress. This project requires a little more time and effort, but the results are well worth it. A rope wall hanging will turn heads, for sure.
Project Overview: Crafting a decorative rope wall is a fun and unique project that is sure to impress.
This project involves attaching manila rope to a wall in a decorative pattern, creating a textured and visually appealing focal point. The rope can be arranged in various ways, from simple horizontal or vertical lines to more complex geometric patterns. The finished product is a stunning wall decoration that adds depth and character to any room.
Mistake to Avoid: Forgetting a proper backing or plan for your wall.
Walls are generally not designed to handle the weight and stress of rope. Attaching rope directly to the wall without proper reinforcement can damage the drywall or plaster, leading to costly repairs. Similarly, failing to plan the design and layout of the rope wall can result in an uneven or unattractive finished product.
Step-by-Step Guide: Crafting a manila rope wall.
1. Plan the design and layout of the rope wall, taking into account the size and shape of the wall, the desired pattern, and the amount of rope needed.
2. Install a backing, such as a wooden frame or a sheet of plywood, to provide a stable and secure surface for attaching the rope.
3. Attach the manila rope to the backing using nails, screws, or adhesive, following the planned design.
4. Ensure that the rope is securely fastened to the backing to prevent it from sagging or coming loose.
5. Trim any excess rope and conceal the ends for a clean and professional finish.
Added Tip: Consider the style of rope you want to use.
To create a rope wall that complements your decor, consider the style of rope you want to use. Experiment with different colors, textures, and thicknesses of rope to create a unique and personalized wall decoration. Consider using a natural fiber rope if you want to add more rustic rope decor to your design.
9. Mistake #3: Choosing Low-Quality or Inappropriate Rope
Selecting substandard rope can lead to project failure and wasted effort. It is crucial to choose the right type and grade of manila rope for your specific project needs. Choosing the wrong rope can be a really big problem, so it is one you should avoid.
Common Mistake: Selecting substandard rope that is prone to breaking or fraying.
Low-quality manila rope may be made from inferior fibers or have a loose and inconsistent weave. This can result in the rope breaking or fraying under stress, compromising the integrity of your project. Purchasing rope from an unreliable supplier can increase the risk of receiving substandard or counterfeit products.
Solution: Investing in high-quality, appropriately sized rope.
Invest in high-quality manila rope from a reputable supplier to ensure its strength, durability, and longevity. Choose a rope diameter that is appropriate for the intended use, taking into account the weight and stress it will be subjected to. Opt for a higher grade of manila rope for projects that require maximum strength and resistance to abrasion.
Here is a quick table of the different grades:
| Grade |
Description |
Recommended Use |
| #1 Grade |
Highest quality, tightly woven, minimal imperfections |
Heavy-duty applications, such as rigging, towing, and construction |
| #2 Grade |
Good quality, slightly less tightly woven, minor imperfections |
General-purpose use, such as landscaping, gardening, and crafting |
| #3 Grade |
Lower quality, loosely woven, more noticeable imperfections |
Decorative purposes, such as rope art, nautical decor, and DIY projects |
10. Cleaning and Long-Term Care
Just like any other natural material, manila rope requires proper care and maintenance to ensure its longevity and appearance. Neglecting to clean and protect the rope can lead to deterioration and a shortened lifespan.
Why care is important: Describe the importance of caring for rope in the long term.
Dirt, dust, and moisture can accumulate on the rope over time, causing it to become brittle, discolored, and prone to mildew. Exposure to sunlight can also fade the rope’s natural color and weaken its fibers. Regular cleaning and protection will help to preserve the rope’s strength, appearance, and overall condition.
Step-by-Step Guide: Describe how to care for and clean Manila rope.
1. Regularly dust or vacuum the rope to remove surface dirt and debris.
2. For more thorough cleaning, gently scrub the rope with a brush and mild soap solution.
3. Rinse the rope thoroughly with clean water to remove any soap residue.
4. Allow the rope to dry completely in a well-ventilated area, away from direct sunlight.
5. Apply a rope sealant or protectant to help prevent moisture absorption and UV damage.
11. Advanced Knotting Techniques
While basic knots are sufficient for many manila rope projects, mastering advanced knotting techniques can open up a world of creative possibilities. Advanced knots can add intricacy, visual appeal, and structural integrity to your projects.
Why advanced techniques: Describe why more advanced knotting skills might be required.
Advanced knotting techniques can be used to create complex patterns, secure heavy loads, or add decorative flourishes to your manila rope projects. These techniques require a higher level of skill and practice, but the results can be truly impressive. Learning some more macrame rope projects could really open your eyes.
List of advanced techniques: Describe a few such techniques.
- Splicing: A method of joining two ropes together by interweaving their strands.
- Whipping: A technique used to prevent the end of a rope from fraying.
- Seizing: A method of binding two ropes together or securing a loop in a rope.
- Macrame: A knotting technique used to create decorative patterns and textures.
- Decorative Knots: Intricate knots used for purely aesthetic purposes, such as the Celtic knot or the Turk’s head knot.
12. Conclusion: Unleash Your Creativity with Manila Rope
From plant hangers to nautical mirrors, storage baskets to decorative rope walls, the possibilities for manila rope projects are truly endless. By avoiding common mistakes, such as neglecting rope preparation, disregarding safety precautions, and choosing low-quality materials, you can ensure that your projects are both beautiful and long-lasting. So, embrace the versatility of manila rope and let your imagination run wild. With a little creativity and attention to detail, you can transform ordinary spaces into extraordinary showcases of rustic charm and nautical elegance.
We are confident that these tips have helped you create some amazing pieces!
FAQ Section
Q: Where can I purchase high-quality manila rope?
A: You can find high-quality manila rope at most hardware stores, craft stores, and online retailers specializing in rope and cordage. Look for rope that is made from natural fibers, tightly woven, and free from defects.
Q: How do I determine the right rope diameter for my project?
A: The appropriate rope diameter depends on the intended use and the weight or stress it will be subjected to. For light-duty projects, such as coasters or plant hangers, a thinner rope (1/4 inch to 3/8 inch) may suffice. For heavier-duty projects, such as rope walls or furniture, a thicker rope (1/2 inch to 1 inch or more) may be necessary.
Q: How do I prevent manila rope from fraying?
A: To prevent manila rope from fraying, seal the ends with rope sealant, diluted PVA glue, or by whipping the ends with twine or yarn. You can also melt the ends with a flame, but this should be done with caution and in a well-ventilated area.
Q: Can I paint or dye manila rope?
A: Yes, you can paint or dye manila rope to customize its color and appearance. Use acrylic paint or fabric dye for best results. Be sure to test the paint or dye on a small section of rope first to ensure that it adheres properly and does not bleed or fade.
Q: How do I clean manila rope that has become dirty or stained?
A: To clean manila rope that has become dirty or stained, gently scrub it with a brush and mild soap solution. Rinse the rope thoroughly with clean water and allow it to dry completely in a well-ventilated area. For stubborn stains, you may need to use a stronger cleaning agent, such as bleach or vinegar, but be sure to test it on a small section of rope first to avoid damaging the fibers.
Q: Is manila rope suitable for outdoor use?
A: Yes, manila rope is suitable for outdoor use, but it should be protected from excessive moisture and sunlight to prevent deterioration. Apply a rope sealant or protectant to help prevent moisture absorption and UV damage. Regularly clean and inspect the rope for signs of wear and tear.
Q: Can I use manila rope for climbing or load-bearing applications?
A: Manila rope is not recommended for climbing or load-bearing applications where safety is critical. Use specialized ropes designed for these purposes, such as climbing ropes or rigging ropes. These ropes are made from synthetic fibers and are engineered to withstand high loads and provide maximum safety.
Q: What are some other creative projects I can make with manila rope?
A: In addition to the projects mentioned in this article, you can also use manila rope to create rope rugs, rope furniture, rope wall hangings, nautical decor, and various other DIY projects. The possibilities are limited only by your imagination. Natural fiber rope is a wonderful resource that we should all be taking advantage of.