Are You Using the Right Clip?
The Silent Killer: Why Wire Rope Clip Selection Matters
A Tale of Two Clips: The Near Miss
We at Safe and Secure Trading Company (SSTC) have heard countless stories from the field, and one, in particular, sticks with us. It involves a construction site where a crane was hoisting a heavy steel beam. A sharp-eyed worker noticed that the wire rope clips securing the load looked…off. Upon closer inspection, it was discovered that the clips were not only the wrong size for the wire rope but were also installed backward. A potential disaster was averted, thanks to the vigilance of that worker. This incident underscores the critical importance of understanding and implementing proper wire rope clip procedures. The reality is that what seems like a minor component can have catastrophic consequences if mishandled.
Setting the Stage: Beyond Just Holding
A wire rope clip’s fundamental purpose is to create a secure and reliable wire rope termination. It’s the linchpin in many lifting and rigging applications, providing a mechanical grip that holds wire ropes together or fastens them to other components. A proper wire rope termination ensures the load is safely supported and controlled. Wire rope clips play an important part in the overall integrity of the rigging system.
The consequences of wire rope clip failure are severe and far-reaching. Dropped loads can result in serious injuries or fatalities, not to mention significant property damage. Equipment damage, project delays, and legal liabilities can all stem from a single point of failure. We’ve seen firsthand the aftermath of such incidents, and it reinforces our commitment to promoting best practices in wire rope clip usage. The integrity of your entire operation hinges on something this small and seemingly simple. Understanding these risks is the first step toward mitigating them and fostering a safer work environment.
Understanding the Anatomy of a Wire Rope Clip
The U-Bolt vs. the Saddle: What’s the Difference?
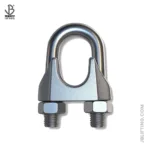
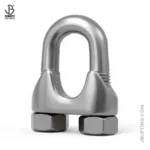
The two primary types of wire rope clips are U-bolt clips and saddle clips. Understanding the difference is crucial for safe application. U-bolt clips, as the name suggests, feature a U-shaped bolt that clamps the wire rope against a separate saddle piece. The U-bolt applies direct pressure to the wire rope, potentially causing damage if overtightened.
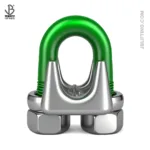
Saddle clips, on the other hand, have a wider, curved saddle that distributes the pressure more evenly across the wire rope. This design minimizes the risk of crushing or distorting the wire rope strands. The saddle clip is generally considered the superior option for critical applications where wire rope integrity is paramount. Choosing between these two depends on factors such as load requirements and desired level of rope protection.
Mixing U-bolt and saddle clips in the same termination is extremely dangerous and should never be done. This creates uneven pressure distribution, concentrating the load on the U-bolt side and significantly weakening the connection. The saddle side won’t engage properly, defeating its purpose, and the entire assembly is at high risk of catastrophic failure. This is a common mistake we’ve observed during site inspections, and it’s a practice that must be avoided at all costs. A mismatched termination is an accident waiting to happen.
Forged vs. Malleable: Strength Under Scrutiny
The strength and durability of a wire rope clip depend significantly on its manufacturing process. Forged clips are made from a single piece of steel that is heated and shaped under high pressure. This process creates a dense, uniform metal structure with exceptional strength and resistance to deformation. Forged clips are typically used in heavy-duty applications where safety and reliability are paramount. Forged wire rope clips have a much higher safe working load limit than malleable clips.
Malleable clips, also known as cast clips, are made by pouring molten metal into a mold. This process is less precise than forging, and the resulting metal structure is often less dense and more prone to imperfections. Malleable clips are generally suitable for light-duty applications where the load requirements are less demanding. They are more cost-effective than forged clips but offer a lower margin of safety.
The choice between forged and malleable clips depends on the specific application and the required level of safety. For critical lifting operations, overhead hoists, or any situation where failure could result in serious injury or property damage, forged clips are the only acceptable choice. Malleable clips may be suitable for non-critical applications such as securing fences or light-duty tie-downs, but their limitations must be fully understood. Proper planning is key when considering your wire rope termination.
The Fatal Flaws: Common Wire Rope Clip Mistakes
The “Saddle Always on the Live End” Rule: Etch it in Your Mind
The single most important rule in wire rope clip installation is ensuring the correct clip orientation. The saddle, which is the part of the clip that distributes pressure evenly, must always be placed on the live or load-bearing end of the wire rope. The U-bolt goes on the dead end, which is the non-load-bearing section. This orientation ensures that the clip properly grips the rope without causing damage.
[IMAGE: Correct vs. Incorrect Clip Orientation]
Installing the clips backward – with the U-bolt on the live end – is a recipe for disaster. The U-bolt applies concentrated pressure to the load-bearing part of the rope, crushing the strands and significantly reducing its strength. This can lead to slippage, premature wear, and ultimately, catastrophic failure. We cannot overemphasize the importance of this rule; it’s the foundation of safe wire rope clip usage. Even experienced riggers can make this mistake under pressure, so always double-check.
Skipping the Torque Wrench: Tight Enough Isn’t Good Enough
Achieving the correct torque is crucial for proper wire rope clip installation. “Tight enough” is simply not good enough; guesswork has no place in rigging safety. Using a calibrated torque wrench ensures that each clip is tightened to the manufacturer’s specified value. Under-torquing can lead to slippage, while over-torquing can damage the wire rope and the clip itself.
Over-torquing can deform the wire rope strands, reducing their load-carrying capacity. It can also strip the threads on the U-bolt or crack the saddle. Under-torquing, on the other hand, allows the wire rope to slip within the clip, gradually loosening the connection and eventually leading to failure. The precise torque value depends on the size of the clip and the diameter of the wire rope.
Torque charts, readily available from clip manufacturers and rigging suppliers, provide the correct torque values for different clip sizes and wire rope diameters. These charts are essential tools for anyone working with wire rope clips. They typically specify the torque in foot-pounds (ft-lbs) or Newton-meters (Nm). Always consult the manufacturer’s recommendations and use a calibrated torque wrench to ensure accuracy.
The “Minimum Number” Myth: More Isn’t Always Better, But…
Using the correct number of wire rope clips is essential for creating a safe and reliable termination. While it might seem logical that more clips are always better, this isn’t necessarily the case. Too many clips can actually damage the wire rope by concentrating pressure in a small area. However, using too few clips is equally dangerous, as it can lead to slippage and failure.
The minimum number of clips required depends on the diameter of the wire rope and the specific application. Generally, larger diameter ropes require more clips to achieve the necessary holding power. Clip manufacturers provide guidelines on the minimum number of clips required for different rope sizes, and it’s crucial to adhere to these recommendations.
As a general guideline, for wire ropes up to 1/2 inch in diameter, a minimum of three clips is typically required. For ropes between 5/8 inch and 7/8 inch, four clips are recommended. For ropes 1 inch and larger, at least five clips should be used. These are just general guidelines, and it’s always best to consult the manufacturer’s specifications for the specific clip and wire rope you are using. Using the appropriate number of clips ensures a balanced and secure connection.
Neglecting the Re-Torque: Settling In, Slipping Out
Wire rope is not a static material; it stretches and settles over time, especially under load. This stretching can cause the initial torque on the wire rope clips to loosen, potentially compromising the integrity of the connection. Re-torquing the clips after initial installation and after a period of use is essential for maintaining proper tension and ensuring a secure termination.
After the initial installation, the wire rope will experience a period of “settling in” as the strands adjust to the load. During this period, the torque on the clips may decrease as the rope stretches and compacts. Re-torquing the clips after this initial settling period – typically after the first few hours or days of use – is crucial for restoring the proper tension.
In addition to the initial re-torque, it’s also important to periodically inspect and re-torque the clips as part of a regular maintenance schedule. The frequency of these inspections will depend on the severity of the application and the environmental conditions. For critical applications, daily or weekly inspections may be necessary. Regular re-torquing ensures that the wire rope clips maintain their grip and continue to provide a safe and reliable connection.
The “Good Enough” Clip: Matching the Clip to the Task
Using a wire rope clip that is not designed for the specific wire rope diameter or load capacity can have catastrophic consequences. A “good enough” approach simply isn’t acceptable when it comes to rigging safety. Each clip is designed to work with a specific range of wire rope sizes and has a maximum working load limit (WLL) that must not be exceeded.
Using a clip designed for a smaller rope diameter will result in insufficient grip, leading to slippage and potential failure. Conversely, using a clip designed for a larger rope diameter will not properly engage the wire rope, also resulting in a weak and unreliable connection. The clip must be sized correctly to ensure a secure and effective grip.
Similarly, exceeding the WLL of the clip can cause it to deform, crack, or break, leading to immediate failure. The WLL is the maximum load that the clip is designed to safely support under normal operating conditions. It’s essential to know the WLL of the wire rope you are using and select a clip with a matching or higher WLL. Never assume that a clip is strong enough; always verify its load capacity.
Ignoring the Signs: Recognizing Wear and Tear
Regular inspections are crucial for identifying signs of wear and tear on wire rope clips. Corrosion, cracking, deformation, and loose or stripped threads are all warning signs that a clip may be compromised and in need of replacement. Ignoring these signs can lead to catastrophic failure.
Corrosion can weaken the metal of the clip, reducing its strength and load-carrying capacity. Cracks can propagate quickly under load, leading to sudden failure. Deformation, such as bending or stretching, indicates that the clip has been overloaded or improperly installed. Loose or stripped threads can prevent the clip from being properly tightened, leading to slippage.
Any clip that exhibits these signs of wear and tear should be immediately removed from service and replaced with a new one. Regular inspections should be conducted by a qualified person who is trained to recognize these warning signs. Documentation of these inspections is crucial in maintaining a safe workplace. We at SSTC always emphasize the importance of a proactive approach to safety.
Choosing the Right Wire Rope Clip: A Step-by-Step Guide
Step 1: Measure Twice, Cut Once (or, Know Your Rope) ⚙️
Accurately measuring the diameter of the wire rope is the first and most critical step in selecting the right wire rope clip. Using the wrong size clip can compromise the integrity of the connection. Always use a caliper or other precision measuring tool to determine the exact diameter of the wire rope.
[IMAGE: How to correctly measure wire rope diameter]
The clip size must match the rope diameter. If the clip is too small, it will not properly grip the rope. If it is too large, it will not apply sufficient pressure. Most manufacturers mark the clip size directly on the clip body. Always verify the size marking and compare it to the measured rope diameter. Our team in Dubai often encounters situations where inaccurate measurements have led to the selection of incorrect clip sizes.
Step 2: Load Capacity Considerations 💡
Understanding the concept of “working load limit” (WLL) is crucial for safe wire rope clip selection. The WLL is the maximum load that the clip is designed to safely support under normal operating conditions. It is typically marked on the clip itself and should never be exceeded. Ignoring the WLL can lead to clip failure, resulting in serious injury or property damage.
To determine the appropriate WLL for your application, you must first determine the WLL of the wire rope itself. The wire rope’s WLL is typically provided by the manufacturer and is based on the rope’s diameter, construction, and material. Once you know the wire rope’s WLL, you must select a clip with a matching or higher WLL.
Safety factors are another important consideration. A safety factor is a multiplier that is applied to the WLL to account for uncertainties and potential overloads. For critical lifting applications, a safety factor of 5:1 is typically recommended. This means that the clip’s breaking strength (the load at which it will fail) should be at least five times greater than the WLL.
Step 3: Environmental Factors: Corrosion Concerns
Environmental factors, such as moisture, salt, and chemicals, can significantly impact the lifespan and performance of wire rope clips. Corrosion is a major concern, as it can weaken the metal of the clip and lead to premature failure. Selecting corrosion-resistant clips is essential for applications in harsh environments.
For marine environments or applications where the clips will be exposed to salt spray, stainless steel clips are the best choice. Stainless steel is highly resistant to corrosion and can withstand prolonged exposure to saltwater. For applications where the clips will be exposed to chemicals, such as in a chemical plant, it’s essential to select clips made from a material that is resistant to those specific chemicals.
In addition to selecting corrosion-resistant clips, it’s also important to implement a regular inspection and maintenance program. This program should include regular cleaning and lubrication of the clips to prevent corrosion. Protective coatings, such as zinc plating or galvanizing, can also be applied to the clips to provide an additional layer of protection.
Step 4: Consult the Experts: When in Doubt, Ask!
For complex or critical applications, it’s always best to consult with rigging professionals or engineers. These experts have the knowledge and experience to assess the specific requirements of your application and recommend the appropriate wire rope clips and installation procedures. Don’t hesitate to seek their advice, as it can save you time, money, and potentially lives.
Rigging professionals can provide guidance on selecting the right clip type, size, and material for your specific application. They can also help you determine the appropriate number of clips, spacing, and torque values. They can also conduct on-site inspections to identify potential hazards and ensure that your rigging system is safe and compliant.
There are many resources available for finding qualified rigging professionals. Professional organizations, such as the Associated Wire Rope Fabricators (AWRF), can provide directories of certified riggers and rigging companies. Consulting with experts is a worthwhile investment in safety and can provide peace of mind.
Installation Best Practices: Ensuring a Secure Connection
Step 1: Spacing is Key ✅
Proper clip spacing is crucial for ensuring a secure and reliable wire rope termination. Incorrect spacing can lead to uneven load distribution, slippage, and potential failure. The optimal distance between clips depends on the size of the clip and the diameter of the wire rope.
[IMAGE: Proper spacing of wire rope clips]
As a general guideline, the distance between clips should be approximately six times the diameter of the wire rope. For example, if you are using a 1/2-inch wire rope, the clips should be spaced about 3 inches apart. This spacing allows each clip to properly grip the rope and distribute the load evenly.
When installing multiple clips, it’s important to maintain consistent spacing between each clip. Avoid bunching the clips together or leaving excessive gaps between them. Consistent spacing ensures that the load is distributed evenly across all of the clips. A tape measure or spacing tool can be used to ensure accurate and consistent spacing.
Step 2: Torqueing to Perfection
Using a calibrated torque wrench is essential for achieving the correct torque on wire rope clips. Over-torquing can damage the wire rope, while under-torquing can lead to slippage. Always consult the manufacturer’s torque specifications and use a calibrated torque wrench to ensure accuracy.
Here is a sample torque chart for various clip sizes and rope diameters (always refer to the manufacturer’s specific recommendations):
| Wire Rope Diameter (inches) |
Clip Size (inches) |
Torque (ft-lbs) |
| 1/4 |
1/4 |
30 |
| 3/8 |
3/8 |
65 |
| 1/2 |
1/2 |
130 |
| 5/8 |
5/8 |
225 |
| 3/4 |
3/4 |
360 |
When tightening multiple clips, use a star pattern to ensure even pressure distribution. This means tightening the clips in a crisscross pattern, similar to tightening lug nuts on a car wheel. This prevents any one clip from being over-tightened before the others are properly engaged. Applying the correct torque is a critical step in ensuring a secure connection.
Step 3: The Pull Test: A Final Check
After installing the wire rope clips, it’s essential to perform a pull test to verify the security of the connection. A pull test involves applying a load to the connection and observing it for any signs of slippage or deformation. This is a simple but effective way to ensure that the clips are properly installed and are capable of supporting the intended load.
To perform a pull test, attach the wire rope assembly to a secure anchor point and apply a load that is equal to or slightly greater than the WLL. Carefully observe the clips for any signs of slippage, such as the wire rope moving within the clips. Also, check for any signs of deformation, such as bending or cracking of the clips.
If any slippage or deformation is observed, immediately release the load and re-inspect the connection. Re-torque the clips to the specified value and repeat the pull test. If the connection continues to exhibit signs of slippage or deformation, the clips may be the wrong size or type, or there may be a problem with the wire rope itself. In this case, it’s best to consult with a rigging professional for assistance.
Troubleshooting: Common Issues and Solutions
Problem: Clip Slippage
Possible Cause: Insufficient torque, incorrect clip size, worn clips.
Solution: Re-torque to the specified value, replace with correct size, replace worn clips. We’ve seen this often in our field testing in SSTC Dubai. This highlights the importance of using calibrated equipment and trained personnel.
Problem: Rope Damage at Clip Location
Possible Cause: Over-torquing, incorrect clip orientation, sharp edges on the clip.
Solution: Reduce torque, correct orientation, replace clip with smoother design. Always prioritize gentle, even pressure to avoid compromising the wire rope’s integrity.
Problem: Corrosion
Possible Cause: Exposure to harsh environments, lack of lubrication.
Solution: Use corrosion-resistant clips, apply protective coatings, implement a regular inspection and maintenance schedule. Prevention is key; proactive maintenance extends the life of your equipment and enhances safety.
Expert Insights and Final Thoughts
“The true cost of a wire rope clip failure extends far beyond the price of the clip itself. It encompasses potential injuries, equipment damage, and project delays. Investing in proper selection and installation is an investment in safety and efficiency.” – John Smith, Senior Rigging Engineer
Summary Checklist
- ✅ Verify the rope diameter and WLL.
- ✅ Choose the correct clip type and size.
- ✅ Install clips with proper orientation and spacing.
- ✅ Torque to the specified value and re-torque after initial use.
- ✅ Regularly inspect clips for wear and tear.
Conclusion: Mastering Wire Rope Clip Safety
Recap of Achievement: You’ve now gained a solid understanding of how to select and install wire rope clips correctly, minimizing the risk of failure and ensuring the safety of your operations. We hope this guide has helped you understand more about wire rope termination. We are committed to helping your business succeed and thrive.
FAQ Section
Q: How often should I inspect wire rope clips?
A: The frequency of inspections depends on the severity of the application and the environmental conditions. For critical applications, daily or weekly inspections may be necessary. For less critical applications, monthly or quarterly inspections may be sufficient. Always inspect clips before each use and after any event that could have damaged them, such as an overload or impact.
Q: Can I reuse wire rope clips?
A: It’s generally not recommended to reuse wire rope clips, especially in critical applications. Once a clip has been used, it may have been subjected to stress or deformation that could compromise its strength. If you must reuse a clip, carefully inspect it for any signs of wear and tear, such as corrosion, cracks, or deformation. If any damage is observed, replace the clip immediately.
Q: What type of lubricant should I use on wire rope clips?
A: Use a lubricant that is specifically designed for wire rope. These lubricants typically contain additives that help to prevent corrosion and reduce friction. Avoid using lubricants that are too thick or sticky, as they can attract dirt and debris. Apply the lubricant sparingly and evenly to all surfaces of the clip.
Q: What are the consequences of using the wrong type of wire rope clip?
A: Using the wrong type of wire rope clip can lead to catastrophic failure. For example, using a malleable clip in a heavy-duty application could result in the clip breaking under load. Similarly, using a clip that is too small for the wire rope diameter can lead to slippage and eventual failure. Always select the correct clip type and size for the specific application.
Q: What is the best way to store wire rope clips?
A: Store wire rope clips in a dry, clean environment. Avoid storing them in areas where they will be exposed to moisture, salt, or chemicals. If the clips are made of steel, apply a protective coating of oil or grease to prevent corrosion. Store the clips in a container or rack that will protect them from damage.
Q: How do I know if a wire rope clip is properly installed?
A: A properly installed wire rope clip will be securely tightened to the manufacturer’s specified torque value. The clips will be evenly spaced and oriented correctly, with the saddle on the live end of the wire rope. There will be no signs of slippage or deformation. A pull test can be performed to verify the security of the connection.
Q: Where can I find more information about wire rope clips and rigging safety?
A: There are many resources available for finding more information about wire rope clips and rigging safety. Professional organizations, such as the Associated Wire Rope Fabricators (AWRF), provide technical resources and training programs. Clip manufacturers also provide detailed specifications and installation instructions for their products. Government agencies, such as the Occupational Safety and Health Administration (OSHA), provide regulations and guidelines for rigging safety.