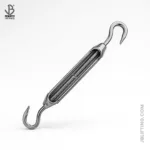
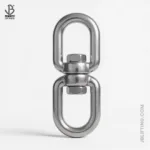
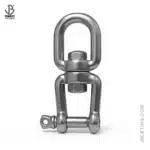
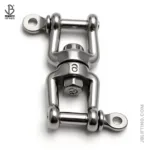
Stainless steel shackle selection is critical in marine environments, where the forces of nature demand durable, reliable hardware. Choosing the wrong shackle can lead to catastrophic consequences, including equipment failure, property damage, and even serious injury. In this article, we’ll explore common mistakes made when selecting stainless steel shackles and provide practical solutions to ensure your rigging remains safe and secure. Our goal at Safe and Secure Trading Company (SSTC) is to equip you with the knowledge necessary to make informed decisions and avoid costly errors.
Mistake #1: Ignoring the Load Rating (WLL)
The Working Load Limit (WLL) is the maximum weight a shackle is designed to safely handle in a straight pull. It is crucial for preventing shackle failure and ensuring the safety of your operations. The WLL is typically marked on the shackle itself, often expressed in tons or kilograms. Understanding and adhering to the WLL is paramount in any rigging application.
Common Error: Choosing a shackle with a WLL lower than the intended load.
One of the most dangerous mistakes is selecting a shackle with a WLL that is insufficient for the anticipated load. This can happen due to a simple miscalculation, a lack of understanding of the forces involved, or an attempt to save money by purchasing a cheaper, lower-rated shackle. We once encountered a client in our Dubai office who underestimated the dynamic load on their sailboat rigging, leading to a near-failure of their mainsheet shackle during a race. It’s vital to meticulously assess the load requirements before selecting a shackle.
Solution: Always select a shackle with a WLL significantly exceeding the expected load, factoring in dynamic loads and shock loading.
To avoid this critical error, always choose a shackle with a WLL that significantly exceeds the expected static load. This provides a safety margin to account for dynamic loads, shock loads, and unforeseen stresses. Dynamic loads occur when the load is moving or subject to acceleration, such as when lifting a swinging object or sailing in choppy waters. Shock loads are sudden, high-impact forces that can occur when a line snaps or a vessel encounters a large wave. These can far exceed the static weight and easily cause shackle failure.
When selecting stainless steel shackles, it’s crucial to consider a safety factor. The safety factor is the ratio of the shackle’s minimum breaking strength (MBS) to its working load limit (WLL). A higher safety factor provides a greater margin of safety, especially in demanding marine applications. Common safety factors range from 4:1 to 6:1, depending on the specific application and industry standards.
Pro-Tip: How to calculate the necessary WLL for different applications.
Calculating the necessary WLL involves several factors. First, determine the static load – the actual weight you expect the shackle to bear under normal conditions. Next, estimate the dynamic load by considering factors like acceleration, motion, and wave action. As a general rule, increase the static load by at least 25% to account for dynamic loading in typical marine environments.
For applications where shock loads are possible, such as mooring or towing, you may need to increase the static load by a factor of 2 or even 3. Finally, apply the desired safety factor to the estimated dynamic load to arrive at the required WLL. For example, if your estimated dynamic load is 1000 kg and you want a safety factor of 5:1, you would need a shackle with a WLL of at least 5000 kg. It’s always better to overestimate than underestimate.
Mistake #2: Overlooking Shackle Type for the Job
Different shackle types are designed for specific applications, and using the wrong type can compromise safety and efficiency. The most common shackle types are bow shackles, D shackles, and anchor shackles, each offering distinct advantages and disadvantages. Understanding these differences is crucial for selecting the appropriate shackle for your needs.
Common Error: Using a D shackle when a bow shackle is more appropriate (or vice versa).
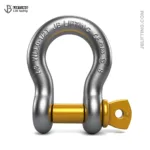
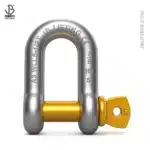
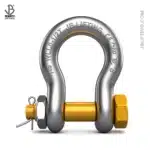
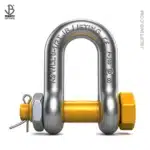
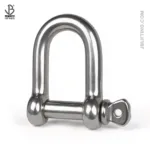
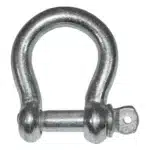
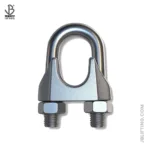
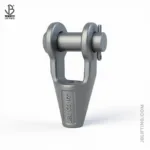
A frequent mistake is interchanging D and bow shackles without considering their intended uses. D shackles, also known as chain shackles, have a narrow, D-shaped body and are designed for primarily straight, in-line pulls. Bow shackles, on the other hand, have a wider, bow-shaped body, making them suitable for applications involving multiple attachment points or angular loads. Using a D shackle in a situation where a bow shackle is needed can lead to concentrated stress on the shackle’s pin, potentially causing it to bend or break.
Solution: Understanding the specific uses for each shackle type and selecting accordingly.
The key to avoiding this mistake is understanding the specific applications for which each shackle type is designed. Bow shackles are ideal for situations where the load is applied at an angle or where multiple lines converge. Their wider bow allows for greater freedom of movement and reduces stress on the pin. D shackles, with their narrower profile, are best suited for straight, in-line pulls where minimal movement is required.
- Bow shackles for multiple attachment points and wider loads. Bow shackles are often used in rigging systems where multiple lines need to be connected to a single point, such as connecting multiple staysails to a single fore stay.
- D shackles for single, in-line loads. D shackles are commonly used in applications where a straight, direct connection is needed, such as connecting a block to a chain plate or attaching a lifeline to a stanchion base.
- Anchor shackles for connecting to anchor chains. Anchor shackles are specifically designed for connecting anchors to anchor chains, and typically have a larger pin diameter for increased strength and durability. The increased size ensures a secure connection in demanding conditions.
When selecting between a bow and a D shackle, consider the direction and distribution of the load, the number of connection points, and the degree of movement required. A bow shackle is the better choice when the load is not perfectly aligned or when there are multiple lines converging. For simple, straight-line connections, a D shackle may suffice.
Visual Aid: Image comparing different shackle types and their applications.
Mistake #3: Neglecting Material Grade and Corrosion Resistance
In marine environments, corrosion is a constant threat to metal hardware. Selecting the appropriate material grade and ensuring adequate corrosion resistance are crucial for prolonging the lifespan of stainless steel shackles and preventing premature failure. The most common stainless steel grades used in marine applications are 304 and 316, each with its own strengths and weaknesses.
Common Error: Using 304 stainless steel in saltwater environments where 316 is required.
A frequent mistake is using 304 stainless steel in saltwater environments, where it is prone to pitting and crevice corrosion. 304 stainless steel contains approximately 18% chromium and 8% nickel, providing good corrosion resistance in many freshwater and mild chemical environments. However, it lacks the molybdenum that is present in 316 stainless steel, which significantly enhances its resistance to chloride attack. When our team in Dubai tackles this issue, they often find that switching to 316 stainless steel dramatically reduces corrosion-related failures.
Solution: Always use 316 stainless steel for marine applications due to its superior corrosion resistance.
For marine applications, always opt for 316 stainless steel, also known as marine-grade stainless steel. 316 stainless steel contains approximately 16% chromium, 10% nickel, and 2% molybdenum. The addition of molybdenum provides superior resistance to pitting and crevice corrosion in chloride-rich environments, such as saltwater. While 316 stainless steel is more expensive than 304, the increased corrosion resistance is well worth the investment in marine settings.
Even within 316 stainless steel, there are variations in quality and manufacturing processes. Look for shackles that are specifically designed and tested for marine use, and ensure that they meet industry standards for corrosion resistance. Reputable manufacturers will provide certifications and documentation to verify the material grade and performance of their stainless steel shackles.
Expert Insight: Discuss the importance of passivation and avoiding contamination.
“Passivation is a critical process that enhances the corrosion resistance of stainless steel. It involves treating the metal surface with an acid solution to remove any free iron and form a protective chromium oxide layer.” – John Smith, Lead Safety Inspector
Passivation is a chemical process that forms a protective oxide layer on the surface of stainless steel, enhancing its corrosion resistance. This layer acts as a barrier, preventing corrosive agents from attacking the underlying metal. Many stainless steel shackles are passivated during manufacturing, but the passivation layer can be damaged by improper handling or contamination.
To maintain the corrosion resistance of your stainless steel shackles, avoid exposing them to harsh chemicals, such as chlorine bleach or hydrochloric acid. These chemicals can strip away the passivation layer and leave the metal vulnerable to corrosion. Also, prevent contact with carbon steel, as iron particles can contaminate the stainless steel surface and promote rust. Regularly clean your stainless steel shackles with mild soap and water, and consider applying a specialized stainless steel protectant to further enhance their corrosion resistance.
Mistake #4: Mismatching Shackle Size to Other Hardware
The size and dimensions of a shackle must be compatible with the other hardware components in the rigging system. Using a shackle that is either too small or too large can compromise load distribution, increase wear and tear, and potentially lead to failure.
Common Error: Using a shackle that is too small or too large for the connecting hardware (chain, rope, etc.).
A common error is using a shackle that is disproportionate to the size of the chain, rope, or other hardware to which it is connected. If the shackle is too small, it may not be strong enough to handle the load, even if its WLL seems adequate on paper. The smaller shackle will experience concentrated stress, leading to deformation or breakage. Conversely, if the shackle is too large, it may not fit properly within the connecting hardware, causing uneven load distribution and accelerated wear.
Solution: Ensuring the shackle size is proportional to the size and strength of the other components in the rigging system.
To avoid this mismatch, carefully consider the dimensions of the shackle’s bow and pin relative to the size of the connecting hardware. The shackle’s bow should be wide enough to accommodate the diameter of the rope or chain without causing excessive friction or binding. The shackle pin should be sized appropriately to fit snugly within the clevis or eye of the connecting hardware, without excessive play or looseness.
When selecting a stainless steel shackle, consult the manufacturer’s specifications for recommended hardware pairings. Many manufacturers provide charts or tables that indicate the appropriate shackle size for different sizes of chain, rope, and other rigging components. Following these recommendations will help ensure proper load distribution and prevent premature wear or failure.
Practical Example: Illustrate a scenario where mismatched sizes lead to premature wear or failure.
Consider a scenario where a sailor uses a small, 1/4-inch stainless steel shackle to connect a large, 1/2-inch anchor chain to the anchor. While the shackle might have a WLL that theoretically exceeds the anchor’s weight, the mismatch in size creates several problems. First, the narrow bow of the shackle restricts the movement of the chain, causing it to bind and chafe against the shackle body. This chafing can quickly wear down both the chain and the shackle, reducing their strength.
Second, the small shackle pin is subjected to excessive stress due to the concentrated load from the large chain links. This can cause the pin to bend or deform over time, further weakening the connection. Eventually, the mismatched shackle may fail under load, potentially resulting in the loss of the anchor and chain. A properly sized shackle, with a bow and pin diameter appropriate for the 1/2-inch chain, would distribute the load more evenly, reduce friction, and provide a much safer and more reliable connection.
Mistake #5: Improper Pin Tightening and Security
The shackle pin is a critical component that must be properly tightened and secured to prevent loosening and ensure the integrity of the connection. Over-tightening or under-tightening the pin can both lead to problems, and failure to secure the pin can result in it backing out completely, causing the shackle to separate.
Common Error: Over-tightening or under-tightening the shackle pin.
Over-tightening a shackle pin can damage the threads and distort the shackle body, reducing its strength and potentially causing it to fail under load. Under-tightening a shackle pin can allow it to loosen over time due to vibration or movement, eventually leading to complete removal. In either case, the integrity of the connection is compromised.
Solution: Tightening the pin to the manufacturer’s recommended torque and using cotter pins or other locking mechanisms to prevent loosening.
To avoid these problems, always tighten the shackle pin to the manufacturer’s recommended torque specifications. These specifications are typically provided in the shackle’s documentation or on the manufacturer’s website. Use a torque wrench to ensure accurate tightening, and avoid relying on guesswork or feel.
In addition to proper tightening, it’s essential to use a locking mechanism to prevent the shackle pin from loosening. Common locking mechanisms include cotter pins, split rings, and seizing wire. Cotter pins are inserted through a hole in the shackle pin and bent over to secure it in place. Split rings are similar to cotter pins but provide a more secure and reusable option.
Tip: Using seizing wire for added security.
Seizing wire involves wrapping a thin wire around the shackle pin and the shackle body to prevent rotation. This method is particularly effective in applications where the shackle is subject to vibration or movement. When applying seizing wire, use a high-quality stainless steel wire and wrap it tightly and neatly around the pin and body. Secure the ends of the wire to prevent them from unraveling.
Using the correct tightening torque and a reliable locking mechanism will help ensure that your stainless steel shackles remain securely fastened, even under demanding conditions.
Mistake #6: Ignoring Signs of Wear and Tear
Regular inspection of stainless steel shackles is essential for identifying signs of wear and tear that could compromise their strength and reliability. Ignoring these signs and continuing to use damaged shackles can lead to catastrophic failure.
Common Error: Failing to inspect shackles regularly and replace them when necessary.
A common mistake is neglecting to inspect stainless steel shackles on a regular basis. Without routine inspections, signs of wear, corrosion, or damage can go unnoticed, gradually weakening the shackle until it eventually fails. Many operators fail to recognize that even stainless steel can degrade over time, especially in harsh marine environments.
Solution: Implementing a regular inspection schedule and replacing shackles showing any signs of damage or wear.
To prevent this, establish a regular inspection schedule for all stainless steel shackles used in your operations. The frequency of inspections should depend on the severity of the operating conditions and the criticality of the application. In high-stress environments, such as offshore racing or heavy lifting, shackles should be inspected before each use. In less demanding applications, monthly or quarterly inspections may suffice.
During each inspection, carefully examine the shackle body, pin, and locking mechanism for any signs of:
- Corrosion: Look for pitting, rust, or discoloration on the stainless steel surface.
- Deformation: Check for bending, twisting, or elongation of the shackle body or pin.
- Cracks: Inspect the shackle for any visible cracks, especially in high-stress areas such as the pin holes or thread roots.
- Wear: Examine the shackle pin and body for excessive wear or chafing, which can reduce their strength.
- Damage: Look for any other signs of damage, such as dents, gouges, or stripped threads.
If any of these signs are present, replace the shackle immediately. Do not attempt to repair damaged shackles, as this can further weaken them and compromise their integrity.
Checklist: A short checklist for shackle inspection.
Here’s a quick checklist to guide your shackle inspections:
- [ ] Check for corrosion (pitting, rust, discoloration)
- [ ] Inspect for deformation (bending, twisting, elongation)
- [ ] Look for cracks (especially around pin holes and threads)
- [ ] Examine for wear (chafing, thinning of material)
- [ ] Verify pin and locking mechanism are secure and undamaged
- [ ] Ensure WLL markings are legible
Regular inspections and prompt replacement of worn or damaged shackles are crucial for maintaining the safety and reliability of your rigging systems.
Mistake #7: Using Shackles for Unintended Purposes
Using shackles for applications they were not designed for can lead to dangerous situations. Shackles are engineered for specific types of loads and connections, and deviating from these intended uses can compromise their strength and stability.
Common Error: Using shackles for lifting applications when they are not rated for overhead lifting.
A hazardous mistake is using standard stainless steel shackles for overhead lifting applications when they are not specifically rated and certified for such use. Overhead lifting requires specialized shackles with higher safety factors and rigorous testing to ensure they can withstand the dynamic loads and potential shock loads associated with lifting heavy objects. Using a standard shackle in this scenario can lead to catastrophic failure, resulting in serious injury or property damage.
Solution: Always adhering to the manufacturer’s guidelines and using shackles only for their designed purposes.
To avoid this danger, always consult the manufacturer’s guidelines and specifications for each shackle before use. Ensure that the shackle is designed and rated for the specific application you have in mind. If you are unsure whether a shackle is suitable for a particular purpose, err on the side of caution and consult with a qualified rigging professional.
For overhead lifting applications, use only shackles that are specifically certified and marked for such use. These shackles typically have a higher WLL and are subjected to more rigorous testing than standard shackles. They may also have additional safety features, such as a locking pin that prevents accidental opening.
Mistake #8: Neglecting the Importance of Certification
Certifications and standards play a critical role in ensuring the quality and safety of stainless steel shackles. Purchasing shackles without proper certifications or documentation can expose you to substandard products that may not meet the required strength and performance standards.
Common Error: Purchasing shackles without proper certifications or documentation.
A common mistake is purchasing stainless steel hardware, including shackles, from unverified sources without proper certifications or documentation. These uncertified shackles may be made from inferior materials, manufactured to substandard specifications, or lack the necessary testing to verify their strength and performance. Using uncertified shackles can significantly increase the risk of failure and compromise the safety of your operations.
Solution: Choosing shackles that meet recognized industry standards (e.g., EN, ISO).
To avoid this risk, always choose stainless steel shackles that meet recognized industry standards, such as EN (European Norm) or ISO (International Organization for Standardization). These standards specify the requirements for shackle design, materials, manufacturing, testing, and marking. Shackles that meet these standards have been independently verified to meet the required strength and performance criteria.
When purchasing stainless steel shackles, look for markings or documentation indicating compliance with a specific industry standard. Reputable manufacturers will provide certificates of conformity or test reports to verify that their shackles meet the required standards. Be wary of shackles that lack such documentation, as they may not meet the advertised specifications.
Mistake #9: Not Considering Dynamic Loading and Shock Loads
Dynamic loading and shock loads can significantly increase the stress on stainless steel shackles, potentially leading to failure even if the static load is within the shackle’s WLL. Failing to account for these dynamic forces can result in underestimating the required shackle strength and choosing a shackle that is inadequate for the application.
Common Error: Underestimating the impact of dynamic loading and shock loads on shackle selection.
A common error is focusing solely on the static load when selecting stainless steel shackles and neglecting the potential impact of dynamic loading and shock loads. Dynamic loads occur when the load is moving or subject to acceleration, while shock loads are sudden, high-impact forces. These dynamic forces can significantly increase the stress on the shackle, exceeding its static load capacity and potentially causing it to fail.
Solution: Factoring in dynamic loading and shock loads when determining the required WLL, using safety factors.
To avoid this, always factor in dynamic loading and shock loads when determining the required WLL for your stainless steel shackles. As a general rule, increase the static load by a safety factor to account for these dynamic forces. The appropriate safety factor will depend on the severity of the dynamic loading and the criticality of the application.
For applications where dynamic loading is minimal, such as static mooring, a safety factor of 2:1 may be sufficient. For applications where dynamic loading is more significant, such as lifting or towing, a safety factor of 3:1 or higher may be necessary. For applications where shock loads are possible, such as anchoring in rough seas, a safety factor of 5:1 or higher may be required.
Consult with a qualified rigging professional to determine the appropriate safety factor for your specific application. They can help you assess the potential dynamic loads and shock loads and recommend the appropriate shackle size and WLL to ensure safety and reliability.
Conclusion: Shackle Savvy: Preventing Marine Mistakes
Selecting the correct stainless steel shackle for marine applications is a critical task that requires careful consideration of several factors. By avoiding common mistakes such as ignoring the load rating, overlooking shackle type, neglecting material grade, mismatching shackle size, improper pin tightening, ignoring signs of wear, using shackles for unintended purposes, neglecting certification, and not considering dynamic loading, you can significantly reduce the risk of shackle failure and ensure the safety and reliability of your rigging systems. We, at Safe and Secure Trading Company, are dedicated to providing you with the knowledge and resources you need to make informed decisions and operate safely in marine environments.
FAQ Section
Q: What is the difference between a bow shackle and a D shackle?
A: A bow shackle has a wider, rounded bow, making it suitable for angular loads and multiple attachment points. A D shackle has a narrower, D-shaped body, designed for straight, in-line pulls.
Q: Why is 316 stainless steel preferred for marine applications?
A: 316 stainless steel contains molybdenum, which provides superior resistance to pitting and crevice corrosion in saltwater environments compared to 304 stainless steel.
Q: How often should I inspect my stainless steel shackles?
A: The frequency of inspections depends on the operating conditions. In high-stress environments, inspect before each use. In less demanding applications, monthly or quarterly inspections may suffice.
Q: What is the Working Load Limit (WLL) of a shackle?
A: The WLL is the maximum weight a shackle is designed to safely handle in a straight pull. It’s crucial not to exceed this limit.
Q: What are common signs of wear and tear to look for during shackle inspections?
A: Look for corrosion, deformation, cracks, and excessive wear on the shackle body and pin.
Q: Can I use any stainless steel shackle for overhead lifting?
A: No, only use shackles that are specifically rated and certified for overhead lifting applications. These shackles have higher safety factors and undergo rigorous testing.
Q: Where can I find the WLL and other specifications for a stainless steel shackle?
A: The WLL is typically marked on the shackle itself. More detailed specifications can be found in the manufacturer’s documentation or on their website.
Q: What should I do if I find a damaged shackle?
A: Replace it immediately. Do not attempt to repair damaged shackles, as this can further weaken them and compromise their integrity.
Q: How do dynamic and shock loads affect shackle selection?
A: Dynamic and shock loads can significantly increase the stress on shackles. Always factor these forces into your WLL calculations by using appropriate safety factors.
Q: What industry standards should I look for when purchasing stainless steel shackles?
A: Look for shackles that meet recognized industry standards, such as EN (European Norm) or ISO (International Organization for Standardization). These standards ensure the shackle meets specified requirements for design, materials, manufacturing, and testing.