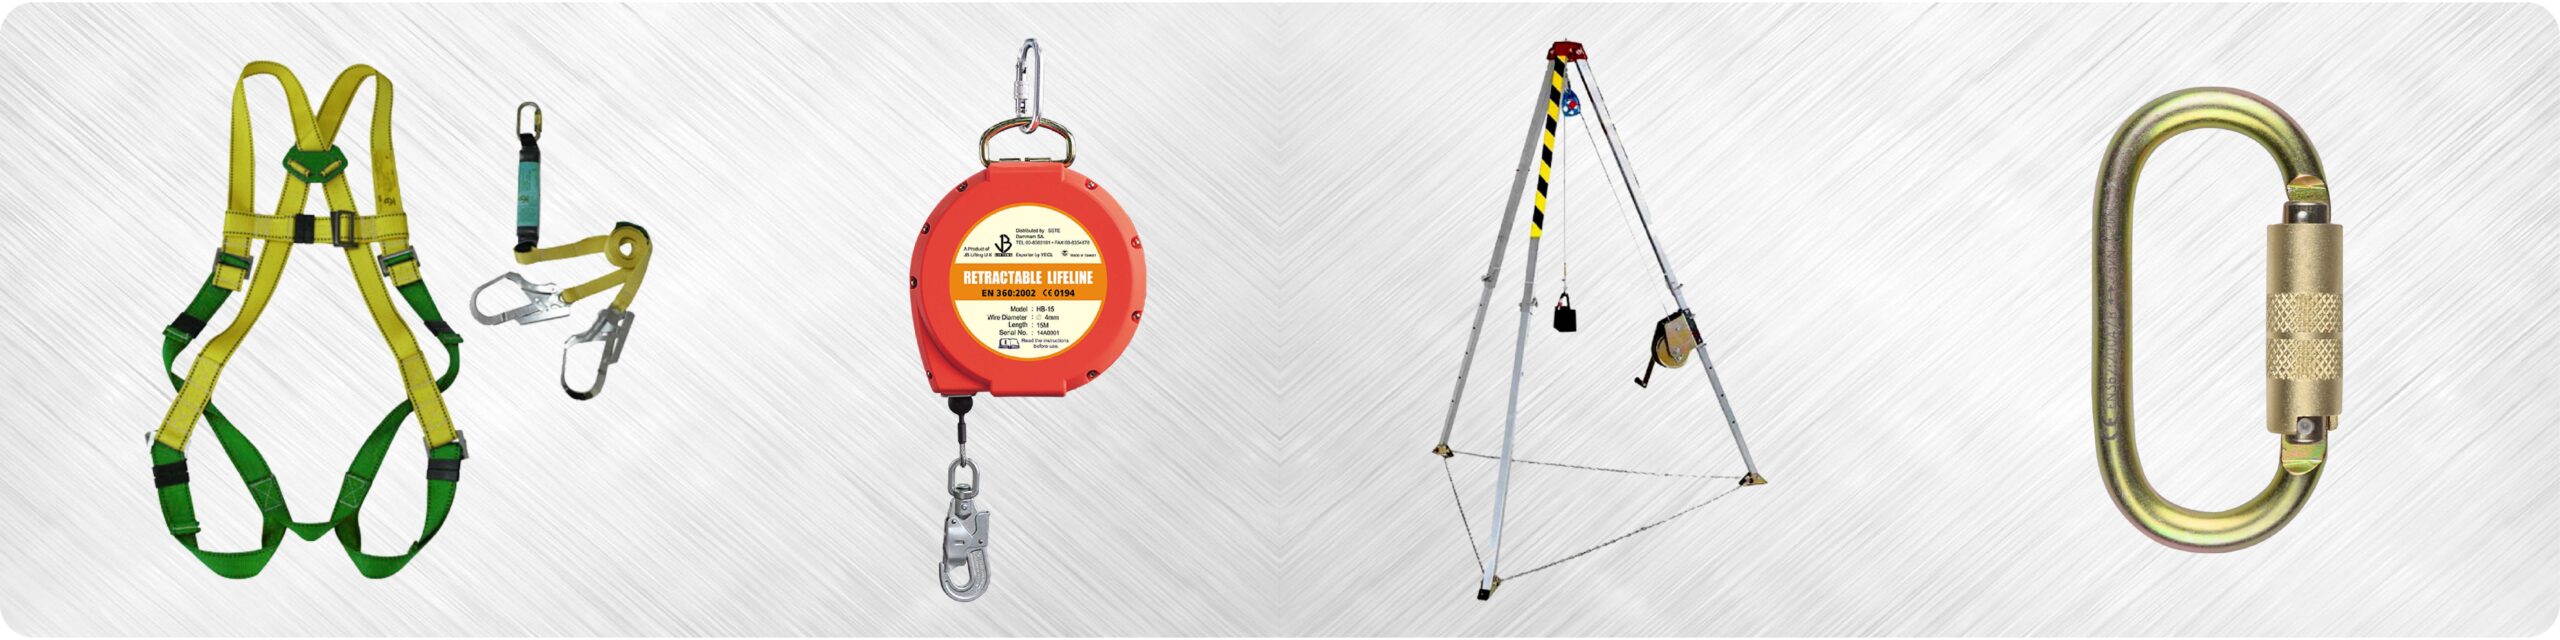
Harness Fitting: A Step-by-Step Guide
The proper fit of a fall protection harness is paramount for ensuring safety and minimizing the risk of injury when working at height. A correctly fitted safety harness is not just a piece of personal protective equipment (PPE); it’s a critical component of a comprehensive fall arrest system designed to protect workers from potentially life-threatening falls. A harness fitting guide ensures workers are properly protected.
Introduction: The Critical Importance of a Properly Fitted Harness
Falls continue to be a leading cause of workplace injuries and fatalities, particularly in industries such as construction, manufacturing, and telecommunications. Ensuring a fall protection harness fits correctly can significantly reduce the risk of serious injury or death in the event of a fall. A harness fitting guide helps ensure that all workers are safe.
Statistical Overview of Fall-Related Injuries
Recent data from the Occupational Safety and Health Administration (OSHA) and the National Institute for Occupational Safety and Health (NIOSH) reveals a concerning prevalence of fall-related injuries across various sectors. For example, OSHA reports that falls account for approximately 33% of all construction fatalities annually. NIOSH studies indicate a direct correlation between improperly fitted harnesses and an increased likelihood of severe injuries, including spinal cord damage, internal organ trauma, and head injuries. These statistics underscore the vital importance of proper safety harness fitting and adherence to OSHA harness requirements. It’s important that OSHA harness requirements are met.
According to the 2026 National Safety Council data, falls remained one of the leading causes of unintentional injury and death in the workplace. They underscore the critical need for rigorous safety measures, including the correct fitting and usage of fall protection harnesses.
Why a Standard “One-Size-Fits-All” Approach Fails
The assumption that a single harness size can adequately fit all body types is a dangerous oversimplification. Individuals vary significantly in height, weight, torso length, and chest circumference. A harness that is too large may not effectively arrest a fall, allowing the worker to slip partially or completely out of the harness. Conversely, a harness that is too small can restrict movement, cause discomfort, and create pressure points that lead to fatigue and potential injury.
Data on body shape and size variance highlights the necessity of personalized harness adjustment. Anthropometric studies show a wide range of body dimensions among workers, necessitating a range of harness sizes and adjustability features. What our team in Dubai has often seen is workers being given ill-fitting harnesses due to availability of the right sizes. Without taking individual measurements and carefully cross-referencing them with manufacturer-specific sizing charts, a “one-size-fits-all” approach compromises worker safety.
Step 1: Initial Harness Inspection – A Data-Driven Approach
Before each use, a thorough inspection of the PPE harness is essential. This inspection should identify any signs of damage, wear, or degradation that could compromise the harness’s integrity. Documentation of these inspections helps track harness condition and identify potential safety hazards.
Visual Inspection Checklist Based on Failure Data
Based on accident investigations and harness failure data, the following visual inspection checklist is crucial:
- Webbing: Check for cuts, abrasions, fraying, chemical damage, burns, or discoloration. Webbing should be clean and free from any substances that could weaken the material.
- Stitching: Inspect all stitching for broken or pulled threads. Stitching should be tight and uniform.
- Buckles and D-rings: Examine buckles and D-rings for distortion, cracks, corrosion, sharp edges, or any signs of damage. Ensure that buckles engage properly and D-rings pivot freely.
- Labels: Verify that all labels are present and legible. Labels provide critical information about the harness’s specifications, limitations, and inspection history.
[IMAGE: A close-up of a harness webbing showing signs of fraying and damage.]
“Regular inspection and maintenance are key to ensuring your fall protection equipment functions as intended.” – Michael Davis, Certified Safety Professional
Documentation: Maintaining a Detailed Inspection Log
Maintaining a detailed inspection log is crucial for tracking the condition of each harness and identifying potential issues before they lead to accidents. The inspection log should include the following information:
- Date of inspection
- Harness identification number
- Inspector’s name
- Detailed description of any defects or damage found
- Corrective actions taken (e.g., repair, replacement)
- Date of next scheduled inspection
This meticulous record-keeping provides a valuable audit trail and helps ensure that harnesses are regularly inspected and maintained in accordance with OSHA harness requirements.
| Date |
Harness ID |
Inspector |
Findings |
Corrective Action |
Next Inspection |
| [Date] |
[Harness ID] |
[Inspector’s Name] |
[Description of Defects] |
[Action Taken] |
[Date] |
| [Date] |
[Harness ID] |
[Inspector’s Name] |
[Description of Defects] |
[Action Taken] |
[Date] |
| [Date] |
[Harness ID] |
[Inspector’s Name] |
[Description of Defects] |
[Action Taken] |
[Date] |
Step 2: Proper Sizing – Utilizing Body Measurement Data
Accurate body measurements are essential for selecting the correct harness size. This ensures a snug and secure fit, maximizing the effectiveness of the fall arrest system. A harness fitting guide is useful.
Gathering Accurate Body Measurements
To obtain accurate body measurements, follow these guidelines:
- Torso Length: Measure from the top of the hip bone to the shoulder.
- Chest Circumference: Measure around the chest at the level of the armpits.
- Waist Size: Measure around the natural waistline.
Use a flexible measuring tape and ensure that the tape is held snugly but not too tightly. Record measurements in a standardized format (e.g., inches or centimeters) for easy comparison with harness sizing charts. We once had a client who continually ordered the wrong sizes because they were estimating the measurements. Once they took the time to measure accurately, they were able to choose the right size and ensure a more secure fit.
Cross-Referencing Measurements with Harness Size Charts
Harness sizing charts vary between manufacturers, so it’s crucial to consult the specific chart for the brand of harness being used. Compare your body measurements to the chart to determine the appropriate harness size.
Note any discrepancies between brands. For example, a “medium” size in one brand may be equivalent to a “large” in another. Always rely on the manufacturer’s sizing chart rather than assuming sizes are consistent across brands. The harness fitting guide will provide some insight.
Step 3: Leg Strap Adjustment – Analyzing Tension for Optimal Mobility
Proper adjustment of the leg straps is crucial for preventing slippage during a fall and ensuring adequate mobility. A properly adjusted fall protection harness is more comfortable and effective.
The “Two-Finger Test”: Quantifying Leg Strap Tightness
The “two-finger test” is a simple and effective method for gauging the appropriate leg strap tightness. After adjusting the leg straps, you should be able to insert two fingers comfortably between the strap and your thigh.
If you can insert more than two fingers, the straps are too loose, increasing the risk of slippage during a fall. If you cannot insert two fingers, the straps are too tight, restricting circulation and causing discomfort. It’s one of the key steps when ensuring safety harness fitting is correct.
Impact on Mobility and Range of Motion: A Biomechanical Perspective
Leg strap adjustments significantly affect the wearer’s mobility and balance. Straps that are too loose can cause the harness to shift during movement, compromising stability and increasing the risk of tripping or losing balance. Straps that are too tight can restrict blood flow and nerve function, leading to fatigue, muscle cramps, and reduced range of motion. Correct harness adjustment is essential for maximizing productivity and minimizing fatigue. When our team in London handles harness adjustment, they always emphasize the importance of balancing security with comfort to ensure workers can perform their tasks effectively.
Step 4: Torso Strap Adjustment – Balancing Comfort and Security
The torso straps play a critical role in distributing the force of a fall across the body. Proper adjustment ensures both comfort and security.
Identifying the Ideal Torso Strap Position Based on Body Type
The optimal torso strap position varies based on individual body dimensions. The straps should fit snugly across the shoulders and back, without creating pressure points or restricting movement.
For individuals with shorter torsos, the straps may need to be adjusted higher to ensure a secure fit. For those with longer torsos, the straps may need to be adjusted lower. Avoid overtightening the straps, as this can cause discomfort and restrict breathing. Correct harness sizing is critical here.
Analyzing Strap Tension for Full Range of Motion
Assess torso strap tension by performing a range of arm and shoulder movements. You should be able to reach overhead, cross your arms in front of your body, and rotate your torso without feeling restricted by the straps.
Overly tight straps can limit upper body mobility, making it difficult to perform certain tasks. Loose straps, on the other hand, may not provide adequate support during a fall. Aim for a snug but comfortable fit that allows for a full range of motion. If the straps are too loose, there will be unnecessary movement.
Step 5: Chest Strap Adjustment – Maintaining Vertical Suspension
The chest strap is essential for maintaining proper body orientation during and after a fall. Proper adjustment prevents the wearer from tilting forward excessively.
Positioning the Chest Strap: Data-Driven Guidelines
The chest strap should typically be positioned around the mid-chest area, approximately 6 inches below the collarbone. Studies on fall arrest dynamics have shown that this placement optimizes body posture and stability during a fall. The chest strap on the fall protection harness prevents you from tipping forward.
Placing the chest strap too high can restrict breathing and cause discomfort. Placing it too low may not provide adequate support, increasing the risk of tilting forward during a fall.
Verifying Proper Tension for Controlled Descent
Verify that the chest strap is tight enough to prevent excessive forward tilting during a fall. You should be able to slide a flat hand between the strap and your chest.
If the strap is too loose, the wearer may tilt forward excessively during a fall, increasing the risk of head or neck injury. If the strap is too tight, it can restrict breathing and cause discomfort. The goal is a snug fit that provides adequate support without compromising comfort or breathing. You need to get the harness sizing correct.
Step 6: Back D-Ring Placement – Centering Fall Arrest Forces
The back D-ring is the primary attachment point for the fall arrest system. Its proper placement is crucial for distributing forces evenly during a fall.
Confirming Proper D-Ring Position Based on Torso Length
Locate the D-ring and confirm that it sits squarely between the shoulder blades. The ideal D-ring position is dependent on torso length.
For individuals with shorter torsos, the D-ring may need to be positioned slightly lower to ensure proper force distribution. For those with longer torsos, the D-ring may need to be positioned slightly higher. The key is to ensure that the D-ring is centered between the shoulder blades, regardless of torso length.
Impact of D-Ring Position on Fall Arrest Dynamics
The D-ring position significantly affects the distribution of forces during a fall. A properly positioned D-ring ensures that the forces are distributed evenly across the body, minimizing the risk of injury.
A D-ring that is too high or too low can create uneven force distribution, increasing the risk of spinal cord injury or other trauma. Ensure that the D-ring is centered and securely attached to the harness.
Step 7: Suspension Trauma Prevention – Data on Mitigation Strategies
Suspension trauma, also known as orthostatic intolerance, is a potentially life-threatening condition that can occur when a worker is suspended in a harness for an extended period after a fall. Prevention is key.
Understanding the Risks of Prolonged Suspension
Prolonged suspension in a harness can restrict blood flow to the legs, leading to pooling of blood in the lower extremities. This can cause a drop in blood pressure, leading to fainting and potentially death.
Studies have shown that suspension trauma can develop within minutes, particularly in individuals with pre-existing medical conditions. Factors such as dehydration, fatigue, and temperature can also contribute to the severity of suspension trauma. It’s critical to understand these risks when choosing a fall arrest system.
Integrating Suspension Trauma Straps: A Practical Guide
Suspension trauma straps are designed to alleviate pressure on the legs and improve circulation during prolonged suspension. These straps typically consist of loops or webbing that the worker can deploy and stand on, reducing the amount of pressure exerted by the harness on the legs.
To properly utilize suspension trauma straps, follow these steps:
1. After a fall, locate the suspension trauma straps attached to your harness.
2. Deploy the straps by unclipping or unzipping them.
3. Place your feet in the loops or on the webbing, distributing your weight evenly.
4. Adjust the straps as needed to maintain a comfortable and secure position.
Regularly practicing the deployment and use of suspension trauma straps is crucial for ensuring that workers can quickly and effectively mitigate the risk of suspension trauma in the event of a fall.
Step 8: Final Fit Check – A Comprehensive Checklist
A final fit check is essential to ensure that the fall protection harness is properly adjusted and compatible with other PPE items.
Dynamic Movement Test: Assessing Harness Stability During Movement
Perform a series of movements to evaluate harness stability. This includes reaching overhead, bending over, twisting your torso, and climbing a short ladder or stairs.
During these movements, observe the harness for any signs of slippage, binding, or discomfort. If you notice any issues, readjust the straps as needed to achieve a more secure and comfortable fit. The goal is to ensure that the harness remains stable and does not restrict your movement during normal work activities. The safety harness fitting is key.
Confirming Compatibility with Other PPE: Data on Integration
Ensure that the harness is compatible with other PPE items, such as hard hats, safety glasses, and respirators. Check that the harness straps do not interfere with the fit or function of these items.
Studies have shown that incompatible PPE can reduce the effectiveness of individual items and increase the risk of injury. For example, a loose-fitting hard hat can be dislodged by a harness strap during a fall, leaving the worker unprotected. We once worked with a client whose workers had issues with their safety glasses fogging up due to the harness straps. By adjusting the straps and choosing glasses with better ventilation, we were able to solve the problem.
Conclusion: Mastering Harness Fitting for Uncompromising Safety
By following this step-by-step harness fitting guide, you can ensure that your fall protection harness provides optimal safety and protection. Remember to inspect your harness before each use, take accurate body measurements, and adjust the straps for a snug and comfortable fit. Regular training and practice are also essential for maintaining proficiency in harness fitting and usage. Prioritizing work at height safety is crucial.
Recap of Achievement
You’ve now successfully fitted your fall protection harness, ensuring optimal safety and compliance! Correct fitting will not only keep you safe but will help comply with necessary regulations.
FAQ Section
Q: How often should I inspect my fall protection harness?
A: You should inspect your harness before each use and at least annually by a competent person. More frequent inspections may be necessary in harsh environments or after exposure to chemicals or other damaging substances.
Q: What should I do if my harness is damaged?
A: If your harness is damaged, immediately remove it from service and replace it with a new one. Do not attempt to repair a damaged harness, as this can compromise its integrity and effectiveness.
Q: How do I clean my fall protection harness?
A: Clean your harness with mild soap and water. Avoid using harsh detergents, solvents, or bleach, as these can damage the webbing and other components. Allow the harness to air dry completely before storing it. Following the harness maintenance instructions is vital.
Q: What are the OSHA requirements for fall protection harnesses?
A: OSHA requires that all fall protection harnesses meet specific performance standards and be used in accordance with manufacturer’s instructions. Employers are responsible for providing appropriate training and ensuring that workers use harnesses correctly. Make sure to follow all OSHA harness requirements.
Q: Can I use a harness that is too large or too small?
A: No, using a harness that is not the correct size can compromise its effectiveness and increase the risk of injury. Always select a harness that fits properly and adjust the straps for a snug and comfortable fit. Using the harness fitting guide will assist in this process.
Q: What is suspension trauma, and how can I prevent it?
A: Suspension trauma is a potentially life-threatening condition that can occur when a worker is suspended in a harness for an extended period after a fall. To prevent suspension trauma, use suspension trauma straps, maintain good circulation in your legs, and be rescued as quickly as possible.