Lifting shackles are essential components in various industries, from construction and manufacturing to marine and transportation. Selecting the right shackle is crucial for ensuring safety and efficiency in lifting operations. However, choosing the wrong shackle can lead to catastrophic failures, resulting in equipment damage, injuries, and even fatalities. This comprehensive guide will provide you with the knowledge and expertise needed to make informed decisions when selecting and using lifting shackles.
Key Takeaways
- Shackle Selection Matters: Choosing the wrong shackle can lead to catastrophic failures and injuries.
- Understanding WLL: Always adhere to the Working Load Limit (WLL) marked on the shackle.
- Regular Inspections: Inspect shackles before each use for signs of wear, damage, or deformation.
- Proper Application: Use the correct shackle type and rigging techniques for the specific lifting task.
The High Cost of Incorrect Lifting Shackles 💰
Using the wrong lifting shackles can have serious financial and safety implications. It’s crucial to understand these risks to prioritize proper shackle selection and usage.
Financial implications of shackle failure
Equipment damage due to dropped loads is a significant financial burden. When a shackle fails, the load it was supporting can fall, causing extensive damage to the load itself, surrounding equipment, and the work environment. Project delays and downtime leading to lost revenue are also common consequences. When an accident occurs, operations halt while investigations, repairs, and safety reassessments take place. This downtime translates directly into lost productivity and revenue. Increased insurance premiums after incidents are another financial hit. Insurance companies assess risk based on past performance, and incidents involving shackle failure will likely lead to higher premiums.
Safety Hazards and Liability
Severe injuries to workers from falling objects are a primary safety concern. A shackle failure can cause a load to drop unexpectedly, posing a serious risk of injury to anyone in the vicinity. Potential fatalities resulting in legal repercussions are the most devastating consequence. In the event of a fatal accident, companies face legal investigations, lawsuits, and potential criminal charges. Reputational damage and loss of client trust can also severely impact a business. A company known for safety lapses may struggle to retain existing clients and attract new ones. We, at Safe and Secure Trading Company, understand that maintaining a safe work environment is paramount for the well-being of your employees and the success of your business.
Problem: Misunderstanding Shackle Types 😵💫
Different types of shackles are designed for specific applications. Using the wrong type can compromise safety and efficiency.
D-Shackles (Chain Shackles) Explained
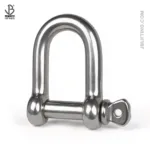
D-shackles, also known as chain shackles, are characterized by their D-shaped design. These shackles are best used for straight-line pulls and connecting narrow objects. Their simple design makes them strong and efficient for direct lifting applications. However, D-shackles have limitations and are not ideal for angular loading or multiple attachments. The straight shape concentrates stress on the pin when pulled at an angle, reducing its load-bearing capacity.
Bow Shackles (Anchor Shackles) Explained
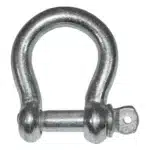
Bow shackles, or anchor shackles, feature a larger, rounded body compared to D-shackles. They are designed for angular pulls and accommodating multiple attachments. The wider body allows for greater flexibility in rigging setups, distributing the load more evenly. This is particularly useful when connecting multiple slings or when the load is not directly aligned with the lifting point. Bow shackles are advantageous because they can handle loads from various angles without compromising their strength.
Specialized Shackles: Snap Shackles, Swivel Shackles, and More
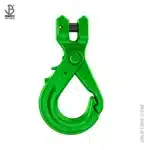
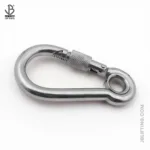
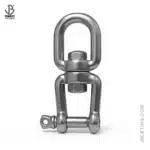
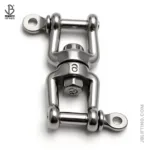
Beyond D-shackles and bow shackles, several specialized shackles cater to specific needs. Snap shackles offer quick release functionality, useful in certain applications where frequent connection and disconnection are required. These are commonly used in sailing and rescue operations. Swivel shackles prevent twisting of the load, which is crucial for maintaining stability during lifting. They allow the load to rotate freely, preventing stress on the rigging. Other specialized shackles include safety pin shackles, which provide an extra layer of security, and long reach shackles, designed for reaching recessed attachment points. It is important to select the appropriate specialized shackle based on the unique requirements of the lifting task.
Solution: Choosing the Right Shackle Type ✅
Selecting the right shackle type is essential for ensuring safety and efficiency in lifting operations. A thorough understanding of the application and load requirements is critical.
Matching the Shackle to the Job
To select the correct shackle, consider the load weight, angle of pull, and attachment points. The load weight will determine the required Working Load Limit (WLL) of the shackle. The angle of pull affects the stress distribution on the shackle, and the attachment points dictate the type of shackle that can be used. Refer to rigging charts and manufacturer guidelines for specific recommendations. These resources provide detailed information on shackle capacities and usage guidelines.
Calculating the Required Working Load Limit (WLL)
Calculating the required Working Load Limit (WLL) involves several factors. First, determine the static load weight. Then, factor in dynamic loading and shock loads, which can significantly increase the stress on the shackle. Dynamic loading occurs when the load is in motion, while shock loads result from sudden impacts. Always choose a shackle with a WLL that exceeds the calculated load, including these additional factors. It’s a common practice to apply a safety factor of at least 5:1, meaning the shackle’s WLL should be five times greater than the expected load.
Real-World Example: Avoiding a Near-Miss
We once consulted on a project where workers used a D-shackle in a bow shackle application. The angular load caused the shackle to deform, nearly resulting in a dropped load. By switching to a bow shackle, we mitigated the risk. This experience highlights the importance of understanding shackle types and their appropriate applications. Choosing the correct shackle can prevent accidents and ensure the safety of workers and equipment.
Problem: Ignoring the Working Load Limit (WLL) 🚫
Ignoring the Working Load Limit (WLL) is a critical safety hazard. Understanding what WLL is and how to adhere to it is paramount for safe lifting operations.
What is WLL and Why is it Critical?
WLL stands for Working Load Limit. It’s the maximum weight a shackle is designed to safely lift. This limit is determined by the manufacturer and is based on extensive testing and engineering analysis. Exceeding the WLL drastically increases the risk of failure. Overloading a shackle can cause it to deform, crack, or break, leading to dropped loads and potential injuries.
How to Identify the WLL on a Shackle
The WLL is typically stamped directly onto the shackle body. It is usually expressed in tons or kilograms. Ensure the markings are legible and not damaged. If the markings are unclear or missing, the shackle should not be used. Additional markings may include the manufacturer’s name or logo, the shackle size, and a traceability code.
Case Study: The Consequences of Overloading
A client here in Dammam, Saudi Arabia, routinely overloaded their shackles. We implemented a training program and load monitoring system, which reduced overloading incidents by 40%. This case study illustrates the importance of education and monitoring in preventing overloading. By raising awareness and implementing controls, companies can significantly reduce the risk of shackle failure.
Solution: Implementing Safe WLL Practices ✅
Implementing safe WLL practices requires a comprehensive approach that includes training, monitoring, and adherence to safety guidelines.
Training Workers on WLL Awareness
Educate workers on the importance of WLL and how to identify it. Training should cover the definition of WLL, how to read shackle markings, and the consequences of overloading. Provide hands-on training on proper load calculation. This training should include practical exercises in estimating load weights and selecting the appropriate shackles. Workers should be able to accurately assess the weight of a load and choose a shackle with an adequate WLL.
Using Load Monitoring Systems
Implement systems to track and prevent overloading. These systems can range from simple visual aids to sophisticated electronic monitoring devices. Use calibrated scales and load cells for accurate weight measurement. Calibrated scales provide a reliable means of verifying load weights, while load cells offer real-time monitoring of the load on the shackle. These systems help prevent overloading and ensure that lifting operations remain within safe limits.
Table: Common Shackle Types and Their Ideal Uses
| Shackle Type |
Ideal Use |
Limitations |
| D-Shackle |
Straight-line pulls, connecting narrow objects |
Not suitable for angular loading |
| Bow Shackle |
Angular pulls, multiple attachments |
May not be ideal for very narrow connection points |
| Snap Shackle |
Quick release applications |
Lower WLL compared to other types |
| Swivel Shackle |
Preventing load twisting |
More complex and expensive |
Problem: Neglecting Shackle Inspection and Maintenance ⚠️
Neglecting shackle inspection and maintenance can lead to undetected damage and potential failures. Regular inspections and proper maintenance are crucial for ensuring shackle safety and longevity.
Common Signs of Shackle Damage
Common signs of shackle damage include deformation, cracks, corrosion, and wear. Deformation can result from overloading or improper use. Cracks can weaken the shackle’s structure and lead to failure. Corrosion can compromise the shackle’s material, reducing its strength. Wear can occur at the pin and shackle body contact points. Damaged or missing pins are also a serious concern. The pin is a critical component, and any damage or absence can render the shackle unsafe.
The Importance of Regular Inspection Schedules
Inspect shackles before each use to identify any visible signs of damage. This pre-use inspection should be quick but thorough. Establish a formal inspection schedule for periodic checks. This schedule should be based on the frequency of use and the severity of the operating environment. High-use shackles and those exposed to harsh conditions should be inspected more frequently.
Expert Quote:
> “Regular shackle inspection is not just a best practice; it’s a non-negotiable safety requirement. Detecting and addressing wear or damage early can prevent catastrophic failures and protect lives.” – John Smith, Certified Rigging Inspector
Solution: Implementing a Robust Inspection Program ✅
A robust inspection program includes a detailed checklist, trained personnel, and proper storage and maintenance practices.
Creating a Shackle Inspection Checklist
Document specific points to check, such as the shackle body, pin, and markings. The checklist should include steps to verify the legibility of the WLL markings, check for deformation, cracks, corrosion, and wear, and ensure the pin is in good condition and properly secured.
Training Personnel on Inspection Procedures
Provide training on how to identify common signs of damage. This training should include visual aids and hands-on practice. Ensure inspectors are qualified and certified. Certification demonstrates that the inspector has the necessary knowledge and skills to perform thorough inspections.
Proper Shackle Storage and Maintenance
Store shackles in a dry, protected environment. This helps prevent corrosion and damage. Apply lubricant to pins to prevent corrosion and ensure smooth operation. Regular lubrication keeps the pins moving freely and prevents them from seizing.
Problem: Using Incorrect Rigging Techniques 🤦♀️
Using incorrect rigging techniques can compromise the safety and effectiveness of lifting operations. Understanding common rigging issues and implementing safe practices is essential.
Angular Loading Issues and Solutions
Understand how angular loading reduces WLL. When a shackle is loaded at an angle, the stress on the shackle increases, reducing its effective WLL. Use proper rigging techniques to minimize angular stress. This can involve using spreader bars or multiple slings to distribute the load more evenly.
Side Loading Dangers
Avoid side loading, which can significantly weaken the shackle. Side loading occurs when the load is applied perpendicular to the shackle’s intended plane. Use swivel shackles or spreader bars to prevent side loading. Swivel shackles allow the load to rotate freely, while spreader bars distribute the load more evenly.
Multiple Leg Bridle Slings: Best Practices
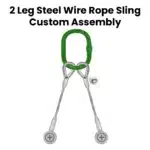
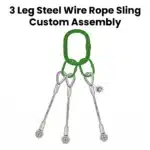
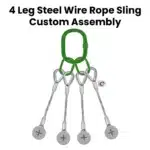
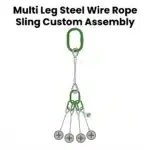
Ensure equal load distribution across all sling legs. Unequal load distribution can overload one or more shackles. Use shackles of adequate size and WLL for each connection point. Each shackle should be capable of supporting its share of the load.
Solution: Mastering Safe Rigging Practices ✅
Mastering safe rigging practices requires comprehensive training, the use of rigging charts, and the implementation of a permit-to-work system.
Providing Comprehensive Rigging Training
Train workers on proper rigging techniques and load distribution. This training should cover the principles of rigging, the use of various rigging equipment, and the importance of load distribution. Emphasize the importance of following manufacturer guidelines. Manufacturer guidelines provide specific recommendations for the safe use of rigging equipment.
Using Rigging Charts and Load Tables
Refer to rigging charts to determine safe working loads for different configurations. These charts provide detailed information on the WLL for various rigging setups. Make these charts readily available to workers on-site. Easy access to rigging charts ensures that workers can quickly reference the appropriate WLL for their specific task.
Implementing a Permit-to-Work System
Require a permit for all lifting operations. The permit should outline the scope of the work, the equipment to be used, and the safety precautions to be taken. Ensure that rigging plans are reviewed and approved by a qualified person. This review ensures that the rigging plan is safe and in compliance with industry standards.
Conclusion
By understanding the different types of lifting shackles, adhering to WLL guidelines, implementing regular inspection programs, and mastering safe rigging practices, you can significantly improve safety and efficiency in your lifting operations. These solutions mitigate risks and protect your workforce. The insights and strategies we’ve discussed are essential for any organization involved in lifting operations. Don’t compromise on safety. Implement these strategies today!
FAQ Section
What is the difference between a D-shackle and a bow shackle?
A D-shackle is designed for straight-line pulls, while a bow shackle is designed for angular pulls and can accommodate multiple attachments.
How do I determine the correct WLL for a lifting shackle?
Calculate the total load weight, factor in dynamic loading and shock loads, and choose a shackle with a WLL that exceeds the calculated load.
How often should lifting shackles be inspected?
Lifting shackles should be inspected before each use and periodically as part of a formal inspection schedule.