Fall Arrester Check: A Step-by-Step Guide
Understanding the Critical Role of Fall Arrester Inspection
The High Stakes: Why Inspection is Non-Negotiable
Fall arrester inspection is not merely a procedural formality; it’s a critical component of workplace safety, particularly in industries where employees work at height. The consequences of neglecting these inspections can be catastrophic, ranging from severe injuries to fatalities. Fall arresters are designed to protect workers in the event of a fall, but their effectiveness hinges on their proper condition and functionality. A damaged or improperly maintained fall arrester can fail to deploy correctly or may even break under the force of a fall, rendering it useless.
Therefore, regular and thorough fall arrester inspection is essential for identifying potential issues before they escalate into dangerous situations. These inspections help detect wear and tear, corrosion, and other forms of damage that can compromise the integrity of the equipment. By addressing these issues proactively, companies can significantly reduce the risk of accidents and ensure the safety of their workforce. The importance of fall arrester inspection cannot be overstated; it’s a fundamental aspect of responsible workplace safety management.
Preventing Accidents: The Primary Goal of Inspection
The primary goal of fall arrester inspection is to prevent accidents by ensuring that the equipment is in optimal working condition. Regular inspections allow for the early detection of any defects or damage that could compromise the device’s performance during a fall. By identifying and addressing these issues promptly, companies can prevent equipment failure and protect workers from potential injuries.
Moreover, inspections serve as a proactive measure to maintain a safe working environment. They demonstrate a commitment to employee safety and help foster a culture of awareness and responsibility. When workers know that their equipment is regularly inspected and maintained, they feel more secure and confident in their ability to perform their tasks safely. This proactive approach not only reduces the risk of accidents but also enhances overall workplace morale and productivity.
Legal and Ethical Obligations: Meeting Safety Standards
Beyond the immediate goal of preventing accidents, fall arrester inspection is also a legal and ethical obligation for employers. Regulatory bodies like OSHA (Occupational Safety and Health Administration) have established specific standards and guidelines for fall protection, including requirements for regular equipment inspection. Compliance with these regulations is not only a legal necessity but also a moral imperative.
Failure to comply with safety standards can result in significant fines, penalties, and legal liabilities. More importantly, it can lead to preventable injuries and fatalities. Employers have a responsibility to provide a safe working environment for their employees, and this includes ensuring that all fall protection equipment is properly inspected, maintained, and used. By prioritizing fall arrester inspection, companies demonstrate their commitment to ethical and responsible business practices, safeguarding their workers and upholding their legal obligations.
Common Problems Arising from Neglecting Inspections
Equipment Failure: The Risk of Unchecked Wear and Tear
Neglecting fall arrester inspection can lead to equipment failure, posing a significant risk to workers who rely on this equipment for their safety. Over time, fall arresters are subjected to wear and tear from regular use, exposure to the elements, and potential mishandling. Without regular inspections, these issues can go unnoticed, gradually weakening the equipment and increasing the likelihood of failure during a fall.
For instance, a self-retracting lifeline (SRL) may experience fraying of the cable or webbing, corrosion of metal components, or damage to the internal mechanisms. These types of degradation can significantly reduce the strength and functionality of the SRL, making it unable to withstand the forces generated during a fall. Regular inspections are crucial for identifying these problems early on, allowing for timely repairs or replacement of the equipment before it fails. Our team in Dubai has encountered numerous instances where routine checks caught critical wear, averting potential disasters.
Compliance Issues: Avoiding Fines and Penalties
Failure to conduct regular fall arrester inspection can result in serious compliance issues, leading to fines, penalties, and other legal repercussions. OSHA and other regulatory agencies have specific requirements for fall protection, including the inspection and maintenance of fall arrest equipment. Companies that fail to comply with these requirements can face substantial financial penalties and may even be subject to legal action.
Moreover, non-compliance can damage a company’s reputation and erode trust with employees and customers. A strong safety record is essential for maintaining a positive image and attracting new business. By prioritizing fall arrester inspection and adhering to safety regulations, companies can avoid costly penalties and demonstrate their commitment to a safe and responsible workplace.
Decreased Worker Morale: The Impact of Unsafe Equipment
The neglect of fall arrester inspection can have a detrimental impact on worker morale. When employees perceive that their safety equipment is not being properly maintained, it can lead to feelings of anxiety, distrust, and decreased job satisfaction. Workers who are constantly worried about the reliability of their fall protection equipment are less likely to be productive and may even be reluctant to perform their tasks.
A safe working environment is essential for maintaining high levels of employee morale. When workers feel safe and secure, they are more likely to be engaged, motivated, and committed to their jobs. By prioritizing fall arrester inspection and ensuring that equipment is in optimal condition, companies can create a positive and supportive work environment that fosters trust, confidence, and productivity. We once had a client whose team’s productivity dipped noticeably due to outdated equipment. Regular inspections restored their confidence and output.
Increased Liability: The Potential for Costly Lawsuits
Neglecting fall arrester inspection can significantly increase a company’s liability in the event of an accident. If a worker is injured or killed due to faulty fall protection equipment, the company may be held liable for damages, including medical expenses, lost wages, and legal fees. The costs associated with these lawsuits can be substantial, potentially jeopardizing the company’s financial stability.
Moreover, the negative publicity surrounding a workplace accident can damage a company’s reputation and make it difficult to attract new customers and employees. A proactive approach to fall arrester inspection can help mitigate these risks by ensuring that equipment is in safe working condition and that all necessary precautions have been taken to prevent accidents. By prioritizing safety and adhering to industry best practices, companies can minimize their liability and protect their financial interests.
Prerequisites for a Thorough Inspection
Gathering the Right Tools: Inspection Checklist, Gloves, Lighting
Before commencing a fall arrester inspection, it is essential to gather the necessary tools and equipment. These tools ensure a comprehensive and accurate assessment of the fall arrester’s condition. Here’s a list of essential items:
- Inspection Checklist: A detailed checklist is crucial for systematically evaluating each component of the fall arrester. This ensures that no critical areas are overlooked.
- Gloves: Wearing gloves protects your hands from dirt, grease, and potential contaminants that may be present on the equipment.
- Lighting: Adequate lighting is necessary to clearly see all parts of the fall arrester, especially in dimly lit areas. A flashlight or work light can be invaluable.
- Measuring Tools: A ruler or measuring tape might be needed to check the length of lanyards or the diameter of ropes for compliance with manufacturer specifications.
- Cleaning Supplies: A clean cloth or brush can help remove dirt and debris, allowing for a better visual inspection.
Having these tools readily available streamlines the inspection process and ensures a thorough evaluation.
Reviewing Manufacturer Guidelines: Understanding Specific Requirements
Each fall arrester model may have specific inspection requirements and recommendations provided by the manufacturer. Reviewing these guidelines is crucial for understanding the unique characteristics and potential issues associated with the particular equipment being inspected.
These guidelines typically include:
- Inspection Frequency: Manufacturers often specify how often the equipment should be inspected, based on usage and environmental conditions.
- Specific Inspection Points: The guidelines highlight critical areas that require special attention during inspection, such as specific components or mechanisms.
- Acceptable Wear Limits: Manufacturers define the acceptable limits of wear and tear for various parts of the fall arrester.
- Maintenance Procedures: The guidelines may provide instructions for cleaning, lubricating, or performing other maintenance tasks.
Failing to follow the manufacturer’s guidelines can lead to inaccurate inspections and potential safety hazards. Always consult the manufacturer’s documentation before beginning the inspection process.
Establishing a Dedicated Inspection Area: Ensuring a Clean Environment
Setting up a dedicated inspection area is essential for ensuring a clean and organized environment where fall arrester inspections can be conducted effectively. This area should be:
- Well-Lit: Adequate lighting is crucial for visual inspection of the equipment.
- Clean and Dry: A clean and dry surface prevents contamination and allows for a clear view of the equipment.
- Spacious: Sufficient space is needed to lay out the fall arrester components and move around freely during the inspection.
- Free from Obstructions: The area should be free from clutter and obstructions that could impede the inspection process.
By establishing a dedicated inspection area, companies can create a standardized and efficient process for evaluating fall arresters, minimizing the risk of errors and ensuring thoroughness.
Qualified Personnel: Who Should Conduct the Inspection?
The responsibility of conducting fall arrester inspections should be assigned to qualified personnel who have the necessary knowledge, training, and experience to perform the task accurately and effectively. Qualified personnel typically include:
- Trained Inspectors: Individuals who have completed formal training programs on fall protection equipment inspection and maintenance.
- Competent Persons: Employees who have demonstrated the ability to identify hazards and implement corrective actions related to fall protection.
- Authorized Personnel: Individuals who have been authorized by the employer to conduct fall arrester inspections based on their qualifications and experience.
These personnel should possess a thorough understanding of fall protection principles, equipment specifications, and inspection procedures. They should also be able to recognize potential defects, assess the severity of damage, and determine whether the equipment is safe for use. Proper training and qualification of inspection personnel are essential for ensuring the integrity of the inspection process and the safety of workers.
Step-by-Step Fall Arrester Inspection Process
Step 1: Visual Inspection of the Housing
The first step in a fall arrester inspection is a thorough visual examination of the housing. This involves checking for any signs of damage, wear, or corrosion that could compromise the integrity of the device.
- Cracks or Dents: Look for any cracks, dents, or other signs of impact damage on the housing. These can indicate that the fall arrester has been subjected to excessive force and may be weakened.
- Corrosion: Check for any signs of corrosion, especially around seams, joints, and other vulnerable areas. Corrosion can weaken the metal components of the housing and lead to failure.
- Deformation: Inspect the housing for any signs of deformation or distortion. This can indicate that the fall arrester has been subjected to excessive stress and may not function properly.
- Loose or Missing Parts: Ensure that all screws, bolts, and other fasteners are securely in place. Replace any missing or loose parts immediately.
A detailed visual inspection of the housing can reveal potential problems that may not be immediately apparent, helping to identify equipment that requires further evaluation or replacement.
Step 2: Checking the Lifeline for Damage
The lifeline is a critical component of the fall arrester, and its condition is paramount to the device’s overall safety. This step involves a meticulous examination of the lifeline for any signs of damage, wear, or degradation.
- Fraying or Abrasion: Check the lifeline for any signs of fraying, abrasion, or excessive wear. These can weaken the lifeline and increase the risk of breakage during a fall.
- Cuts or Tears: Inspect the lifeline for any cuts, tears, or other damage that could compromise its strength. Even small cuts can significantly reduce the lifeline’s ability to withstand the forces generated during a fall.
- Corrosion: Check for any signs of corrosion on metal lifelines. Corrosion can weaken the metal and lead to failure.
- Kinks or Knots: Inspect the lifeline for any kinks, knots, or other irregularities that could affect its performance. These can create weak points in the lifeline and increase the risk of breakage.
- Contamination: Check for any contamination from chemicals, dirt, or other substances that could degrade the lifeline material.
If any damage is detected, the fall arrester should be immediately removed from service and replaced.
Step 3: Inspecting the Locking Mechanism
The locking mechanism is a vital component of the fall arrester, responsible for engaging and arresting a fall. This step involves checking the locking mechanism for proper function and ensuring that it engages smoothly and reliably.
- Engagement: Test the locking mechanism by simulating a fall. The mechanism should engage quickly and securely, preventing the lifeline from extending further.
- Release: Ensure that the locking mechanism releases smoothly and easily when the tension on the lifeline is released.
- Corrosion or Obstructions: Check for any signs of corrosion, dirt, or other obstructions that could impede the locking mechanism’s function.
- Damage: Inspect the locking mechanism for any signs of damage, such as cracks, dents, or broken parts.
If the locking mechanism does not function properly, the fall arrester should be removed from service and repaired or replaced.
Step 4: Verifying the Energy Absorber
The energy absorber is designed to dissipate the force generated during a fall, reducing the impact on the worker. This step involves inspecting the energy absorber for any signs of damage or deployment.
- Deployment: Check the energy absorber to ensure that it has not been deployed. A deployed energy absorber indicates that the fall arrester has been subjected to a fall and should be replaced.
- Damage: Inspect the energy absorber for any signs of damage, such as tears, cuts, or punctures. These can compromise its ability to absorb energy during a fall.
- Contamination: Check for any contamination from chemicals, dirt, or other substances that could degrade the energy absorber material.
If the energy absorber is damaged or deployed, the fall arrester should be removed from service and replaced.
Step 5: Testing the Retraction and Extension
For self-retracting lifelines (SRLs), it’s important to test the retraction and extension mechanism to ensure smooth and reliable operation. This step involves checking the lifeline’s ability to retract and extend freely without any binding or hesitation.
- Smooth Retraction: Extend the lifeline fully and then allow it to retract slowly. The lifeline should retract smoothly and evenly, without any jerking or binding.
- Full Extension: Extend the lifeline fully and ensure that it reaches its maximum length without any difficulty.
- Locking During Extension: Slowly extend the lifeline, then quickly tug on it. The locking mechanism should engage, preventing further extension.
- Audible Clicks: Listen for any unusual noises, such as grinding or clicking, during retraction and extension. These noises can indicate internal damage or wear.
If the lifeline does not retract or extend smoothly, or if the locking mechanism does not engage properly, the SRL should be removed from service and repaired or replaced.
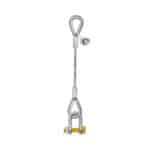
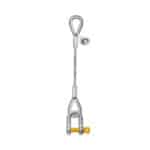
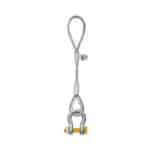
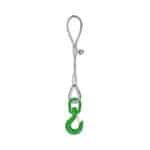
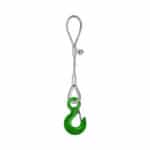
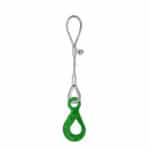
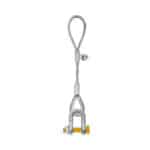
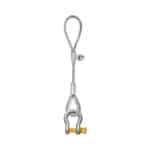
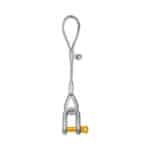
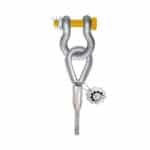
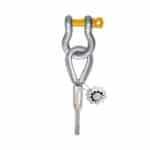
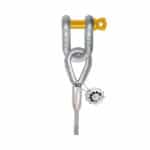
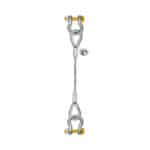
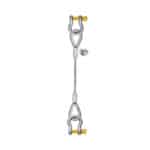
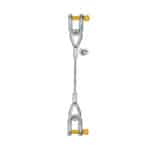
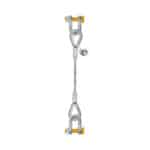
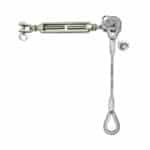
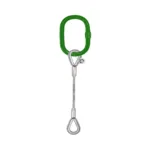
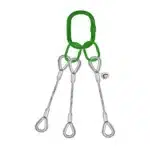
Step 6: Examining the Attachment Points (Карабины, Крюки)
The attachment points, such as carabiners and hooks, are crucial for connecting the fall arrester to the harness and the anchorage point. This step involves inspecting these attachment points for any signs of damage, wear, or corrosion.
- Gate Function: Ensure that the gate on the carabiner or hook opens and closes smoothly and securely. The gate should spring back into the closed position automatically.
- Locking Mechanism: If the carabiner or hook has a locking mechanism, ensure that it engages and disengages properly.
- Cracks or Bends: Inspect the carabiner or hook for any cracks, bends, or other signs of damage.
- Corrosion: Check for any signs of corrosion, especially around the gate and locking mechanism.
- Sharp Edges: Ensure that there are no sharp edges or burrs that could damage the lifeline or harness.
Any damaged or malfunctioning attachment points should be replaced immediately.
Step 7: Reviewing the Impact Indicator (if equipped)
Some fall arresters are equipped with an impact indicator, which provides a visual indication that the device has been subjected to a fall. This step involves checking the impact indicator to determine if it has been activated.
- Activation: Check the impact indicator to see if it has been activated. The indicator may be a tear-away label, a colored thread, or another type of visual signal.
- Clear Indication: Ensure that the impact indicator provides a clear and unambiguous indication of whether or not the device has been subjected to a fall.
- Tampering: Check for any signs of tampering or manipulation of the impact indicator.
If the impact indicator has been activated, the fall arrester should be removed from service and replaced.
Documenting Your Inspection: Maintaining a Detailed Record
Using an Inspection Checklist: Ensuring Consistency
An inspection checklist is an indispensable tool for maintaining consistency and thoroughness in fall arrester inspections. It provides a standardized format for documenting the inspection process and ensures that all critical components are evaluated systematically.
- Comprehensive Coverage: The checklist should cover all essential aspects of the fall arrester, including the housing, lifeline, locking mechanism, energy absorber, attachment points, and impact indicator (if equipped).
- Clear Criteria: The checklist should define clear criteria for evaluating each component, such as acceptable wear limits, signs of damage, and proper function.
- Standardized Format: The checklist should use a standardized format, such as checkboxes, rating scales, or open-ended questions, to facilitate consistent and accurate documentation.
- Easy to Use: The checklist should be easy to use and understand, even for personnel with limited training.
By using an inspection checklist, companies can ensure that all fall arrester inspections are conducted consistently and thoroughly, minimizing the risk of overlooking potential problems.
Here is an example of what an inspection checklist might look like in HTML:
| Component |
Inspection Criteria |
Pass |
Fail |
Comments |
| Housing |
Cracks, dents, corrosion |
|
|
|
| Lifeline |
Fraying, cuts, abrasion |
|
|
|
| Locking Mechanism |
Proper engagement and release |
|
|
|
| Energy Absorber |
Deployment, damage |
|
|
|
| Attachment Points |
Gate function, locking mechanism, cracks |
|
|
|
| Impact Indicator |
Activation status |
|
|
|
Recording Findings and Actions Taken: Creating an Audit Trail
In addition to using an inspection checklist, it is essential to record all findings and actions taken during the inspection process. This creates an audit trail that documents the history of the fall arrester and provides valuable information for future inspections.
- Detailed Notes: Record any defects, damage, or other issues identified during the inspection.
- Corrective Actions: Document any corrective actions taken, such as repairs, replacements, or adjustments.
- Date and Time: Record the date and time of the inspection.
- Inspector’s Name: Identify the person who conducted the inspection.
- Equipment Identification: Include the serial number or other identifying information for the fall arrester.
Maintaining a detailed record of all inspections and actions taken helps to ensure accountability, track equipment performance, and identify potential trends or patterns.
Tagging and Removing Damaged Equipment: Preventing Reuse
When a fall arrester is found to be damaged or defective, it is crucial to tag it immediately and remove it from service to prevent accidental reuse.
- Tagging: Attach a highly visible tag to the fall arrester, clearly indicating that it is out of service and should not be used.
- Removal: Remove the fall arrester from the work area and store it in a secure location to prevent it from being accidentally put back into service.
- Disposal: Dispose of the damaged fall arrester properly, following the manufacturer’s recommendations and any applicable regulations.
By tagging and removing damaged equipment, companies can prevent accidents and ensure that workers are using only safe and reliable fall protection equipment.
Retaining Inspection Records: Meeting Legal Requirements
Retaining inspection records is not only a best practice but also a legal requirement in many jurisdictions. OSHA and other regulatory agencies require companies to maintain records of fall arrester inspections for a specified period.
- Retention Period: Determine the required retention period for inspection records in your jurisdiction.
- Secure Storage: Store inspection records in a secure location where they can be easily accessed when needed.
- Electronic Records: Consider using electronic record-keeping systems to streamline the storage and retrieval of inspection records.
Retaining inspection records demonstrates compliance with safety regulations and provides valuable documentation in the event of an accident or audit.
Troubleshooting Common Issues During Inspection
Problem 1: Lifeline Fraying or Cutting
Issue: The lifeline shows signs of fraying or has visible cuts.
Cause: Fraying and cuts can occur due to abrasion against rough surfaces, exposure to sharp objects, or general wear and tear over time.
Solution:
1. Assess the Severity: If the fraying is minor and superficial, carefully inspect the area. For any cuts, retire the device immediately.
2. Immediate Retirement: Remove the fall arrester from service immediately. Do not attempt to repair the lifeline.
3. Replacement: Replace the entire fall arrester with a new one. Lifelines cannot be repaired and must be replaced to ensure safety.
4. Prevention: To prevent future issues, ensure that workers are trained to avoid dragging the lifeline across abrasive surfaces and to protect it from sharp objects. Regularly clean the lifeline to remove dirt and debris that can accelerate wear.
Expert Quote:
“A compromised lifeline is like a ticking time bomb. Never gamble with a frayed or cut lifeline; replace it immediately.” – John Smith, Lead Safety Inspector
Problem 2: Locking Mechanism Malfunction
Issue: The locking mechanism does not engage properly or releases unexpectedly.
Cause: This can be due to dirt or debris obstructing the mechanism, corrosion, or damage to internal components.
Solution:
1. Cleaning: Try cleaning the locking mechanism with a brush and mild solvent to remove any dirt or debris.
2. Lubrication: Apply a small amount of lubricant to the moving parts of the locking mechanism to ensure smooth operation.
3. Testing: Test the locking mechanism thoroughly after cleaning and lubricating. Simulate a fall to ensure that it engages quickly and securely.
4. Professional Repair: If the locking mechanism still does not function properly after cleaning and lubricating, remove the fall arrester from service and send it to a qualified technician for repair. If repair isn’t feasible, replace the unit.
We once had a user who got stuck on this step. Here’s the trick to avoid that common issue: Always consult the manufacturer’s guidelines for approved lubricants and cleaning agents to avoid damaging the mechanism.
Problem 3: Damaged Housing
Issue: The housing of the fall arrester is cracked, dented, or shows signs of corrosion.
Cause: This can be due to impact damage, exposure to harsh chemicals or environmental conditions, or general wear and tear.
Solution:
1. Assessment: Carefully inspect the housing for any signs of damage. Small cracks or dents may seem minor but can compromise the structural integrity of the device.
2. Immediate Retirement: Remove the fall arrester from service immediately if there is any visible damage to the housing.
3. Replacement: Replace the entire fall arrester with a new one. The housing protects the internal components of the device, and any damage can affect its performance.
4. Prevention: To prevent future issues, protect the fall arrester from impact damage and exposure to harsh chemicals. Store the device in a dry, clean environment when not in use.
Implementing a Regular Inspection Schedule
Daily Pre-Use Inspections: Empowering Workers
Daily pre-use inspections are a critical component of any comprehensive fall protection program. These inspections empower workers to take responsibility for their own safety and ensure that their equipment is in good working condition before each use.
- Worker Responsibility: Train workers to conduct a quick visual inspection of their fall arresters before each use.
- Simple Checklist: Provide workers with a simple checklist to guide their inspections.
- Immediate Reporting: Encourage workers to report any problems or concerns immediately.
- No Use of Damaged Equipment: Emphasize that damaged equipment should never be used.
By empowering workers to conduct daily pre-use inspections, companies can create a culture of safety and reduce the risk of accidents.
Periodic Formal Inspections: Involving Qualified Personnel
In addition to daily pre-use inspections, companies should also conduct periodic formal inspections by qualified personnel. These inspections provide a more thorough and detailed evaluation of the fall arresters and help to identify any potential problems that may have been missed during the daily inspections.
- Qualified Inspectors: Use trained and qualified personnel to conduct the formal inspections.
- Detailed Inspection Checklist: Use a comprehensive inspection checklist to ensure that all critical components are evaluated.
- Documentation: Document the findings of the formal inspections, including any corrective actions taken.
- Scheduled Frequency: Establish a regular schedule for formal inspections, based on the manufacturer’s recommendations and the frequency of use of the fall arresters.
Periodic formal inspections provide an added layer of safety and help to ensure that fall arresters are maintained in optimal condition.
Post-Incident Inspections: Assessing Equipment After a Fall
After any fall incident, it is essential to conduct a thorough inspection of the fall protection equipment involved, including the fall arrester. This inspection helps to determine if the equipment functioned properly and if any damage occurred during the fall.
- Immediate Removal: Remove the fall arrester from service immediately after the incident.
- Detailed Inspection: Conduct a detailed inspection of the fall arrester, including all components.
- Documentation: Document the findings of the inspection, including any damage or malfunctions.
- Root Cause Analysis: Use the inspection findings to help determine the root cause of the fall and identify any corrective actions that need to be taken to prevent future incidents.
Post-incident inspections are crucial for understanding how fall protection equipment performs during a fall and for identifying any areas for improvement.
Best Practices for Maintaining Fall Arresters
Proper Storage: Protecting Equipment from the Elements
Proper storage of fall arresters is essential for protecting them from the elements and preventing damage.
- Clean and Dry Environment: Store fall arresters in a clean and dry environment, away from moisture, dust, and direct sunlight.
- Protective Containers: Use protective containers or bags to store fall arresters when they are not in use.
- Avoid Extreme Temperatures: Avoid storing fall arresters in extreme temperatures, which can damage the materials.
- Hang or Coil Properly: Hang or coil lifelines properly to prevent kinks and tangles.
Proper storage helps to extend the life of fall arresters and ensure that they are in good working condition when needed.
Regular Cleaning: Removing Dirt and Debris
Regular cleaning is essential for removing dirt, debris, and other contaminants that can damage fall arresters.
- Mild Soap and Water: Use mild soap and water to clean fall arresters.
- Soft Brush: Use a soft brush to remove dirt and debris from hard-to-reach areas.
- Rinse Thoroughly: Rinse fall arresters thoroughly with clean water to remove all traces of soap.
- Air Dry: Allow fall arresters to air dry completely before storing them.
Regular cleaning helps to prevent corrosion, abrasion, and other forms of damage.
Scheduled Servicing: Ensuring Optimal Performance
Scheduled servicing by qualified technicians is essential for ensuring the optimal performance of fall arresters.
- Manufacturer Recommendations: Follow the manufacturer’s recommendations for scheduled servicing.
- Qualified Technicians: Use qualified technicians to perform the servicing.
- Thorough Inspection: Ensure that the servicing includes a thorough inspection of all components.
- Lubrication and Adjustments: Ensure that the servicing includes lubrication of moving parts and adjustments as needed.
Scheduled servicing helps to identify and address any potential problems before they become serious, ensuring that fall arresters are in optimal working condition when needed.
Conclusion: Ensuring Worker Safety Through Diligent Inspection
Recap of Achievement: Protecting Lives and Preventing Accidents
In conclusion, a diligent and consistent fall arrester inspection program is paramount for ensuring worker safety and preventing accidents in workplaces where fall hazards exist. By following the step-by-step guide outlined in this article, companies can effectively identify potential issues with their fall protection equipment, take corrective actions, and maintain a safe working environment. Regular inspections, proper maintenance, and adherence to manufacturer guidelines are essential for maximizing the lifespan and effectiveness of fall arresters, ultimately protecting the lives of workers who depend on this equipment. We are committed to providing you with the knowledge and resources necessary to implement a robust fall protection program.
FAQ Section
Q: How often should fall arresters be inspected?
A: Fall arresters should undergo a daily pre-use inspection by the user and a formal inspection by a competent person at least every six months, or more frequently depending on the manufacturer’s recommendations and the severity of the working conditions.
Q: What qualifications should a person have to conduct a formal fall arrester inspection?
A: The person conducting the formal inspection should be a “competent person” as defined by OSHA, meaning they are capable of identifying existing and predictable hazards and have the authority to take prompt corrective measures to eliminate them. They should also have specific training and knowledge regarding fall protection equipment inspection and maintenance.
Q: What should I do if I find a defect during a fall arrester inspection?
A: If you find any defect during a fall arrester inspection, immediately remove the equipment from service. Tag it as “Out of Service” and do not allow it to be used until it has been properly repaired or replaced.
Q: Can I repair a damaged fall arrester myself?
A: No, fall arresters should only be repaired by qualified technicians who are authorized by the manufacturer. Attempting to repair a fall arrester yourself can be dangerous and may void the warranty.
Q: What is the lifespan of a fall arrester?
A: The lifespan of a fall arrester depends on several factors, including the frequency of use, the working conditions, and the manufacturer’s recommendations. Even if a fall arrester appears to be in good condition, it should be retired after a certain period, typically 5-10 years, as specified by the manufacturer.
Q: How should fall arresters be stored when not in use?
A: Fall arresters should be stored in a clean, dry, and cool environment, away from direct sunlight, heat, and chemicals. They should be hung or coiled properly to prevent kinks and tangles.
Q: What are the OSHA requirements for fall protection equipment inspection?
A: OSHA requires that fall protection equipment be inspected before each use and that a competent person conduct a formal inspection at least annually. The inspections must ensure that the equipment is free from damage, defects, and other conditions that could compromise its safety. 2026 OSHA provides detailed guidelines and standards for fall protection in various industries.