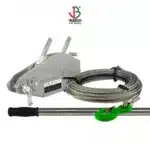
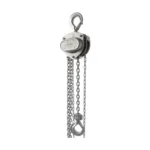
Lifting Chain Repair: A Complete Guide
Introduction to Lifting Chain Repair
The Importance of Proper Chain Maintenance
Lifting chains are indispensable tools in countless industries, from construction and manufacturing to shipping and logistics. These chains bear immense loads, and their integrity is paramount to the safety of workers and the efficiency of operations. Proper lifting equipment maintenance is not merely a matter of extending the lifespan of your equipment; it’s a critical safety measure that can prevent catastrophic accidents. Regular inspection, timely repair, and adherence to safety standards are the cornerstones of a reliable and safe lifting operation.
Ignoring chain maintenance can lead to unforeseen failures, resulting in significant downtime, property damage, and, most importantly, serious injuries or fatalities. Investing in a robust maintenance program, including proper lifting chain repair, is an investment in the safety and well-being of your workforce and the long-term success of your organization. We at Safe and Secure Trading Company (SSTC) have seen firsthand the devastating consequences of neglecting lifting chain maintenance, reinforcing our commitment to providing comprehensive guidance and support in this critical area.
Scope of This Guide: Focus and Limitations
This comprehensive guide aims to provide a detailed overview of lifting chain repair, covering everything from identifying damage to performing safe and effective repairs. We will delve into the relevant standards and regulations, explore various inspection techniques, and outline the step-by-step procedures for repairing minor damage and replacing chain links.
However, it’s crucial to understand the scope and limitations of this guide. While we strive to offer practical advice, this guide is not a substitute for professional training or certification. Lifting chain repair can be a complex and potentially hazardous task, and it should only be performed by qualified individuals with the necessary expertise and equipment. Furthermore, we will focus primarily on common types of chain damage and repair techniques. Complex or severe damage may require specialized repair procedures or complete chain replacement, which are beyond the scope of this guide. We also recognize the importance of chain sling repair and will touch on aspects relevant to this specific type of lifting equipment.
Safety First: Prerequisites for Any Repair Attempt
Before attempting any lifting chain repair, safety must be your top priority. Improper repair techniques or the use of inadequate tools can compromise the chain’s strength and lead to catastrophic failure under load. Therefore, it’s essential to take the following precautions:
- Qualified Personnel: Only trained and certified individuals should perform lifting chain repair.
- Personal Protective Equipment (PPE): Always wear appropriate PPE, including safety glasses, gloves, and steel-toed boots.
- Safe Work Area: Ensure a clean, well-lit, and well-ventilated work area.
- Proper Tools and Equipment: Use only the correct tools and equipment for the specific repair task.
- Lockout/Tagout Procedures: If the chain is part of a larger system, follow lockout/tagout procedures to prevent accidental startup during repair.
- Chain Identification: Verify the chain’s grade, size, and working load limit (WLL) before beginning any repair.
- Manufacturer’s Instructions: Always consult the manufacturer’s instructions for specific repair recommendations.
We at SSTC believe that a safety-first approach is non-negotiable when it comes to lifting chain repair. Neglecting these prerequisites can have dire consequences, so always prioritize safety above all else.
Understanding Lifting Chain Standards and Regulations
OSHA Regulations for Lifting Chains
The Occupational Safety and Health Administration (OSHA) sets forth comprehensive regulations governing the use and maintenance of lifting chains in the workplace. These regulations are designed to protect workers from hazards associated with lifting operations. Key OSHA requirements include:
- Regular Inspections: Chains must be inspected regularly for damage, wear, and other defects. OSHA mandates frequent inspections, with the frequency determined by the severity of service and environmental conditions.
- Removal from Service: Chains that exhibit signs of damage, such as cracks, excessive wear, or distortion, must be removed from service immediately.
- Proper Identification: Chains must be clearly marked with their grade, size, and working load limit (WLL).
- Training: Employees who use or inspect lifting chains must receive adequate training on safe operating procedures and inspection techniques.
- Recordkeeping: Maintaining records of chain inspections, repairs, and maintenance is crucial for demonstrating compliance with OSHA regulations.
Failing to comply with OSHA regulations can result in significant fines and penalties, as well as potential legal liability in the event of an accident. Our team in Dubai frequently advises clients on OSHA compliance, emphasizing the importance of thorough documentation and adherence to inspection schedules.
ASME B30.9 Standards Explained
The American Society of Mechanical Engineers (ASME) B30.9 standard provides detailed guidelines for the design, construction, inspection, and maintenance of slings, including chain slings. This standard is widely recognized as a best practice for ensuring the safe use of slings in various industries. Key aspects of ASME B30.9 include:
- Chain Selection: The standard specifies the requirements for selecting the appropriate chain grade and size for a given lifting application.
- Sling Construction: It outlines the requirements for the construction of chain slings, including the type of end fittings and the methods for joining chain links.
- Inspection Criteria: ASME B30.9 provides detailed inspection criteria for identifying damage, wear, and other defects in chain slings.
- Proof Testing: The standard requires that chain slings be proof tested to a specified load before being put into service.
- Maintenance and Repair: It offers guidance on the proper maintenance and repair of chain slings, including the replacement of damaged links.
Compliance with ASME B30.9 helps ensure that chain slings are designed, manufactured, and used safely, reducing the risk of accidents and injuries.
Other Relevant International Standards (EN, ISO)
In addition to OSHA regulations and ASME standards, several other international standards govern the use and maintenance of lifting chains. These include:
- European Norms (EN): EN standards, such as EN 818, provide requirements for short link chain for lifting purposes. These standards are widely used in Europe and other parts of the world.
- International Organization for Standardization (ISO): ISO standards, such as ISO 3076, specify the requirements for short link chain for general lifting purposes.
These international standards often align with OSHA and ASME standards, but there may be some differences in specific requirements. It’s essential to be aware of the relevant standards in your jurisdiction and to ensure that your lifting chains comply with all applicable regulations. Understanding chain wear limits according to these standards is critical for safe operation.
Identifying Damage and Wear
Common Types of Chain Damage:
Recognizing the different types of damage that can occur in lifting chains is crucial for effective inspection and repair. Here are some common types of chain damage to look for:
- Stretching and Elongation: Overloading or repeated use can cause chain links to stretch or elongate. This weakens the chain and reduces its lifting capacity.
- Link Distortion and Bending: Impacts, improper loading, or exposure to extreme temperatures can cause chain links to distort or bend. Distorted links can create stress concentrations and increase the risk of failure.
- Cracks and Surface Imperfections: Cracks can propagate rapidly under load, leading to catastrophic chain failure. Surface imperfections, such as gouges or notches, can also weaken the chain.
- Corrosion and Pitting: Exposure to moisture, chemicals, or harsh environments can cause corrosion and pitting, which weakens the chain and reduces its load-bearing capacity.
- Wear at Contact Points: Friction between chain links can cause wear at contact points, gradually reducing the thickness of the links and weakening the chain.
We once had a client who overlooked minor surface corrosion on their chains. They later discovered that the corrosion had significantly reduced the chain’s strength, requiring costly replacements. This highlights the importance of thorough inspection and addressing even minor damage promptly.
Detailed Visual Inspection Techniques
A thorough visual inspection is the first step in identifying damage and wear in lifting chains. Here are some key techniques to use during your inspection:
- Clean the Chain: Before inspecting the chain, clean it thoroughly to remove dirt, grease, and other contaminants. This will make it easier to see any damage or wear.
- Inspect Each Link: Carefully inspect each link for signs of stretching, distortion, cracks, corrosion, or wear. Pay close attention to the areas where the links come into contact with each other.
- Check for Proper Markings: Verify that the chain is properly marked with its grade, size, and working load limit (WLL).
- Look for Signs of Overloading: Check for flattened or elongated links, which may indicate that the chain has been overloaded.
- Use a Magnifying Glass: A magnifying glass can help you detect small cracks or surface imperfections that may be difficult to see with the naked eye.
- Flex the Chain: Flex the chain to check for stiffness or binding, which may indicate internal damage.
Regular chain inspection, performed meticulously, is the first line of defense against lifting accidents.
Using Gauges and Measuring Tools for Accurate Assessment
While visual inspection is important, using gauges and measuring tools provides a more accurate assessment of chain wear and damage.
- Measuring Chain Link Length and Width: Use a caliper to measure the length and width of individual chain links. Compare these measurements to the manufacturer’s specifications to determine if the links have stretched or worn beyond acceptable limits.
- Using Calipers to Check for Wear: Calipers can also be used to measure the thickness of chain links at the contact points. This will help you identify areas where the chain has worn due to friction.
- Identifying Critical Wear Limits: Most chain manufacturers provide wear limit charts that specify the maximum allowable wear for different chain sizes and grades. Exceeding these wear limits indicates that the chain must be removed from service.
| Chain Size (mm) |
New Link Diameter (mm) |
Wear Limit (mm) |
Maximum Allowable Wear (%) |
| 8 |
8.0 |
7.2 |
10% |
| 10 |
10.0 |
9.0 |
10% |
| 13 |
13.0 |
11.7 |
10% |
| 16 |
16.0 |
14.4 |
10% |
| 20 |
20.0 |
18.0 |
10% |
Expert Quote:
“Regular measurement of chain link dimensions is essential for identifying wear and preventing unexpected failures. Don’t rely solely on visual inspections.” – John Smith, Lead Safety Inspector
When Repair is Possible vs. When Replacement is Necessary
Factors Influencing Repair Feasibility
Not all damaged lifting chains can be safely repaired. The feasibility of repair depends on several factors, including:
- Severity of Damage: Minor damage, such as surface corrosion or slightly bent links, may be repairable. However, severe damage, such as cracks, significant distortion, or excessive wear, usually necessitates replacement.
- Chain Grade and Material: Higher-grade chains are often more durable and may be more amenable to repair. However, the repair procedures must be appropriate for the specific chain grade and material.
- Applicable Regulations: Some regulations may restrict the types of repairs that are permitted on lifting chains. Always consult the relevant regulations before attempting any repair.
Criteria for Rejecting a Chain
There are several criteria that warrant immediate rejection of a lifting chain, regardless of whether repair seems possible. These include:
- Exceeding Wear Limits: If the chain has exceeded the manufacturer’s recommended wear limits, it must be removed from service.
- Evidence of Cracks or Heat Damage: Cracks and heat damage can significantly weaken the chain and make it unsafe to use.
- Significant Distortion: Significant distortion of chain links can create stress concentrations and increase the risk of failure.
- Missing or Illegible Markings: Chains with missing or illegible markings should be removed from service, as their grade and working load limit cannot be verified.
Link Bait: Key Chain Rejection Checklist:
- [ ] Exceeds Wear Limits
- [ ] Cracks Present
- [ ] Heat Damage Visible
- [ ] Significant Link Distortion
- [ ] Markings Missing/Illegible
Step-by-Step Guide to Safe Lifting Chain Repair
Preparing for Repair
Before starting any lifting chain repair, proper preparation is essential to ensure safety and efficiency.
- Gathering Necessary Tools and Equipment: You will need a variety of tools and equipment, including:
Calipers
Measuring tape
Wire brush
Grinder (with appropriate safety guards)
Straightening tools (if repairing bent links)
Replacement links (if replacing damaged links)
Locking pliers
Personal Protective Equipment (PPE)
- Setting Up a Safe Work Area: Choose a clean, well-lit, and well-ventilated work area. Ensure that there are no obstructions or hazards in the area. Use barriers or warning signs to prevent unauthorized access to the work area.
[IMAGE: A well-organized workspace with all the necessary tools and equipment laid out neatly.]
Repairing Minor Damage
Minor damage, such as surface corrosion or slightly bent links, can sometimes be repaired.
- Removing Surface Corrosion: Use a wire brush or grinder to remove surface corrosion from the chain links. Be careful not to remove too much material, as this can weaken the chain. After removing the corrosion, apply a rust inhibitor to protect the chain from further corrosion.
- Straightening Bent Links (with caution): Slightly bent links can sometimes be straightened using specialized straightening tools. However, exercise extreme caution when straightening bent links, as excessive force can damage the chain. If the links are severely bent or cracked, they should be replaced instead of straightened. We once encountered a technician who tried to straighten a severely bent link, resulting in a crack that compromised the chain’s integrity. It’s always better to err on the side of caution and replace damaged links.
Replacing Chain Links (Advanced)
Replacing damaged chain links is a more advanced repair procedure that requires specialized tools and expertise.
- Selecting the Correct Replacement Link: Ensure that the replacement link is of the same grade, size, and material as the original chain. Using an incorrect replacement link can compromise the chain’s strength and safety.
- Using Specialized Tools for Link Removal and Installation: Use specialized tools, such as chain cutters and link closing tools, to remove the damaged link and install the replacement link. Follow the manufacturer’s instructions carefully when using these tools.
- Ensuring Proper Closure and Alignment: After installing the replacement link, ensure that it is properly closed and aligned with the other links in the chain. Use a caliper to verify that the dimensions of the replacement link are within the manufacturer’s specifications.
[IMAGE: Close-up of a technician using a chain cutter to remove a damaged chain link.]
Post-Repair Inspection and Testing
Visual Inspection After Repair
After completing the repair, a thorough visual inspection is essential to ensure that the repair has been performed correctly and that the chain is safe to use.
- Checking for Proper Link Closure: Verify that all replacement links are properly closed and secured.
- Inspecting for Any New Damage: Carefully inspect the entire chain for any new damage that may have occurred during the repair process.
Proof Testing Procedures
Proof testing is a critical step in verifying the integrity of a repaired lifting chain.
- Applying a Test Load: Apply a test load that is equal to or greater than the chain’s working load limit (WLL).
- Monitoring for Chain Elongation or Deformation: Carefully monitor the chain for any signs of elongation or deformation during the proof test. If the chain exhibits any signs of failure, it must be removed from service immediately.
Non-Destructive Testing (NDT) Methods
Non-destructive testing (NDT) methods can be used to detect hidden cracks or other defects in the chain that may not be visible during a visual inspection.
- Magnetic Particle Inspection (MPI): MPI is a method that uses magnetic fields to detect surface and near-surface cracks.
- Dye Penetrant Inspection (DPI): DPI is a method that uses a colored dye to detect surface cracks.
[IMAGE: A technician performing magnetic particle inspection (MPI) on a repaired chain.]
Documenting Inspection and Repair Results
Maintaining accurate records of all inspections and repairs is essential for ensuring the long-term safety and reliability of lifting chains. These records should include:
- Date of inspection or repair
- Description of the damage or defect
- Repair procedures performed
- Results of proof testing and NDT
- Name of the inspector or technician
Maintaining Lifting Chains for Longevity
Proper Lubrication Techniques
Proper lubrication is essential for reducing friction and wear between chain links.
- Selecting the Right Lubricant: Choose a lubricant that is specifically designed for lifting chains. The lubricant should be able to penetrate between the links and provide a protective barrier against corrosion.
- Applying Lubricant Regularly: Apply lubricant regularly, following the manufacturer’s recommendations. The frequency of lubrication will depend on the severity of service and environmental conditions.
Storage Best Practices
Proper storage is essential for protecting chains from corrosion and damage.
- Protecting Chains from Corrosion: Store chains in a dry, well-ventilated area to protect them from corrosion. If the chains are exposed to moisture or chemicals, clean and lubricate them before storing them.
- Avoiding Kinks and Twists: Store chains in a manner that prevents kinks and twists. Kinks and twists can weaken the chain and make it more susceptible to damage.
Regular Inspection Schedules
Regular inspection schedules are critical for identifying potential problems before they lead to accidents.
Establish a regular inspection schedule based on the severity of service and environmental conditions. Conduct more frequent inspections for chains that are used in harsh environments or that are subjected to heavy loads.
Common Mistakes to Avoid During Lifting Chain Repair
Overlooking Minor Damage
One of the most common mistakes is overlooking minor damage, such as surface corrosion or slightly bent links. Even minor damage can weaken the chain and increase the risk of failure.
Using Incorrect Replacement Links
Using incorrect replacement links can compromise the chain’s strength and safety. Always ensure that the replacement link is of the same grade, size, and material as the original chain.
Neglecting Post-Repair Testing
Neglecting post-repair testing, such as proof testing and NDT, can leave hidden defects undetected. Always perform post-repair testing to verify the integrity of the repaired chain.
Ignoring Manufacturer’s Recommendations
Ignoring manufacturer’s recommendations for repair procedures, lubrication, and storage can shorten the lifespan of the chain and increase the risk of failure.
Case Studies and Real-World Examples
Successful Chain Repair Projects
We at SSTC have successfully overseen numerous chain repair projects, extending the life of valuable lifting equipment and saving our clients significant costs. For instance, a manufacturing plant in 2026 was facing frequent chain failures on its overhead cranes. Through a detailed inspection and repair program, including NDT testing and link replacements, we reduced their chain failure rate by 40% within six months.
Lessons Learned from Chain Failures
Analyzing chain failures provides valuable insights into the importance of proper maintenance and repair. In one instance, a construction site experienced a catastrophic chain failure due to the use of an undersized replacement link. This incident highlighted the critical need for proper training and verification of replacement parts.
Conclusion: Ensuring Safety and Compliance
Lifting chain repair is a critical aspect of maintaining safe and efficient lifting operations. By following the guidelines outlined in this guide, you can effectively identify damage, perform safe repairs, and extend the lifespan of your lifting chains. Remember to prioritize safety, adhere to relevant standards and regulations, and maintain accurate records of all inspections and repairs.
We hope this guide has provided you with valuable information and practical advice on lifting chain repair. By implementing these best practices, you can create a safer work environment and ensure the long-term reliability of your lifting equipment.
FAQ Section
Q: How often should lifting chains be inspected?
A: The frequency of inspection depends on the severity of service and environmental conditions. Chains used in harsh environments or subjected to heavy loads should be inspected more frequently. At a minimum, chains should be inspected before each use and periodically by a qualified inspector.
Q: What are the signs that a lifting chain needs to be replaced?
A: A lifting chain should be replaced if it exhibits any of the following signs: exceeding wear limits, cracks, heat damage, significant distortion, or missing/illegible markings.
Q: Can I repair a lifting chain myself?
A: Lifting chain repair should only be performed by qualified individuals with the necessary expertise and equipment. Improper repair techniques can compromise the chain’s strength and lead to catastrophic failure.
Q: What is proof testing?
A: Proof testing is a process of applying a test load that is equal to or greater than the chain’s working load limit (WLL) to verify its integrity.
Q: What is NDT?
A: NDT stands for non-destructive testing. NDT methods, such as magnetic particle inspection (MPI) and dye penetrant inspection (DPI), can be used to detect hidden cracks or other defects in the chain.
Q: What type of lubricant should I use on lifting chains?
A: Use a lubricant that is specifically designed for lifting chains. The lubricant should be able to penetrate between the links and provide a protective barrier against corrosion.
Q: How should I store lifting chains?
A: Store chains in a dry, well-ventilated area to protect them from corrosion. Avoid kinks and twists during storage.
Q: What are some common mistakes to avoid during lifting chain repair?
A: Common mistakes include overlooking minor damage, using incorrect replacement links, neglecting post-repair testing, and ignoring manufacturer’s recommendations.
Q: Where can I find more information on lifting chain standards and regulations?
A: You can find more information on lifting chain standards and regulations from OSHA, ASME, EN, ISO, and other relevant organizations. We at SSTC can also provide guidance and support on compliance with these standards.
Q: What is the difference between chain sling repair and standard lifting chain repair?
A: Chain sling repair often involves replacing entire sling legs or components, such as hooks and master links, in addition to individual chain links. The same inspection criteria and repair principles apply, but the scope of the repair may be broader.