A rigging screw checklist is absolutely non-negotiable when it comes to ensuring safety in any lifting operation. It’s a critical tool for preventing accidents and maintaining the integrity of your equipment. This comprehensive guide will walk you through every essential step, helping you understand why each point is vital for your operations.
Introduction: Why a Rigging Screw Checklist is Non-Negotiable
The High Stakes of Lifting Operations
Lifting operations, whether in construction, manufacturing, or shipping, are inherently high-risk activities. The potential for serious injury or even fatality is ever-present if equipment fails or procedures are not followed meticulously. Rigging hardware, including rigging screws, are small components, but they play a colossal role in the overall safety and success of these operations. The integrity of each rigging screw is paramount to supporting and securing heavy loads. Neglecting to properly inspect and maintain this equipment can lead to catastrophic consequences. It’s not just about the cost of repairing damaged equipment; it’s about the human cost of preventable accidents. Safety regulations are in place for a reason, and adherence to them is essential for creating a safe working environment.
[IMAGE: A crane lifting a heavy load with workers observing from below]
The Problem: Accidents Due to Rigging Failure
Accidents stemming from rigging failures are far too common. These failures can be attributed to a variety of factors, including overlooked visual defects, exceeding load capacity limits, improper assembly techniques, and a lack of regular maintenance. When rigging screws fail, the consequences can be devastating, leading to dropped loads, equipment damage, serious injuries, and even fatalities. The impact of such incidents extends beyond the immediate physical harm, affecting morale, productivity, and the company’s reputation. A proactive approach to inspection and maintenance is crucial to mitigate these risks. Regular rigging screw inspection can identify potential problems before they escalate into dangerous situations.
Solution: Proactive Inspection with a Rigging Screw Checklist
The solution to minimizing the risks associated with rigging operations lies in proactive inspection using a detailed rigging screw checklist. A comprehensive checklist serves as a systematic guide, ensuring that all critical aspects of the rigging screw are thoroughly examined before each lift. This includes verifying load capacity, checking for corrosion, inspecting threads for damage, and confirming proper assembly. By following a rigorous checklist, you can identify potential issues early, allowing you to take corrective actions before they lead to equipment failure. Implementing a regular inspection program not only enhances safety but also extends the lifespan of your rigging equipment, saving you money in the long run. A well-executed rigging screw checklist is an indispensable tool for any organization that values safety and efficiency.
Anecdote: A Real-World Near Miss
At SSTC, we once consulted with a client in the shipbuilding industry who narrowly avoided a disaster due to a faulty rigging screw. The team had been preparing to lift a large section of a ship hull when a worker noticed a hairline crack on one of the rigging screws during a pre-lift inspection. Had they proceeded with the lift without identifying this defect, the screw could have failed under the immense load, potentially causing the massive section of the hull to fall. This could have resulted in significant damage to the shipbuilding equipment and severe injuries to the workers nearby. Fortunately, the crack was detected in time, and the damaged rigging screw was immediately replaced. This near-miss incident served as a stark reminder of the importance of meticulous inspection and the value of a comprehensive rigging screw checklist. It reinforced the understanding that even seemingly minor defects can have catastrophic consequences.
Identifying Common Rigging Screw Problems Before They Cause Catastrophe
Problem 1: Overlooked Visual Defects
One of the most common causes of rigging screw failure is simply overlooking visual defects during pre-lift inspections. These defects can range from minor cracks and dents to more severe deformities such as bending or twisting. Cracks are particularly dangerous as they can propagate rapidly under load, leading to sudden failure. Dents and deformities can indicate that the rigging screw has been subjected to excessive force or impact, compromising its structural integrity. Visual inspection should be conducted meticulously, paying close attention to the entire surface of the rigging screw, including the threads, body, and end fittings. A magnifying glass and adequate lighting can be helpful in detecting subtle defects that might otherwise be missed. Our team in Dubai often emphasizes the importance of using a systematic approach to visual inspection, starting at one end of the rigging screw and working methodically to the other, ensuring that no area is overlooked.
[IMAGE: Close-up of a rigging screw with a visible crack highlighted]
Problem 2: Ignoring Load Capacity Limits
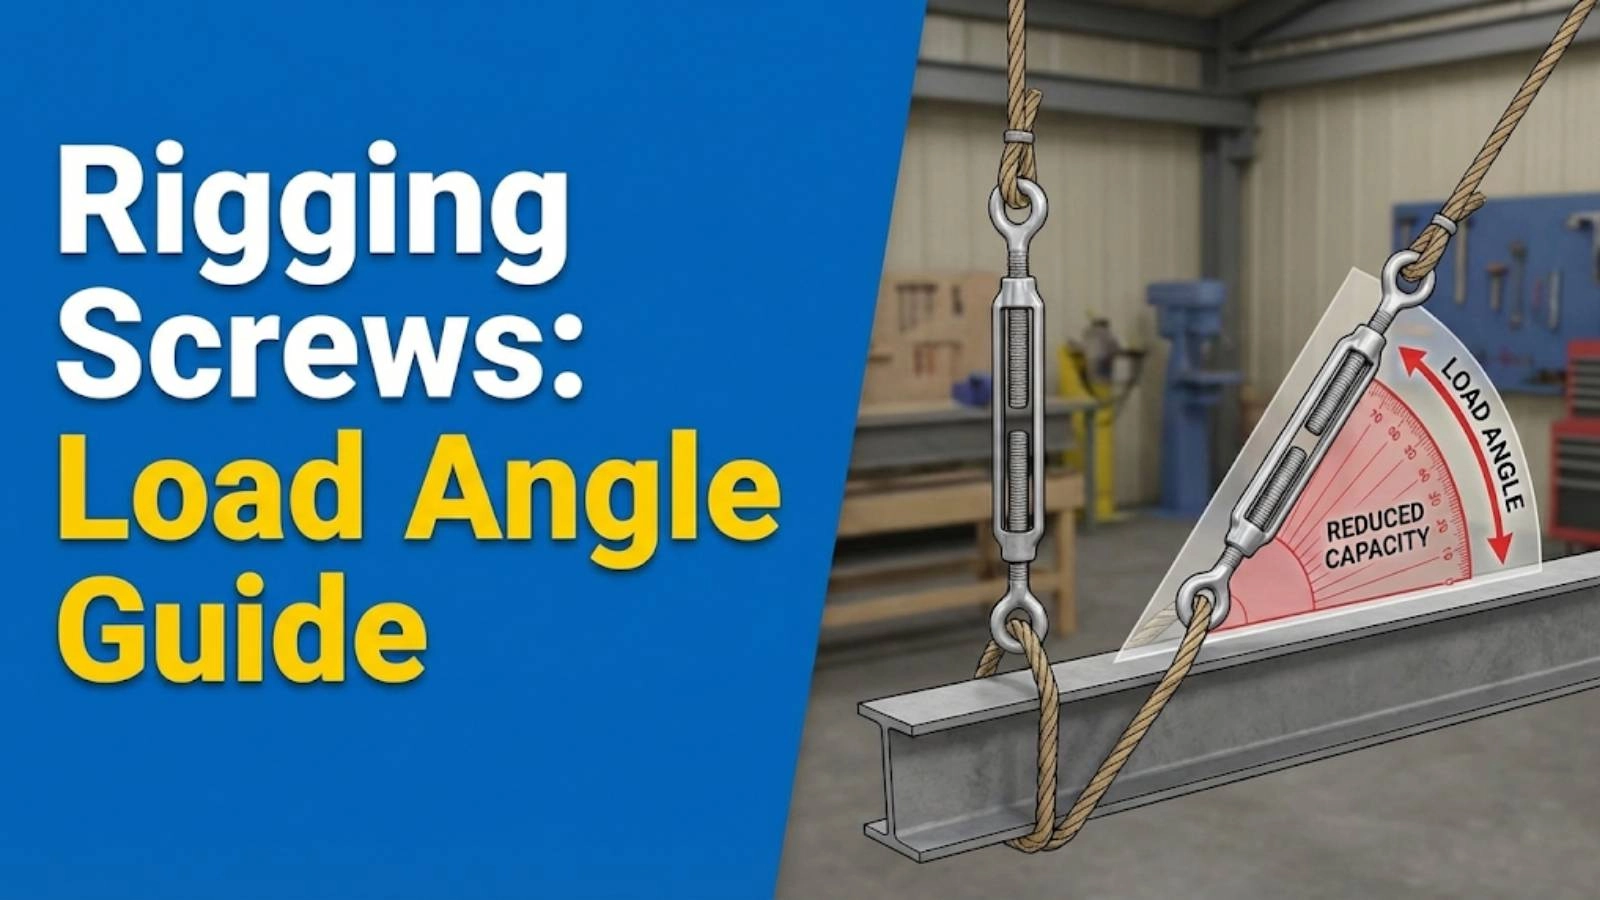
Exceeding the load capacity limits of a rigging screw is a recipe for disaster. Each rigging screw is designed to safely handle a specific maximum load, known as the Working Load Limit (WLL). This limit is typically marked on the rigging screw itself, and it’s crucial to verify this information before each lift. It is vital to understand the weight of the load being lifted and to ensure that the rigging screw has sufficient capacity to handle it safely. Factors such as the angle of the lift and the number of rigging screws being used can also affect the load distribution, and these factors must be taken into account when determining the required capacity. Never assume that a rigging screw can handle a load simply because it looks “strong enough.” Always consult the manufacturer’s specifications and use a load calculator to ensure that the WLL is not exceeded.
Problem 3: Improper Assembly Techniques
Even a high-quality rigging screw can fail if it is not assembled correctly. Improper assembly techniques can introduce stress points and weaken the overall structure, reducing its load-bearing capacity. One common mistake is overtightening the rigging screw, which can damage the threads and compromise its integrity. Another issue is misalignment, where the rigging screw is not properly aligned with the load, causing uneven stress distribution. Always follow the manufacturer’s instructions for assembly and ensure that all components are properly aligned and tightened to the specified torque. Using the correct tools and techniques is essential for ensuring that the rigging screw is assembled safely and effectively.
Problem 4: Lack of Regular Maintenance
Rigging screws are often exposed to harsh environmental conditions, including moisture, chemicals, and extreme temperatures. These conditions can lead to corrosion, rust, and other forms of degradation that weaken the rigging screw over time. A lack of regular maintenance, such as lubrication and cleaning, can accelerate this process. Regular maintenance should include inspecting the rigging screw for signs of corrosion, applying a suitable lubricant to protect against rust, and cleaning away any dirt or debris that could accelerate wear. A well-maintained rigging screw will not only last longer but will also perform more reliably, reducing the risk of failure. Implementing a preventative maintenance program is a cost-effective way to ensure the long-term safety and reliability of your rigging equipment.
The Ultimate Rigging Screw Checklist: 9 Steps to Safety
Step 1: Verify Load Capacity (WLL) and Markings
⚙️ Why? Ensuring the rigging screw meets the load requirements is paramount to safety.
✅ How? Locate the WLL marking on the rigging screw body. Compare this value against the calculated load requirements for the lift. Never use a rigging screw if the WLL is unclear or illegible. If the marking is damaged, remove the rigging screw from service immediately. Also, it is imperative to know your load limitations and to ensure that you comply with all safety regulations.
[IMAGE: Close-up of a rigging screw showing the WLL marking clearly]
Step 2: Conduct a Thorough Visual Inspection for Damage
⚙️ Why? Identifying any physical damage early prevents potential failures.
✅ How? Inspect the entire rigging screw for cracks, dents, bends, or any other signs of damage. Pay close attention to areas around the threads, shanks, and end fittings. Use a magnifying glass if necessary to detect hairline cracks. Rotate the rigging screw as you inspect it to ensure you see the entire surface. Note any areas of concern for further evaluation.
> “A simple visual inspection can catch up to 80% of potential rigging failures if done thoroughly and systematically.” – John Carter, Certified Rigging Inspector
Step 3: Check for Corrosion and Rust
⚙️ Why? Corrosion weakens the metal and reduces its load-bearing capacity.
✅ How? Examine the rigging screw for signs of rust, pitting, or other forms of corrosion. Pay particular attention to areas where moisture may accumulate, such as threads and crevices. Use a wire brush or scraper to remove loose rust and debris to better assess the extent of the corrosion. If corrosion is significant, the rigging screw should be removed from service.
[IMAGE: A rigging screw with visible rust and corrosion]
Step 4: Inspect Threads for Damage and Wear
⚙️ Why? Damaged threads compromise the integrity of the connection.
✅ How? Check the threads for signs of wear, damage, or deformation. Run your fingers along the threads to feel for any rough spots or inconsistencies. Use a thread gauge to ensure that the threads are within acceptable tolerances. If the threads are stripped, cross-threaded, or otherwise damaged, the rigging screw should not be used. Thread damage can greatly affect the safety regulations of your site, so be sure to have your team familiar with all potential issues.
Step 5: Confirm Proper Assembly and Alignment
⚙️ Why? Incorrect assembly can lead to uneven stress distribution and premature failure.
✅ How? Ensure that all components of the rigging screw are properly assembled and aligned. Check that the end fittings are securely attached and that the threads are fully engaged. Make sure that the rigging screw is aligned with the load to avoid side loading or bending stresses. If any components are loose or misaligned, correct the issue before proceeding with the lift. Our team in Dubai has encountered numerous incidents where misalignment led to premature wear and tear on rigging screws.
Step 6: Ensure Correct Pin Installation and Security
⚙️ Why? A loose or improperly installed pin can cause the rigging to disconnect under load.
✅ How? If the rigging screw uses pins for attachment, verify that the pins are the correct size and type for the application. Ensure that the pins are fully inserted and secured with cotter pins or other locking devices. Check that the pins are not bent, damaged, or corroded. If any issues are found, replace the pin with a new one that meets the manufacturer’s specifications. Screw pin shackle inspection is vital for this.
Step 7: Verify Lock Nut Tightness (if applicable)
⚙️ Why? A loose lock nut can allow the rigging screw to loosen over time, leading to instability.
✅ How? If the rigging screw has a lock nut, check that it is properly tightened and secured. Use a wrench to verify that the lock nut is snug against the body of the rigging screw. If the lock nut is loose, tighten it to the manufacturer’s recommended torque. If the lock nut is damaged or missing, replace it before using the rigging screw.
Step 8: Review Environmental Factors Affecting Rigging Screws
⚙️ Why? Harsh environments can accelerate corrosion and degradation.
✅ How? Consider the environmental conditions in which the rigging screw will be used. Exposure to salt water, chemicals, or extreme temperatures can accelerate corrosion and weaken the metal. Take appropriate precautions to protect the rigging screw from these elements, such as applying a protective coating or using stainless steel components. Regularly inspect the rigging screw for signs of environmental damage and take corrective action as needed. This is especially important as environmental elements greatly influence safety regulations.
Step 9: Document Your Inspection and Findings
⚙️ Why? Maintaining records provides a history of inspections and helps identify trends.
✅ How? Keep a detailed record of each inspection, including the date, time, inspector’s name, and any findings. Note any defects or issues that were identified and the corrective actions that were taken. Use a standardized form or checklist to ensure consistency in the inspection process. Store the inspection records in a safe and accessible location for future reference.
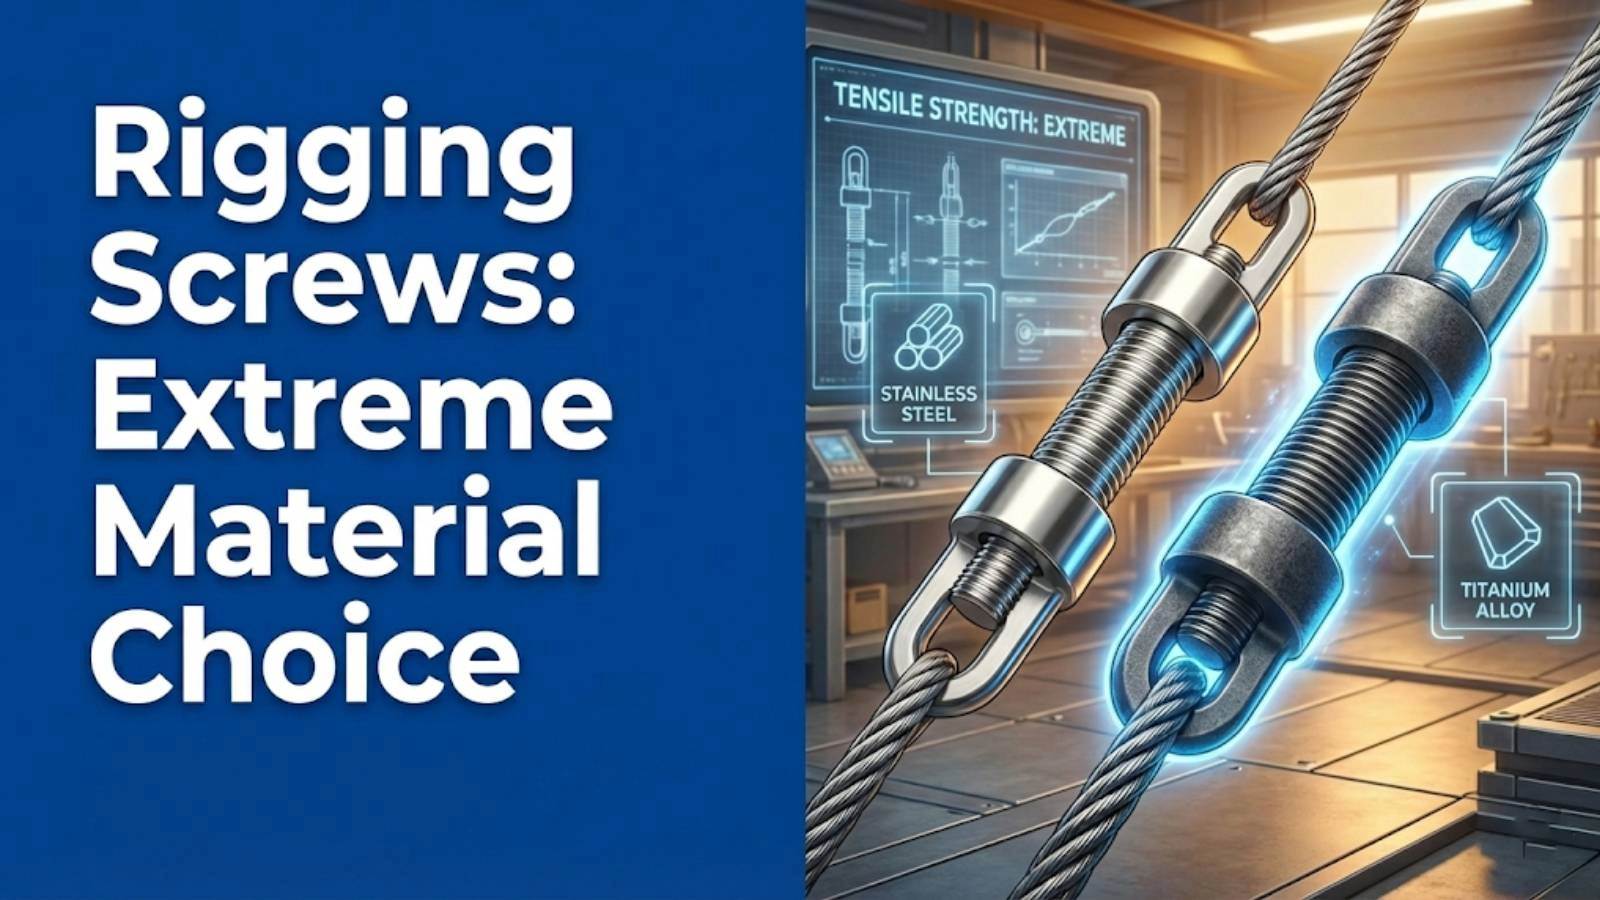
Understanding Different Types of Rigging Screws and Their Specific Risks
Turnbuckles: Common Issues and Solutions
Turnbuckles are a common type of rigging screw used to adjust the tension in ropes, cables, and tie rods. They consist of two threaded eye bolts or jaw ends connected by a central body that can be rotated to increase or decrease the tension. Common issues with turnbuckles include thread damage, corrosion, and bending of the eye bolts. To mitigate these risks, regularly inspect the threads for damage, apply a corrosion-resistant coating, and ensure that the turnbuckle is properly aligned with the load. If the eye bolts are bent or deformed, the turnbuckle should be replaced immediately. A comprehensive turnbuckle checklist is essential for maintaining safety.
Eye Bolts: Inspection Focus Areas
Eye bolts are another type of rigging screw used to provide a secure attachment point for lifting and rigging. They consist of a threaded bolt with a looped eye at one end. Key inspection areas for eye bolts include the threads, the eye, and the shank. Check the threads for damage or wear, inspect the eye for cracks or deformation, and examine the shank for bending or twisting. Ensure that the eye bolt is properly tightened and that the load is applied in a straight line to avoid side loading. If any defects are found, the eye bolt should be removed from service.
Shackles: Avoiding Pin-Related Failures
Shackles are U-shaped pieces of metal secured with a removable pin, used to connect different components in a rigging system. Pin-related failures are a common cause of shackle accidents. Ensure the correct type and size of pin is used and that it is fully engaged and properly secured with a cotter pin or other locking device. Regularly inspect the pin for bending, damage, or corrosion, and replace it if necessary. Also, make sure that the shackle is properly aligned with the load and that the load is not applied at an angle that could cause the pin to bend or break. Screw pin shackle inspection is important for all types of shackles.
Wire Rope Clips: Ensuring Proper Installation
Wire rope clips are used to secure the end of a wire rope to form an eye or to join two wire ropes together. Proper installation is crucial for ensuring the safety and reliability of the connection. The clips should be installed with the U-bolt on the dead end of the wire rope and the saddle on the live end. The clips should be tightened to the manufacturer’s recommended torque, and the wire rope should be inspected regularly for slippage or damage. Re-tighten the clips after the initial load is applied, as the wire rope may stretch or settle.
The Importance of Regular Training and Competency
Training Programs for Rigging Safety
Regular training is essential for ensuring that all personnel involved in rigging operations are competent and knowledgeable about safety procedures. Training programs should cover topics such as rigging hardware inspection, load capacity calculations, proper lifting techniques, and emergency response procedures. Training should be conducted by qualified instructors with practical experience in rigging operations. Hands-on training and simulations can help reinforce theoretical knowledge and develop practical skills. Training programs should also be regularly updated to reflect changes in industry standards and safety regulations.
Certification and Accreditation Options
Certification and accreditation can provide assurance that personnel have met a certain level of competency in rigging operations. Several organizations offer certification programs for riggers, inspectors, and other related roles. These programs typically involve a combination of classroom training, practical assessments, and written examinations. Certification can enhance credibility and demonstrate a commitment to safety. Accreditation of training programs ensures that they meet established standards and provide high-quality instruction.
Refresher Courses: Staying Up-to-Date
Even experienced riggers need to stay up-to-date with the latest safety regulations, best practices, and technological advancements. Refresher courses can help maintain competency and ensure that personnel are aware of any changes in the industry. Refresher courses should cover topics such as new rigging hardware, updated inspection procedures, and emerging safety concerns. These courses can also provide an opportunity for riggers to share their experiences and learn from each other. Regular refresher training is a cost-effective way to prevent accidents and maintain a safe working environment.
Implementing a Comprehensive Inspection Program
Creating a Schedule for Regular Inspections
A comprehensive inspection program begins with establishing a schedule for regular inspections. The frequency of inspections should be based on factors such as the type of rigging hardware, the frequency of use, and the environmental conditions. High-use rigging hardware should be inspected more frequently than hardware that is used less often. Rigging hardware that is exposed to harsh environmental conditions should also be inspected more frequently. A written inspection schedule can help ensure that all rigging hardware is inspected on a timely basis. This helps adhere to safety regulations.
Designating Qualified Personnel for Inspections
Inspections should be conducted by qualified personnel who have the knowledge, skills, and experience to identify potential problems. Qualified inspectors should have completed a recognized training program and should be familiar with the relevant safety regulations. They should also have access to the necessary tools and equipment to conduct thorough inspections. Designating qualified personnel for inspections helps ensure that inspections are conducted properly and that potential problems are identified and addressed.
Maintaining Accurate Inspection Records
Accurate inspection records are essential for tracking the condition of rigging hardware and identifying trends. Inspection records should include the date of the inspection, the name of the inspector, the type of rigging hardware inspected, and any findings. Records should also include any corrective actions that were taken. Maintaining accurate inspection records helps ensure that rigging hardware is properly maintained and that potential problems are addressed promptly.
Integrating the checklist into your Safety Management System (SMS)
Integrating the rigging screw checklist into your Safety Management System (SMS) ensures that the checklist becomes a routine part of your operational procedures. The SMS should define the roles and responsibilities for implementing the checklist, provide training for personnel involved in the inspection process, and establish procedures for documenting and tracking inspection results. Integrating the checklist into the SMS demonstrates a commitment to safety and helps create a culture of safety within the organization.
Troubleshooting Common Rigging Screw Issues
Problem: Difficulty Tightening or Loosening
If you encounter difficulty tightening or loosening a rigging screw, the first step is to inspect the threads for damage or corrosion. Clean the threads with a wire brush and apply a lubricant to ease the movement. If the threads are severely damaged, the rigging screw should be replaced. Another potential cause is binding due to misalignment. Ensure that the rigging screw is properly aligned with the load and that there is no side loading. If the problem persists, consider using a specialized tool, such as a cheater bar, to increase leverage.
Problem: Visible Cracks or Deformations
Visible cracks or deformations are a clear indication that the rigging screw has been compromised and should be removed from service immediately. Cracks can propagate rapidly under load, leading to sudden failure. Deformations indicate that the rigging screw has been subjected to excessive force or impact, weakening its structure. Do not attempt to repair a cracked or deformed rigging screw. Replacement is the only safe option.
Problem: Corroded or Rusted Components
Corrosion and rust can significantly weaken rigging screws over time. If you notice signs of corrosion, remove loose rust and debris with a wire brush or scraper. Apply a corrosion-resistant coating to protect the metal from further degradation. For severe corrosion, the rigging screw should be replaced. Regular lubrication can help prevent corrosion by creating a barrier between the metal and the environment. Using stainless steel components in corrosive environments can also extend the lifespan of rigging screws.
Expert Advice for Ensuring Long-Term Rigging Screw Reliability
Proper Storage and Handling Techniques
Proper storage and handling techniques are crucial for ensuring the long-term reliability of rigging screws. Store rigging screws in a dry, clean environment away from corrosive substances. Protect them from physical damage during transport and handling. Avoid dropping or dragging rigging screws, as this can cause dents or deformations that weaken the metal. Use protective covers or containers to prevent damage during storage and transport.
Lubrication and Maintenance Best Practices
Regular lubrication is essential for preventing corrosion and ensuring smooth operation of rigging screws. Apply a suitable lubricant to the threads and other moving parts on a regular basis. The type of lubricant should be appropriate for the environmental conditions and the type of rigging screw. Follow the manufacturer’s recommendations for lubrication frequency and type. Clean rigging screws regularly to remove dirt, debris, and contaminants that can accelerate wear.
Replacement Schedules: When to Retire a Rigging Screw
Even with proper maintenance, rigging screws will eventually reach the end of their service life. Establishing a replacement schedule based on factors such as usage frequency, environmental conditions, and manufacturer’s recommendations can help prevent failures. Rigging screws that are used frequently or exposed to harsh environments should be replaced more often. A visual inspection should be conducted before each use, and any rigging screw that shows signs of damage or wear should be removed from service immediately.
Conclusion: Lifting with Confidence – Your Recap of Achievement
By diligently following this rigging screw checklist, you’ve taken proactive steps to prevent rigging failures, enhanced safety for your team and equipment, and ensured compliance with industry best practices. We at SSTC are confident that this guide will empower you to maintain a safer and more efficient working environment. The key to success is consistent application and a commitment to safety.
FAQ Section
Q: How often should I inspect my rigging screws?
A: Rigging screws should be inspected before each use and at regular intervals, depending on the frequency of use and environmental conditions. High-use rigging screws should be inspected more frequently than those used less often.
Q: What should I do if I find a damaged rigging screw?
A: If you find a damaged rigging screw, remove it from service immediately. Do not attempt to repair it. Replace it with a new rigging screw that meets the manufacturer’s specifications.
Q: Can I use a damaged rigging screw if it’s only slightly damaged?
A: No, you should never use a damaged rigging screw, even if the damage appears to be minor. Any damage can compromise the integrity of the rigging screw and increase the risk of failure.
Q: What type of lubricant should I use on my rigging screws?
A: The type of lubricant should be appropriate for the environmental conditions and the type of rigging screw. Consult the manufacturer’s recommendations for the appropriate lubricant.
Q: How do I determine the load capacity (WLL) of a rigging screw?
A: The WLL is typically marked on the rigging screw itself. If the marking is unclear or illegible, do not use the rigging screw. Consult the manufacturer’s specifications to determine the WLL.
Q: What are the most common causes of rigging screw failure?
A: The most common causes of rigging screw failure include overlooked visual defects, exceeding load capacity limits, improper assembly techniques, and a lack of regular maintenance.
Q: How can I prevent corrosion on my rigging screws?
A: You can prevent corrosion by storing rigging screws in a dry, clean environment, applying a corrosion-resistant coating, and regularly lubricating the threads and other moving parts.
Q: What qualifications should a rigging inspector have?
A: A rigging inspector should have completed a recognized training program and should be familiar with the relevant safety regulations. They should also have access to the necessary tools and equipment to conduct thorough inspections.
Q: What is the importance of regular training for rigging personnel?
A: Regular training is essential for ensuring that all personnel involved in rigging operations are competent and knowledgeable about safety procedures. Training programs should cover topics such as rigging hardware inspection, load capacity calculations, proper lifting techniques, and emergency response procedures.
Q: How do I integrate a rigging screw checklist into my Safety Management System (SMS)?
A: Integrate the rigging screw checklist into your SMS by defining the roles and responsibilities for implementing the checklist, providing training for personnel involved in the inspection process, and establishing procedures for documenting and tracking inspection results.