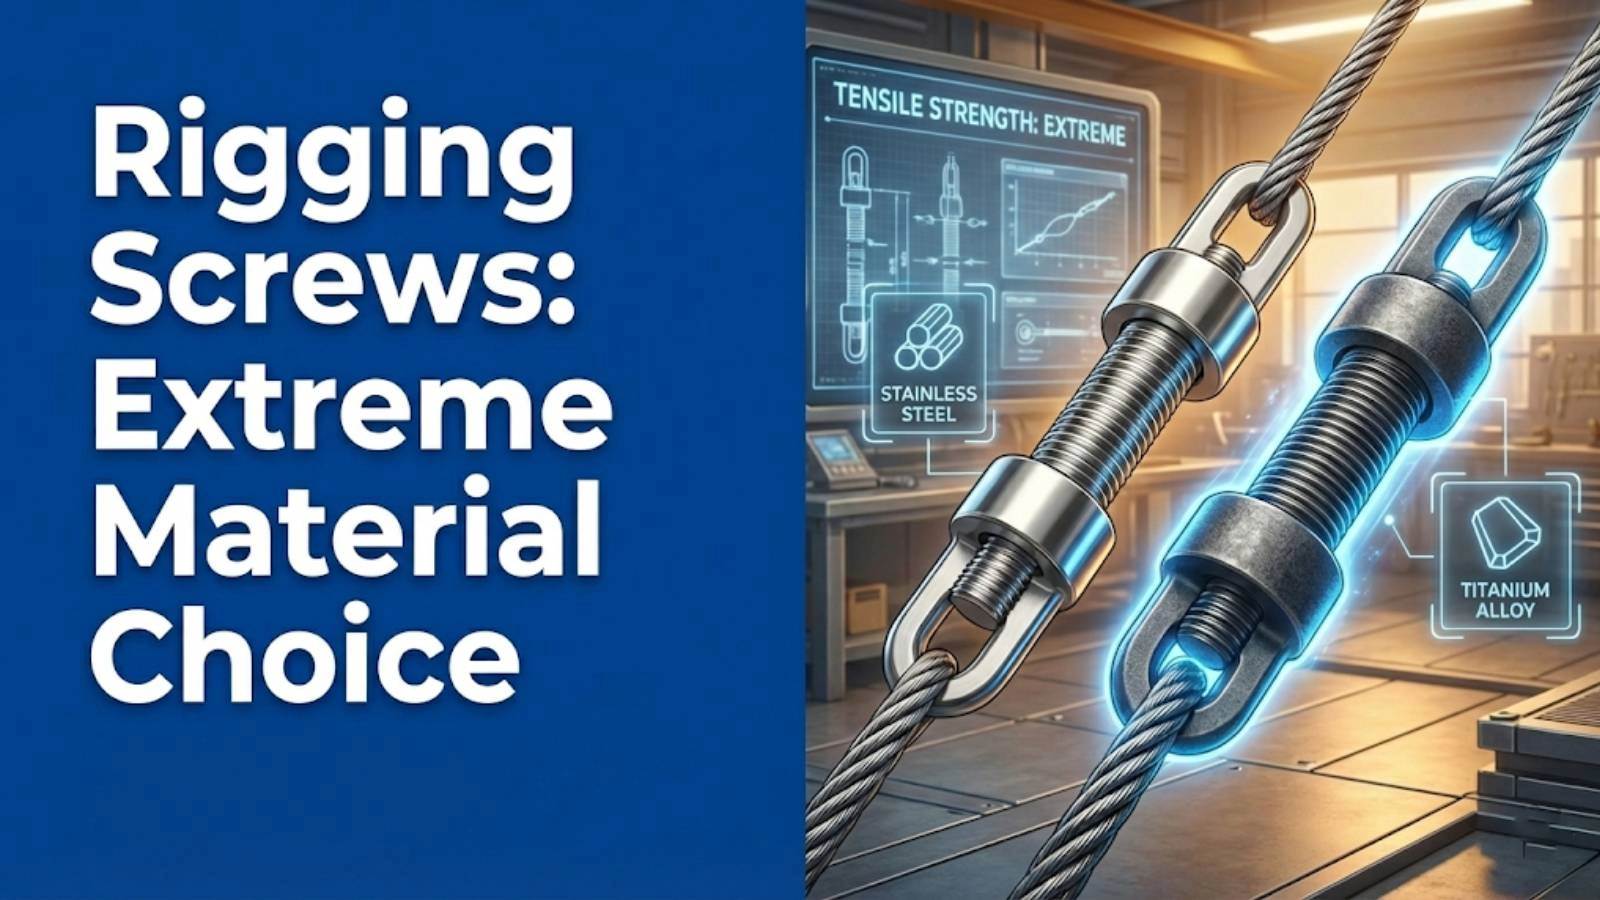
The silent danger of overloaded rigging screws is a critical concern in various industries, from construction to marine operations. Understanding the rigging screw weight and its limitations is paramount to ensuring safety and preventing catastrophic failures. A rigging screw, also known as a turnbuckle or tensioner, is a seemingly simple piece of hardware, but its capacity to handle load is governed by a complex interplay of factors.
Overloading these components can lead to severe consequences, including equipment damage, personal injury, and even fatalities. Often, accidents occur not because of blatant disregard for safety but due to a lack of understanding of the subtle yet critical aspects of rigging screw usage. This article aims to shed light on these often-overlooked factors, providing a comprehensive guide to avoiding common mistakes and ensuring the safe and efficient use of rigging screws.
We will address the common pitfalls that lead to rigging screw failure, such as ignoring the Safe Working Load (SWL), mismatching components, failing to account for load angle, neglecting dynamic loading, overlooking environmental factors, improper thread engagement, over-tightening, lack of regular inspections, and using damaged or modified screws. By understanding and avoiding these mistakes, you can significantly enhance safety and extend the lifespan of your rigging equipment.
Mistake #1: Ignoring the Safe Working Load (SWL)
One of the most critical, yet frequently overlooked, aspects of using rigging screws is understanding and adhering to the Safe Working Load (SWL). The SWL is the maximum load that a rigging screw is designed to handle safely under normal operating conditions. Ignoring this limit is akin to playing Russian roulette with your equipment and personnel.
Defining Safe Working Load: What Does SWL Really Mean?
The Safe Working Load (SWL) is a crucial rating that indicates the maximum weight a rigging screw can safely support without the risk of failure. It’s important to differentiate SWL from the breaking strength, also known as the minimum breaking load (MBL). The breaking strength represents the point at which the rigging screw will catastrophically fail, while the SWL is a fraction of that, typically determined by a safety factor.
The safety factor is a multiplier applied to the breaking strength to arrive at the SWL. For example, a rigging screw with a breaking strength of 5,000 lbs and a safety factor of 5 would have an SWL of 1,000 lbs. This safety factor accounts for variables like material defects, wear and tear, and unforeseen stresses that can occur during operation.
The SWL is not an absolute limit but rather the maximum recommended load. Exceeding the SWL, even by a small margin, can significantly increase the risk of failure and should be avoided at all costs. The SWL ensures that the rigging screw operates within its elastic limit, preventing permanent deformation and ensuring a longer service life.
The SWL is Not a Suggestion: Why It Must Be Followed
The SWL is not merely a suggestion; it is a critical safety guideline that must be strictly followed to prevent accidents and equipment failures. Exceeding the SWL can lead to premature failure of the rigging screw, potentially resulting in catastrophic consequences.
When a rigging screw is overloaded, it can experience plastic deformation, meaning it will not return to its original shape after the load is removed. This deformation weakens the screw and makes it more susceptible to failure under subsequent loads. Repeated overloading can lead to fatigue cracks, which can propagate rapidly and cause the screw to break without warning.
Real-world examples of accidents caused by ignoring SWL are numerous and often tragic. In one instance, a construction crew attempted to lift a precast concrete panel that exceeded the SWL of their rigging screws. The screws failed under the excessive load, causing the panel to fall and seriously injure several workers. In another case, a marine operator overloaded a turnbuckle during a mooring operation, resulting in the turnbuckle snapping and causing a runaway vessel to collide with a pier.
These incidents underscore the critical importance of adhering to the SWL. By respecting the SWL, you are ensuring that the rigging screw operates within its designed capacity, minimizing the risk of failure and protecting both personnel and equipment.
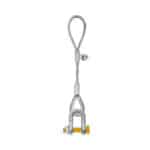
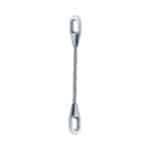
How to Correctly Identify the SWL on Your Rigging Screw
Correctly identifying the SWL on your rigging screw is essential for safe operation. The SWL is typically marked on the body of the screw, often near the jaw or eye. The marking may be stamped, engraved, or printed on the metal.
The SWL is usually expressed in pounds (lbs), kilograms (kg), or tons (t). It is crucial to understand the units and ensure that you are using the correct conversion factors when calculating the load. For example, 1 ton is equal to 2,000 lbs or 1,000 kg.
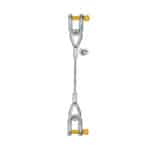
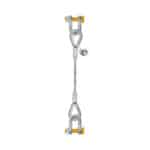
[IMAGE: Examples of different SWL markings on rigging screws]
Different manufacturers may use different markings, so it is important to familiarize yourself with the specific markings used on your equipment. Some common markings include “SWL,” “WLL” (Working Load Limit), or simply a number followed by the unit of measure. Some rigging screws may also include a CE mark, indicating that they meet European safety standards. We in Dubai find that the CE mark is a reassuring indicator.
If the SWL marking is illegible or missing, the rigging screw should not be used. In such cases, consult the manufacturer’s documentation or contact a qualified rigging inspector to determine the SWL. Never assume the SWL based on the size or appearance of the screw.
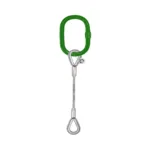
Mistake #2: Mismatching Rigging Screw Components
A rigging system is only as strong as its weakest link. Mismatching rigging screw components, such as using a high-strength screw with a low-strength shackle, can create a dangerous situation where the entire system is compromised. It’s crucial to understand the importance of component compatibility and ensure that all parts of the rigging system are rated for the same load.
The Chain is Only as Strong as Its Weakest Link: Component Compatibility
The principle that a chain is only as strong as its weakest link is particularly relevant in rigging systems. If you use a rigging screw with a higher SWL than the other components in the system, the entire system is effectively limited to the SWL of the weakest component.
For example, if you have a rigging screw with an SWL of 2,000 lbs, but you are using it with a shackle that has an SWL of only 1,000 lbs, the maximum load you can safely lift is 1,000 lbs. Attempting to lift a load greater than 1,000 lbs could cause the shackle to fail, even though the rigging screw is capable of handling the weight.
[IMAGE: Illustration showing a rigging system with mismatched components]
Component compatibility extends beyond just the SWL. It also includes factors like material compatibility, thread size, and type of load. Using incompatible components can lead to premature wear, corrosion, and even catastrophic failure.
Mixing and Matching: Why it’s a Bad Idea
Mixing and matching rigging components from different manufacturers or with different SWLs can have serious consequences. When you use incompatible components, you are essentially creating a system with unpredictable strength characteristics.
For example, using a high-strength screw with a low-strength shackle can concentrate stress on the weaker component, causing it to fail prematurely. Similarly, using components made from different materials can lead to galvanic corrosion, which weakens the metal and reduces its load-bearing capacity.
Incompatible thread sizes can also create problems. If you try to force a screw with a different thread size into a nut or fitting, you can damage the threads and reduce the thread engagement, weakening the connection.
[IMAGE: Close-up of damaged threads caused by using incompatible components]
We once had a client who tried to save money by using a mix of old and new rigging components, without checking their compatibility. The result was a catastrophic failure during a lift, causing significant damage to the load and narrowly avoiding serious injury to the crew. This incident serves as a stark reminder of the importance of using only compatible components in a rigging system.
Ensuring Compatibility: A Step-by-Step Guide
Ensuring compatibility in a rigging system requires a systematic approach. Here’s a step-by-step guide to help you ensure that all components are properly matched:
1. Check the SWL of all components: Before using any rigging system, verify the SWL of all components, including the rigging screw, shackles, hooks, slings, and any other hardware. Make sure that all components have an SWL that is equal to or greater than the weight of the load you are lifting.
2. Ensure components are rated for the same type of load: Different components are designed for different types of loads, such as tension, shear, or bending. Make sure that all components in the system are rated for the type of load you will be applying.
3. Verify material compatibility: Avoid mixing components made from dissimilar metals, as this can lead to galvanic corrosion. If you must use components made from different metals, use a corrosion-inhibiting compound to prevent corrosion.
4. Check thread compatibility: Ensure that all threaded connections have compatible thread sizes and types. Do not force a screw with a different thread size into a nut or fitting.
5. Inspect components for damage: Before each use, inspect all components for signs of wear, corrosion, or damage. Replace any damaged components immediately.
6. Consult the manufacturer’s documentation: Refer to the manufacturer’s documentation for specific guidance on component compatibility and usage.
7. Maintain records: Keep records of all rigging components, including their SWLs, inspection dates, and any repairs or replacements.
By following these steps, you can ensure that all components in your rigging system are compatible and that the system is safe to use.
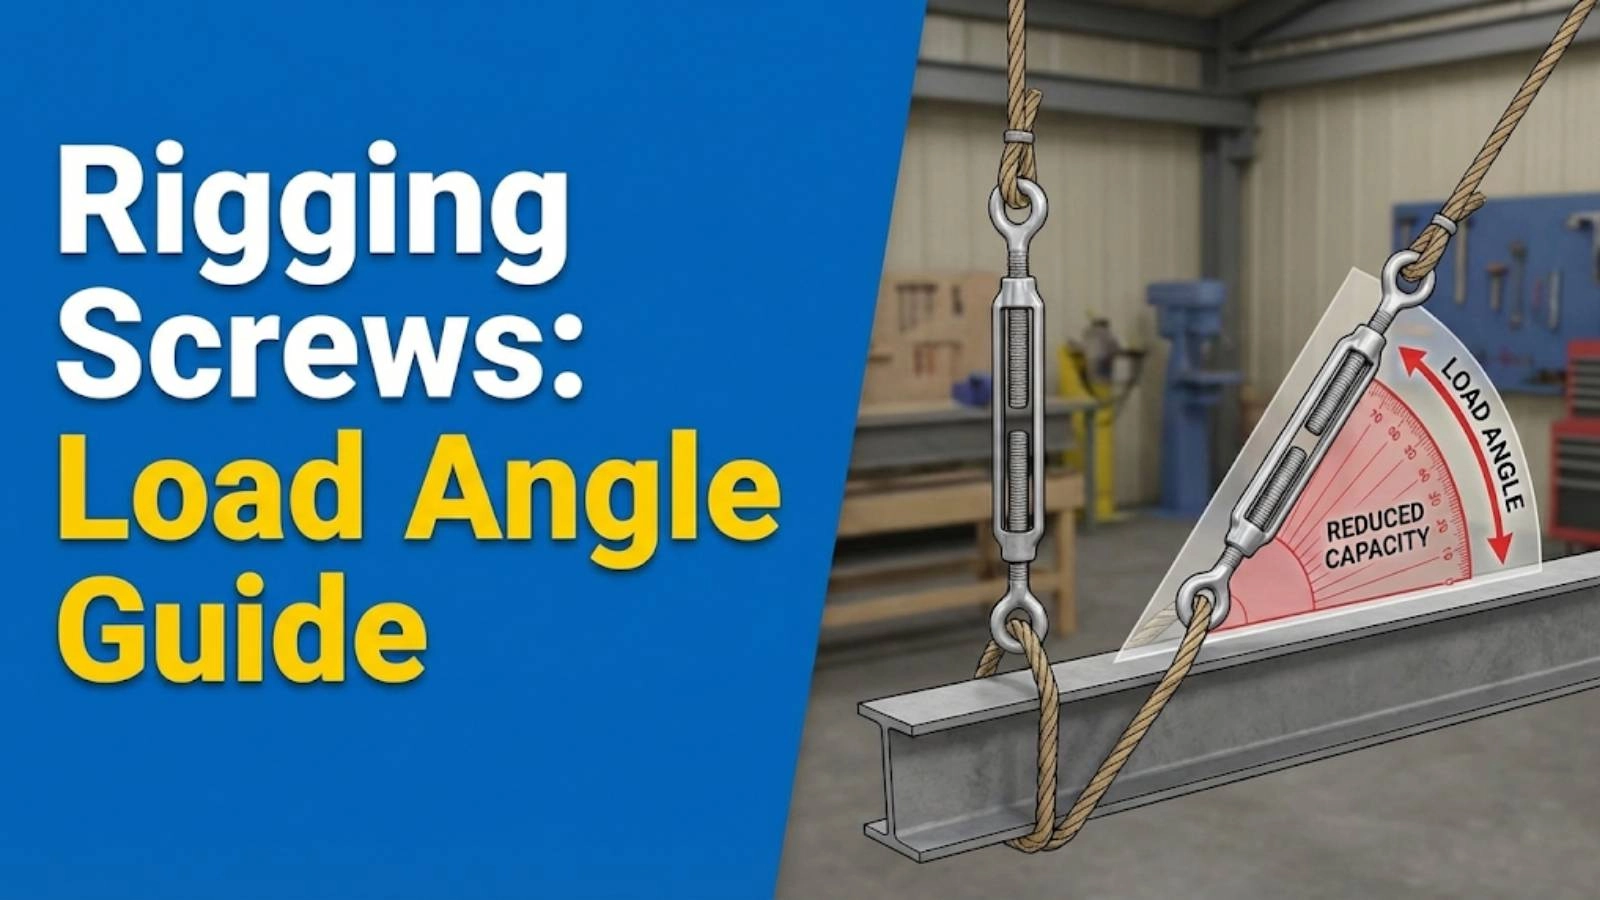
Mistake #3: Failing to Account for Load Angle
Failing to account for the load angle is a common mistake that can significantly reduce the effective SWL of a rigging screw. The angle at which the load is applied affects the stress on the screw, and even a small angle can dramatically decrease its capacity.
The Angle Multiplier: How Load Angle Impacts Capacity
The angle of the load affects the stress on the rigging screw by increasing the force exerted on the screw’s legs. When a load is applied vertically, the stress is evenly distributed between the two legs of the screw. However, when the load is applied at an angle, the stress is concentrated on one leg, reducing the overall capacity of the screw.
The relationship between load angle and SWL is typically expressed using an angle multiplier. The angle multiplier is a factor that is multiplied by the SWL to determine the reduced SWL at a given angle. The angle multiplier decreases as the load angle increases.
For example, if a rigging screw has an SWL of 1,000 lbs and the load is applied at an angle of 45 degrees, the angle multiplier might be 0.707. In this case, the reduced SWL would be 1,000 lbs x 0.707 = 707 lbs.
This means that the rigging screw can only safely handle a load of 707 lbs when the load is applied at a 45-degree angle. Attempting to lift a load greater than 707 lbs could cause the screw to fail.
[IMAGE: Diagram illustrating how load angle affects the stress on a rigging screw]
Even a small angle can significantly reduce the effective SWL. For example, at a 30-degree angle, the angle multiplier might be 0.866, reducing the SWL by 13.4%. At a 60-degree angle, the angle multiplier might be 0.5, reducing the SWL by 50%.
Common Angle Mistakes: Real-World Scenarios
Many real-world rigging setups involve dangerous load angles that can compromise safety. One common mistake is using a rigging screw to lift a load that is not directly below the screw. This creates a load angle that can significantly reduce the SWL.
For example, consider a scenario where a rigging screw is used to lift a pipe that is located several feet away from the screw. The angle between the screw and the pipe will create a load angle that reduces the effective SWL. If the load angle is too large, the screw could fail, causing the pipe to fall.
[IMAGE: Example of a rigging setup with a dangerous load angle]
Another common mistake is using multiple rigging screws to lift a single load, without properly accounting for the load angle. When multiple screws are used, the load is distributed between the screws, but the load angle can still affect the stress on each screw. If the load angle is not properly accounted for, one or more of the screws could be overloaded, leading to failure.
Identifying these angles requires careful observation and measurement. Use a protractor or angle finder to measure the angle between the rigging screw and the load. Be sure to account for any slope or unevenness in the surface.
Calculating Load Angle and Adjusting SWL
Calculating the reduced SWL based on load angle requires a simple formula:
Reduced SWL = SWL x Angle Multiplier
The angle multiplier can be found in rigging charts or calculated using trigonometric functions. For example, the angle multiplier for a 45-degree angle can be calculated as:
Angle Multiplier = cos(45 degrees) = 0.707
Once you have calculated the angle multiplier, you can use the formula above to determine the reduced SWL.
It’s important to note that the angle multiplier applies to each leg of the rigging screw. If you are using multiple screws, you must calculate the reduced SWL for each screw individually.
To help readers understand this concept, we often use visual aids, such as diagrams and charts, to illustrate the relationship between load angle and SWL. These visual aids can make it easier to grasp the concept and apply it in real-world situations. Our team in Dubai often creates custom charts for specific rigging configurations.
[IMAGE: Visual aid illustrating the relationship between load angle and SWL]
By understanding how load angle affects the SWL of a rigging screw and using the appropriate formulas and visual aids, you can ensure that your rigging operations are safe and efficient.
Mistake #4: Neglecting Dynamic Loading (Shock Loads)
Dynamic loading, also known as shock loading, refers to sudden and unexpected forces applied to a rigging system. Neglecting dynamic loading is a critical oversight that can lead to premature failure and dangerous situations. It’s essential to understand what dynamic loading is, how to identify potential sources, and how to minimize its impact.
What is Dynamic Loading and Why Does It Matter?
Dynamic loading occurs when a load is subjected to sudden acceleration or deceleration, creating forces that are significantly greater than the static weight of the load. This can happen due to sudden starts and stops, impacts, or dropped loads.
The increased stress caused by dynamic loading can exceed the SWL of the rigging screw, even if the static weight of the load is well within the limit. This can lead to plastic deformation, fatigue cracks, and ultimately, catastrophic failure.
Dynamic loading matters because it can dramatically reduce the lifespan of rigging equipment and increase the risk of accidents. Ignoring dynamic loading is like driving a car without shock absorbers; the ride will be rough, and the car will be more likely to break down.
Identifying Potential Shock Loads: Common Causes
Identifying potential sources of shock loads is crucial for preventing accidents. Here are some common situations where shock loads are likely to occur:
- Sudden starts and stops: When lifting or moving a load, avoid sudden starts and stops. Gradual acceleration and deceleration will minimize the forces exerted on the rigging system.
- Impacts: Impacts can create significant shock loads. Be careful to avoid impacts when handling loads, especially when working in confined spaces.
- Dropped loads: Dropped loads can create enormous shock loads. Never allow a load to free fall, even for a short distance.
- Snagging: If a load becomes snagged, the sudden release of tension can create a shock load. Use caution when freeing a snagged load.
- Wave action: In marine environments, wave action can create dynamic loading on rigging systems used for mooring or lifting.
[IMAGE: Illustration of a load experiencing dynamic loading due to a sudden stop]
We once had a client who was lifting a heavy piece of machinery onto a truck. The load snagged on a part of the truck bed, and when the tension was released, the sudden movement created a shock load that snapped the rigging screw. Fortunately, no one was injured, but the incident could have been much worse.
Minimizing the Impact of Dynamic Loading
Minimizing the impact of dynamic loading requires a combination of careful planning, proper equipment selection, and safe operating practices. Here are some strategies to help you reduce the risk of dynamic loading:
- Use shock-absorbing equipment: Shock-absorbing equipment, such as spring-loaded shackles or dynamic load arrestors, can help to cushion the impact of dynamic loads and reduce the stress on the rigging screw.
- Slow and controlled movements: Avoid sudden starts and stops. Use slow and controlled movements when lifting or moving loads.
- Proper rigging techniques: Use proper rigging techniques to distribute the load evenly and minimize the risk of snagging.
- Regular inspections: Regularly inspect rigging equipment for signs of wear, corrosion, or damage. Replace any damaged equipment immediately.
- Reduce the SWL: When dynamic loading is likely to occur, reduce the SWL of the rigging screw to account for the increased stress.
- Training: Ensure that all personnel involved in rigging operations are properly trained in safe operating practices and the identification of potential shock loads.
By taking these steps, you can minimize the impact of dynamic loading and ensure the safe and efficient use of rigging screws.
Mistake #5: Ignoring Environmental Factors and Corrosion
Environmental factors, such as saltwater, chemical exposure, and extreme temperatures, can significantly affect the performance and lifespan of rigging screws. Ignoring these factors and the potential for corrosion can lead to weakened components and catastrophic failures.
The Silent Killer: How Corrosion Weakens Rigging Screws
Corrosion is a major threat to rigging screws, as it weakens the metal and reduces its load-bearing capacity. Corrosion occurs when metal reacts with its environment, causing it to degrade and lose its strength.
There are several types of corrosion, including:
- General corrosion: This is a uniform type of corrosion that affects the entire surface of the metal.
- Pitting corrosion: This type of corrosion creates small pits or holes in the metal, which can weaken the screw and create stress concentrations.
- Galvanic corrosion: This type of corrosion occurs when two dissimilar metals are in contact in the presence of an electrolyte, such as saltwater. The more active metal corrodes preferentially, while the less active metal is protected.
Corrosion can significantly reduce the tensile strength and shear strength of a rigging screw, making it more susceptible to failure under load. Regular inspections are essential for detecting corrosion early and preventing it from causing serious damage.
Environmental Enemies: Identifying Harsh Conditions
Certain environments are more corrosive than others. Identifying these harsh conditions is crucial for taking appropriate preventive measures. Some common environmental enemies include:
- Saltwater environments: Saltwater is highly corrosive and can quickly degrade metal components. Rigging screws used in marine environments are particularly vulnerable to corrosion.
- Chemical exposure: Exposure to certain chemicals, such as acids, bases, and solvents, can accelerate corrosion.
- Extreme temperatures: Extreme temperatures can also affect the rate of corrosion. High temperatures can accelerate corrosion, while low temperatures can make metal more brittle and susceptible to cracking.
- High humidity: High humidity can create a moist environment that promotes corrosion.
- Industrial environments: Industrial environments often contain pollutants and corrosive substances that can damage rigging screws.
[IMAGE: Rigging screw showing signs of severe corrosion]
We once worked with a client who used rigging screws in a chemical plant. The screws were exposed to various corrosive chemicals, and the client failed to implement a proper maintenance program. As a result, the screws corroded rapidly, and several of them failed under load, causing a major accident.
Prevention is Key: Protecting Your Rigging Screws
Preventing corrosion is essential for extending the lifespan of rigging screws and ensuring safe operation. Here are some key preventive measures:
- Proper cleaning and lubrication: Regularly clean rigging screws to remove dirt, debris, and corrosive substances. Lubricate the screws with a corrosion-inhibiting lubricant to protect them from moisture and chemicals.
- Using corrosion-resistant materials: When possible, use rigging screws made from corrosion-resistant materials, such as stainless steel or galvanized steel.
- Protective coatings: Apply protective coatings, such as paint or epoxy, to rigging screws to shield them from the environment.
- Regular inspections: Regularly inspect rigging screws for signs of corrosion. Pay close attention to areas where corrosion is likely to occur, such as threads, joints, and areas exposed to moisture.
- Proper storage: Store rigging screws in a dry, well-ventilated area to prevent corrosion.
- Sacrificial anodes: In marine environments, use sacrificial anodes to protect rigging screws from galvanic corrosion. The anodes will corrode preferentially, protecting the screws from damage.
By implementing these preventive measures, you can significantly reduce the risk of corrosion and extend the lifespan of your rigging screws.
Mistake #6: Improper Thread Engagement
Proper thread engagement is crucial for ensuring a secure and reliable connection in a rigging screw. Insufficient thread engagement can lead to concentrated stress on fewer threads, increasing the risk of stripping or failure under load.
Thread Engagement 101: Ensuring a Secure Connection
Thread engagement refers to the amount of contact between the male and female threads of a threaded connection. Sufficient thread engagement is essential for distributing the load evenly across all threads and preventing stress concentrations.
When a threaded connection is properly engaged, the load is distributed over a large surface area, reducing the stress on each individual thread. This ensures that the connection can withstand the applied load without failing.
Insufficient thread engagement, on the other hand, concentrates the stress on fewer threads, increasing the risk of stripping or failure. This is because the threads that are engaged must bear a disproportionate share of the load.
The Danger of Shallow Threads: When It’s Not Enough
Partially engaged threads can be extremely dangerous, as they are more likely to strip or fail under load. When only a few threads are engaged, the load is concentrated on those threads, exceeding their load-bearing capacity.
This can lead to the threads deforming, stripping, or even breaking off. Once the threads are damaged, the connection becomes even weaker, and the risk of failure increases dramatically.
[IMAGE: Illustration of insufficient thread engagement in a rigging screw]
We once investigated an accident where a rigging screw failed due to insufficient thread engagement. The screw was used to lift a heavy load, and the threads stripped under the stress, causing the load to fall. The investigation revealed that the screw had been installed with only a few threads engaged, which was not enough to support the load.
Best Practices for Thread Engagement
Ensuring adequate thread engagement requires careful attention to detail and adherence to best practices. Here are some key guidelines:
- Ensure adequate thread engagement length: As a general rule, the thread engagement length should be at least equal to the diameter of the screw. For example, a 1/2-inch screw should have at least 1/2 inch of thread engagement.
- Visually inspect threads for damage or wear before use: Before installing a rigging screw, visually inspect the threads for signs of damage or wear. Damaged threads can reduce the thread engagement and weaken the connection.
- Use the correct nut or fitting: Make sure that you are using the correct nut or fitting for the screw. Using an incorrect nut or fitting can reduce the thread engagement and damage the threads.
- Tighten the connection properly: Tighten the connection to the manufacturer’s recommended torque. Overtightening can damage the threads, while undertightening can reduce the thread engagement.
- Use a thread lubricant: Applying a thread lubricant can reduce friction and prevent galling, making it easier to achieve proper thread engagement.
- Regularly inspect thread engagement: Regularly inspect thread engagement to ensure that the connection remains secure.
By following these best practices, you can ensure that your rigging screws have adequate thread engagement and that your rigging operations are safe and reliable.
Mistake #7: Over-Tightening
Overtightening a rigging screw can be just as detrimental as undertightening. While it might seem like tightening it as much as possible is the best way to ensure a secure connection, overtightening can actually damage the threads and reduce the SWL.
Tighten with Care: The Risks of Overtightening
Overtightening a rigging screw can create excessive stress on the threads and the surrounding components. This stress can lead to several problems, including:
- Deformation of threads: Overtightening can deform the threads, making it difficult to disassemble the connection and reducing the thread engagement.
- Damage to components: Overtightening can damage the components being connected, such as the nut, fitting, or the rigging screw itself.
- Reduced SWL: Overtightening can reduce the SWL of the rigging screw by weakening the threads and the surrounding components.
- Premature failure: In extreme cases, overtightening can lead to premature failure of the rigging screw under load.
[IMAGE: Illustration of deformed threads caused by overtightening]
The key is to tighten the rigging screw to the manufacturer’s recommended torque, which is the amount of force needed to create a secure connection without damaging the components.
Feeling the Pressure: Signs of Overtightening
Recognizing the signs of overtightening can help you avoid damaging your rigging screws. Some common signs of overtightening include:
- Difficulty in disassembly: If you have difficulty disassembling a connection, it may be a sign that it has been overtightened.
- Deformation of threads: Visually inspect the threads for signs of deformation. If the threads are flattened or distorted, it may be a sign of overtightening.
- Cracking or breakage: Cracking or breakage of the components being connected is a clear sign of overtightening.
- Increased resistance: If you feel increased resistance when tightening a connection, it may be a sign that you are overtightening it.
If you notice any of these signs, stop tightening the connection immediately and inspect the components for damage. If necessary, replace any damaged components.
The Right Touch: Torque Recommendations and Best Practices
Achieving the right amount of tightness requires careful attention to detail and adherence to best practices. Here are some key guidelines:
- Consult the manufacturer’s recommendations for torque values: The manufacturer’s recommendations for torque values are the best source of information for determining the proper tightness for a rigging screw.
- Use a torque wrench where appropriate: A torque wrench is a specialized tool that allows you to apply a specific amount of torque to a connection. Using a torque wrench can help you avoid overtightening or undertightening.
- Tighten in stages: Tighten the connection in stages, gradually increasing the torque until you reach the recommended value. This will help to ensure that the load is distributed evenly across all threads.
- Use a thread lubricant: Applying a thread lubricant can reduce friction and prevent galling, making it easier to achieve the proper tightness.
- Regularly calibrate your torque wrench: Torque wrenches can lose their accuracy over time, so it is important to calibrate them regularly.
- Avoid using excessive force: Avoid using excessive force when tightening a connection. If you have to use a lot of force, it may be a sign that something is wrong.
By following these best practices, you can ensure that your rigging screws are tightened properly and that your rigging operations are safe and reliable.
Mistake #8: Lack of Regular Inspections and Maintenance
Regular inspections and maintenance are essential for identifying potential problems early and preventing rigging screw failures. A lack of attention to these details can lead to catastrophic consequences.
The Eyes Have It: The Importance of Regular Inspections
Regular inspections can help you identify signs of wear, corrosion, or damage before they lead to a failure. Inspections should be performed before each use and at regular intervals, depending on the frequency and severity of use.
The frequency of inspections should be based on several factors, including:
- Frequency of use: Rigging screws that are used frequently should be inspected more often.
- Severity of use: Rigging screws that are subjected to heavy loads or harsh environments should be inspected more often.
- Environmental conditions: Rigging screws used in corrosive environments should be inspected more often.
- Manufacturer’s recommendations: Consult the manufacturer’s recommendations for inspection intervals.
A documented inspection program is essential for ensuring that inspections are performed consistently and that any problems are addressed promptly. The inspection program should include a checklist of items to be inspected, as well as a procedure for documenting the results of the inspection.
What to Look For: Signs of Wear and Damage
During inspections, look for the following signs of wear and damage:
- Cracks: Cracks can indicate that the rigging screw has been subjected to excessive stress or fatigue.
- Corrosion: Corrosion can weaken the metal and reduce its load-bearing capacity.
- Deformation: Deformation, such as bending or twisting, can indicate that the rigging screw has been overloaded.
- Worn threads: Worn threads can reduce the thread engagement and weaken the connection.
- Loose or missing parts: Loose or missing parts can compromise the safety of the rigging screw.
- Illegible markings: Illegible markings can make it difficult to determine the SWL of the rigging screw.
[IMAGE: Close-up of a rigging screw showing signs of wear and corrosion]
If you find any of these signs of wear or damage, remove the rigging screw from service immediately and replace it with a new one.
Maintenance Matters: Lubrication and Cleaning
In addition to regular inspections, proper maintenance is essential for extending the lifespan of rigging screws and ensuring safe operation. Maintenance should include:
- Proper lubrication: Lubrication can reduce friction and prevent corrosion. Lubricate the threads and moving parts of the rigging screw regularly with a corrosion-inhibiting lubricant.
- Cleaning: Cleaning can remove dirt, debris, and corrosive substances. Clean the rigging screw regularly with a mild detergent and water. Rinse thoroughly and allow to dry completely before lubricating.
By performing regular inspections and maintenance, you can identify potential problems early and prevent rigging screw failures.
Mistake #9: Using Damaged or Modified Rigging Screws
Using damaged or modified rigging screws is a recipe for disaster. These screws have been compromised and are no longer safe to use. It’s essential to recognize the red flags of damaged screws, understand the dangers of modifications, and know when to discard equipment.
Red Flags: Recognizing Damaged Screws
Damaged rigging screws can pose a significant safety risk, and it’s crucial to be able to identify them. Here are some red flags to look out for:
- Visible cracks: Any cracks, regardless of size, indicate a structural weakness and render the screw unsafe.
- Bends or distortions: Bends or distortions suggest the screw has been overloaded or subjected to undue stress.
- Excessive corrosion: Significant rust or corrosion weakens the metal and compromises its integrity.
- Damaged threads: Stripped, flattened, or otherwise damaged threads reduce the screw’s ability to bear a load securely.
- Missing or damaged safety features: Missing cotter pins, damaged locking mechanisms, or any other compromised safety feature should be cause for immediate concern.
[IMAGE: A collage showing examples of damaged rigging screws]
If you observe any of these red flags, the rigging screw should be immediately removed from service and replaced. Do not attempt to repair or use a damaged screw.
No Modifications Allowed: The Danger of Alterations
Modifying rigging screws can compromise their structural integrity and create a dangerous situation. Rigging screws are designed and manufactured to meet specific standards, and any alteration can invalidate those standards.
Modifications can include:
- Welding: Welding can alter the metal’s properties and create weak spots.
- Grinding: Grinding can remove material and reduce the screw’s load-bearing capacity.
- Drilling: Drilling holes can create stress concentrations and weaken the screw.
- Heating: Heating can change the metal’s temper and reduce its strength.
2026, it’s crucial to remember that modifying rigging screws can also have legal implications. If an accident occurs due to a modified screw, the person who made the modification could be held liable.
When in Doubt, Throw it Out: Replacing Damaged Equipment
When it comes to rigging screws, it’s always better to err on the side of caution. If you have any doubt about the safety of a rigging screw, discard it immediately and replace it with a new one.
Discarding damaged equipment is not only a matter of safety but also a matter of responsibility. By removing damaged equipment from service, you are protecting yourself, your colleagues, and the public from potential harm.
Proper disposal methods should be followed to prevent others from using discarded equipment. Cut the screw in half or otherwise render it unusable before disposing of it.
We at Safe and Secure Trading Company always advise clients: When in doubt, throw it out. Your safety is worth more than the cost of a new rigging screw.
Conclusion: Mastering Rigging Screw Weight for Safety
By avoiding these common mistakes, you can significantly enhance the safety and efficiency of your rigging operations. Understanding the Safe Working Load (SWL), ensuring component compatibility, accounting for load angle, minimizing dynamic loading, addressing environmental factors, ensuring proper thread engagement, avoiding over-tightening, conducting regular inspections, and avoiding the use of damaged or modified screws are all crucial for safe rigging practices.
Remember, the safe use of rigging screws requires a combination of knowledge, skill, and attention to detail. By following these guidelines, you can confidently and safely use rigging screws in a variety of applications.
We’ve equipped you with the knowledge and best practices needed to handle rigging screws with confidence and safety. This knowledge ensures every lift is not just efficient, but also secure.
FAQ Section
Q: What is the difference between SWL and breaking strength?
A: The Safe Working Load (SWL) is the maximum load a rigging screw is designed to handle safely, while the breaking strength is the point at which the screw will fail. The SWL is typically a fraction of the breaking strength, determined by a safety factor.
Q: How do I determine the correct SWL for my rigging screw?
A: The SWL is typically marked on the body of the screw. If the marking is illegible or missing, consult the manufacturer’s documentation or contact a qualified rigging inspector.
Q: Can I use a rigging screw that has been modified?
A: No, modifying rigging screws can compromise their structural integrity and create a dangerous situation. Never use a rigging screw that has been modified.
Q: How often should I inspect my rigging screws?
A: Rigging screws should be inspected before each use and at regular intervals, depending on the frequency and severity of use. A documented inspection program is essential for ensuring that inspections are performed consistently.
Q: What should I do if I find a damaged rigging screw?
A: Remove the damaged rigging screw from service immediately and replace it with a new one. Do not attempt to repair or use a damaged screw.
Q: What is dynamic loading and how can it affect rigging screws?
A: Dynamic loading, or shock loading, refers to sudden and unexpected forces applied to a rigging system. It can significantly increase the stress on rigging screws and lead to premature failure. Minimizing dynamic loading requires careful planning, proper equipment selection, and safe operating practices.
Q: How does load angle affect the SWL of a rigging screw?
A: The angle of the load affects the stress on the rigging screw by increasing the force exerted on the screw’s legs. Even a small angle can significantly reduce the effective SWL. Use an angle multiplier to calculate the reduced SWL based on load angle. The rigging screw load capacity decreases as the angle of load increases.
Q: What are some common environmental factors that can affect rigging screws?
A: Saltwater, chemical exposure, and extreme temperatures can all affect the performance and lifespan of rigging screws. Corrosion is a major threat, and preventive measures such as proper cleaning, lubrication, and using corrosion-resistant materials are essential.
Q: Why is proper thread engagement important?
A: Proper thread engagement is crucial for ensuring a secure and reliable connection. Insufficient thread engagement can lead to concentrated stress on fewer threads, increasing the risk of stripping or failure under load.
Q: Is it possible to overtighten a rigging screw?
A: Yes, overtightening a rigging screw can be just as detrimental as undertightening. Overtightening can damage the threads and reduce the SWL. Tighten the rigging screw to the manufacturer’s recommended torque, and use a torque wrench where appropriate.