The Importance of Safety Harness Inspection
Why Regular Inspections Are Non-Negotiable
Falls are a leading cause of workplace injuries and fatalities, making fall protection a critical aspect of workplace safety. According to the Bureau of Labor Statistics, falls account for a significant percentage of construction-related deaths each 2026. Safety harness inspection plays a crucial role in preventing these incidents.
Harness failure can have devastating consequences. If a harness fails during a fall, the worker may sustain serious injuries or even die. Defective or worn-out harnesses are often the culprit, highlighting the critical importance of regular safety harness inspection.
Employers have a legal and ethical obligation to provide a safe working environment for their employees. This includes ensuring that all fall protection equipment, especially safety harnesses, is in good working condition. Neglecting safety harness inspection can result in hefty fines, lawsuits, and, most importantly, preventable injuries or fatalities. Proper PPE inspection is key to avoiding those legal and financial issues.
Harness Inspection: A Proactive Safety Measure
Proactive safety practices are far more effective than reactive measures. Instead of waiting for an incident to occur, regular safety harness inspection allows you to identify and address potential hazards before they cause harm. This approach demonstrates a commitment to safety and helps prevent accidents before they happen.
Inspections contribute significantly to a culture of safety. When workers see that their employer takes safety seriously, they are more likely to prioritize safety themselves. Regular safety harness inspection reinforces the importance of safety and encourages workers to be more vigilant about potential hazards.
Investing in regular safety harness inspection offers a significant return on investment. Preventing just one fall-related injury can save thousands of dollars in medical expenses, lost productivity, and legal fees. Moreover, a safe workplace improves employee morale and reduces absenteeism.
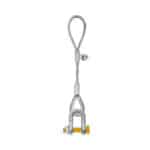
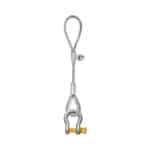
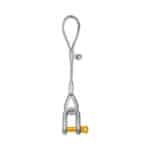
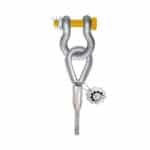
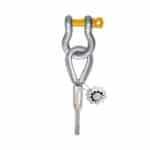
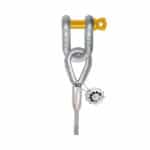
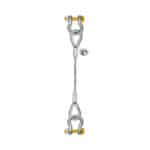
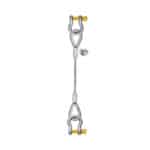
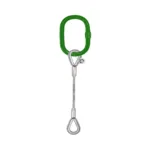
Understanding Safety Harness Components
Harness Anatomy: A Visual Breakdown
A safety harness is a complex piece of equipment with several key components, each designed to perform a specific function. Understanding these components is essential for conducting thorough and effective harness inspections.
The main components include webbing, D-rings, buckles, adjusting devices, and sub-pelvic straps. The webbing is the primary load-bearing element of the harness. D-rings serve as attachment points for connecting to a fall arrest system. Buckles and adjusting devices allow the user to properly fit the harness. Sub-pelvic straps provide additional support and prevent the worker from slipping out of the harness during a fall.
[IMAGE: Diagram of a safety harness, clearly labeling each component]
Safety harnesses are typically made from durable materials such as nylon or polyester webbing. These materials are chosen for their strength, resistance to abrasion, and ability to withstand environmental factors. The D-rings are usually made of forged steel, while buckles and adjusting devices may be made of steel or high-strength plastic.
Identifying Potential Weak Points
Certain areas of a safety harness are more susceptible to wear and tear than others. These areas include the webbing around D-rings, the stitching at stress points, and the buckles and adjusting devices. Regular safety harness inspection should focus on these potential weak points.
Common types of damage include cuts, abrasions, and fraying of the webbing; corrosion, deformation, or cracks in the buckles and D-rings; and loose or broken stitching. These types of damage can significantly reduce the harness’s load-bearing capacity and increase the risk of failure during a fall.
Each component of a safety harness has a specific load-bearing capacity. It is essential to understand these limits and to ensure that the harness is used within its intended parameters. Overloading a harness can cause it to fail, even if it appears to be in good condition.
Pre-Use Inspection: Your First Line of Defense
Step 1: Gather Necessary Equipment and Information
Before starting a safety harness inspection, gather all necessary equipment and information. This includes the manufacturer’s instructions, an inspection checklist, and proper lighting. Having these resources readily available will ensure that the inspection is thorough and accurate.
The manufacturer’s instructions provide detailed information about the specific harness model, including its intended use, limitations, and inspection criteria. The safety inspection checklist serves as a guide to ensure that all critical components are inspected. Adequate lighting is essential for visually inspecting the harness for damage.
“We once had a client in our Dubai office who skipped reading the manufacturer’s instructions. They missed a crucial detail about the harness’s lifespan and nearly used an expired harness. Always read the instructions first!”
Step 2: Visual Inspection of Webbing
Carefully inspect the webbing for any signs of damage, such as cuts, abrasions, or fraying. Pay close attention to areas around D-rings and buckles, as these are common stress points. Document any observed damage and assess its severity.
Cuts and abrasions can weaken the webbing and reduce its load-bearing capacity. Fraying can indicate that the webbing is deteriorating and may be more susceptible to damage. Any significant damage should be cause for concern and may require the harness to be removed from service. Workplace safety depends on it.
The severity of webbing damage depends on the extent and location of the damage. Minor abrasions may not be cause for immediate concern, but they should be monitored closely. More significant cuts or fraying require the harness to be taken out of service.
Step 3: Inspecting Buckles and Connectors
Ensure that all buckles and connectors function properly and lock securely. Check for corrosion, deformation, or cracks, which can compromise their strength. Test the security of the connections by applying gentle pressure and ensuring that they remain locked.
Properly functioning buckles and connectors are essential for maintaining the integrity of the harness. Corrosion can weaken the metal components, while deformation or cracks can make them more likely to fail under stress. If any issues are identified, the harness should be removed from service immediately.
The security of the connections can be tested by applying gentle pressure to the buckles and connectors after they are locked. If the connections come undone easily, the harness should not be used. The harness safety depends on this important step.
Step 4: Examining D-Rings and Attachment Points
Check D-rings and attachment points for bending, cracking, or distortion. Ensure that they are properly aligned and securely attached to the harness. Pay close attention to the stress points on D-rings, as these are areas where damage is more likely to occur.
Bending, cracking, or distortion can significantly reduce the strength of D-rings and attachment points. Proper alignment is essential for ensuring that the load is distributed evenly. If any issues are identified, the harness should be removed from service.
D-rings are subjected to significant stress during a fall. Therefore, it is crucial to inspect them carefully for any signs of damage. Any bending, cracking, or distortion should be cause for immediate concern.
Step 5: Verifying Stitching and Seams
Check for loose threads, broken stitches, or unraveling along all seams. Pay particular attention to the stitching around D-rings and buckles, as these are high-stress areas. Understand the importance of seam integrity in maintaining the harness’s overall strength.
Loose threads, broken stitches, or unraveling can compromise the integrity of the seams and reduce the harness’s load-bearing capacity. Seam integrity is crucial for ensuring that the harness can withstand the forces generated during a fall. A proper equipment inspection depends on verification of this element.
Different stitching patterns are used in harness construction, each with its own strength and durability. Understanding these patterns can help you identify potential weaknesses in the seams. For example, reinforced stitching is typically used in high-stress areas.
Detailed Inspection Process: A Step-by-Step Guide
Step 6: Conduct a Tactile Inspection
Supplement the visual inspection with a tactile inspection. Feel for inconsistencies, stiffness, or weak spots in the webbing and other components. Compare the texture of different parts of the harness to identify any areas that feel different.
Tactile inspection can help identify hidden damage that may not be visible to the naked eye. For example, internal damage to the webbing may cause it to feel stiffer or weaker than other areas. This is a critical part of harness safety.
“We once had a user who missed a small cut in the webbing during a visual inspection, but they caught it during the tactile inspection. This highlights the importance of using both visual and tactile inspection techniques.”
Step 7: Review the Harness Label and Markings
Ensure that the harness label is legible and intact. Verify the harness’s manufacturing date and lifespan. Understand the limitations and specifications of the harness as indicated on the label.
The harness label provides essential information about the harness, including its model number, manufacturing date, and intended use. The manufacturing date is particularly important because harnesses have a limited lifespan. The OSHA compliance relies on this step.
Harnesses typically have a lifespan of five to ten years from the date of manufacture, regardless of whether they have been used. Using a harness beyond its expiration date can significantly increase the risk of failure.
Step 8: Document Your Findings
Record all observations, including any damage or defects, in a detailed inspection log. Use a standardized inspection checklist to ensure that all critical components are inspected. Maintain a comprehensive inspection log for each harness.
Documenting your findings is essential for tracking the condition of the harness over time. This information can be used to identify potential problems and to determine when a harness should be removed from service. This documentation also is critical in case of an incident or accident that requires further investigation.
A standardized inspection checklist ensures that all critical components are inspected consistently. The checklist should include all of the steps outlined in this guide, as well as any additional recommendations from the manufacturer.
Step 9: Making the Decision: Pass or Fail
Based on your inspection findings, determine whether the harness is safe for use. Use the criteria outlined in the manufacturer’s instructions and this guide to make your decision. Understand when a harness must be removed from service.
A harness should be removed from service if it exhibits any significant damage, such as cuts, abrasions, or fraying of the webbing; corrosion, deformation, or cracks in the buckles or D-rings; or loose or broken stitching. Any doubt about the safety of the harness should err on the side of caution.
Proper procedures for disposing of damaged harnesses should be followed to prevent them from being used again. This typically involves cutting the harness into pieces and marking it as “unusable.”
Post-Inspection Procedures and Best Practices
Storing and Maintaining Safety Harnesses
Proper storage conditions are essential for preventing damage to safety harnesses. Store harnesses in a clean, dry place away from direct sunlight and extreme temperatures. Avoid storing harnesses in areas where they may be exposed to chemicals or corrosive substances.
Cleaning procedures should be followed to maintain harness integrity. Use mild soap and water to clean the harness. Avoid using harsh chemicals or solvents, as these can damage the webbing. Allow the harness to air dry completely before storing it. Harness maintenance is key to its longevity.
Preventative maintenance tips can extend the lifespan of a safety harness. Regularly inspect the harness for any signs of damage, even if it has not been used recently. Replace any damaged components promptly.
Training and Competency
Ensure that all users are properly trained in harness inspection. Training should cover all aspects of the inspection process, including how to identify different types of damage, how to use an inspection checklist, and how to make a pass/fail decision.
Regular refresher courses are essential for maintaining competency in harness inspection. These courses should cover any updates to inspection procedures or new information about harness safety. This knowledge is important to workplace safety.
Supervision plays a crucial role in enforcing inspection protocols. Supervisors should ensure that all workers are properly trained in harness inspection and that they are following the correct procedures. Supervisors should also conduct regular audits to ensure that inspections are being performed consistently and accurately.
Troubleshooting Common Inspection Issues
Addressing Common Types of Damage
Different types of harness damage require different strategies. Minor abrasions may be addressed with careful monitoring, while more significant damage requires the harness to be removed from service. When in doubt, consult with a manufacturer or safety expert.
Repairing minor damage to a safety harness may be possible in some cases. However, it is essential to follow the manufacturer’s instructions carefully and to use only approved repair methods. In most cases, it is safer and more cost-effective to replace the entire harness rather than attempting to repair it. PPE inspection should be a high priority.
“According to a study by the National Safety Council, over 60% of harness failures are attributed to improper maintenance and lack of regular inspections.”
Dealing with Unclear Inspection Results
If you are unsure about the safety of a harness after conducting an inspection, seek a second opinion from a qualified inspector. A fresh set of eyes may be able to identify damage that you missed. This process is critical to fall protection equipment.
Objective measurement tools can be used to assess damage more accurately. For example, a thickness gauge can be used to measure the thickness of the webbing and to identify areas that have been worn thin. A pull tester can be used to test the strength of the seams.
Document the decision-making process in detail. Explain why you made the decision to pass or fail the harness. This documentation can be helpful if questions arise later.
Conclusion: Ensuring Safety Through Rigorous Inspection
Recap of Key Inspection Steps
The safety harness inspection process includes several critical steps. First, gather necessary equipment and information. Second, perform a visual inspection of the webbing, buckles, connectors, D-rings, and stitching. Third, conduct a tactile inspection to identify hidden damage. Fourth, review the harness label and markings. Fifth, document your findings and make a pass/fail decision. Sixth, store and maintain harnesses properly and provide ongoing training. Each of these steps contributes to a safe workplace.
[CHECKLIST: A downloadable PDF checklist for safety harness inspection]
The Ongoing Commitment to Safety
Regular safety harness inspection is not a one-time event but an ongoing commitment to safety. By implementing a comprehensive inspection program, you can significantly reduce the risk of fall-related injuries and fatalities in the workplace.
Promoting a culture of safety is essential for ensuring that workers take safety seriously. This includes providing adequate training, enforcing inspection protocols, and recognizing and rewarding safe behavior.
At Safe and Secure Trading Company, we’re committed to providing you with the tools and resources you need to maintain a safe workplace. Our expertise is based on years of experience.
FAQ Section
Q: How often should a safety harness be inspected?
A: Safety harnesses should be inspected before each use and at least annually by a competent person. More frequent inspections may be necessary in harsh environments or when the harness is subjected to heavy use.
Q: What are the key things to look for during a safety harness inspection?
A: Key things to look for include cuts, abrasions, and fraying of the webbing; corrosion, deformation, or cracks in the buckles and D-rings; loose or broken stitching; and a legible and intact harness label.
Q: What should I do if I find damage during a safety harness inspection?
A: If you find any damage during a safety harness inspection, remove the harness from service immediately. Do not use the harness until it has been inspected and repaired or replaced by a qualified person.
Q: Can I repair a damaged safety harness myself?
A: In most cases, it is not recommended to repair a damaged safety harness yourself. Repairs should only be performed by a qualified person using approved methods. It is often safer and more cost-effective to replace the entire harness.
Q: How long does a safety harness last?
A: Safety harnesses typically have a lifespan of five to ten years from the date of manufacture, regardless of whether they have been used. The manufacturer’s instructions will provide specific information about the lifespan of the harness.
Q: What is a competent person?
A: A competent person is someone who is capable of identifying existing and predictable hazards in the surroundings or working conditions which are unsanitary, hazardous, or dangerous to employees, and who has authorization to take prompt corrective measures to eliminate them. This person should have specific training and experience in safety harness inspection.
Q: What are OSHA requirements for safety harness inspection?
A: OSHA requires that employers ensure that all fall protection equipment, including safety harnesses, is inspected before each use and maintained in a safe condition. Employers must also provide training to employees on how to inspect and use fall protection equipment properly. The OSHA compliance is key to avoiding penalties.
Q: What are the best practices for storing safety harnesses?
A: Store safety harnesses in a clean, dry place away from direct sunlight and extreme temperatures. Avoid storing harnesses in areas where they may be exposed to chemicals or corrosive substances.
Q: How can I ensure that my workers are properly trained in safety harness inspection?
A: Provide comprehensive training to all workers who use safety harnesses. Training should cover all aspects of the inspection process, including how to identify different types of damage, how to use an inspection checklist, and how to make a pass/fail decision. Regular refresher courses should also be provided to maintain competency.
Q: What are the benefits of using a safety harness inspection checklist?
A: A safety inspection checklist ensures that all critical components are inspected consistently. The checklist should include all of the steps outlined in this guide, as well as any additional recommendations from the manufacturer.