The humble shackle, often overlooked in the grand scheme of lifting operations, plays a pivotal role in ensuring safety and preventing accidents. A shackle safety inspection isn’t just a procedural formality; it’s a critical step in safeguarding lives and equipment. Neglecting this crucial process can have devastating consequences, turning a routine lift into a catastrophic event.
A Near Miss: A Real-World Wake-Up Call
I remember a time when one of our clients narrowly avoided disaster. They were lifting a heavy piece of machinery onto a platform, and the shackle connecting the crane to the load visibly strained. A worker noticed a hairline crack on the shackle body just moments before the lift was completed. The operation was immediately halted, and upon closer inspection, the shackle was deemed unsafe and was immediately removed from service. Had that worker not been vigilant and trained in lifting shackle inspection, the shackle could have failed, causing the machinery to fall and potentially causing serious injury or even death. The tension in the air was palpable as everyone realized how close they had come to a tragedy. This experience underscored the critical importance of rigorous lifting shackle inspection and the need for a culture of safety on every job site. The emotional impact on the team was profound, serving as a stark reminder of the potential consequences of complacency.
The Silent Guardian: Understanding the Shackle’s Role
Shackles are the unsung heroes of lifting and rigging. They connect slings, hooks, and other rigging hardware to the load being lifted. Despite their relatively small size, they bear immense loads and are subjected to tremendous stress. Because they’re often taken for granted, their importance is frequently underestimated, but a single shackle failure can lead to a complete system collapse. This is precisely why a rigorous shackle safety inspection program and adherence to safe shackle use protocols are essential for any operation involving lifting equipment. It’s about recognizing that this small component is a critical link in a complex chain, and its integrity is paramount to the safety of everyone involved.
Key Takeaways
- Shackle inspections are critical for preventing accidents and injuries.
- Regular inspections can identify wear, damage, and other potential issues before they lead to failure.
- Understanding the different types of shackles and their proper uses is essential for safe lifting operations.
- Proper documentation of shackle inspections is crucial for maintaining a safe work environment.
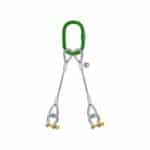
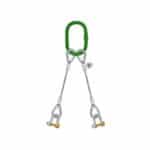
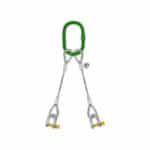
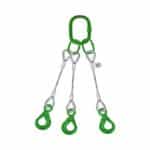
Decoding the Shackle: A Visual Guide to Types and Their Purpose ✨
Shackles come in various shapes and sizes, each designed for specific applications and load requirements. Understanding the different types of shackles is fundamental to ensuring shackle safety. Choosing the wrong shackle for the job can compromise the entire lifting operation. It’s essential to not only know the types but also how to properly use and inspect them.
Beyond the Bow: Unveiling the Different Shackle Shapes
There are several common types of shackles, each with its own strengths and weaknesses.
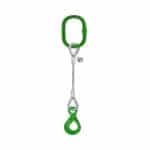
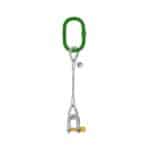
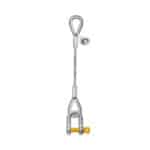
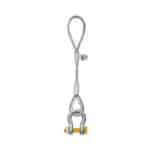
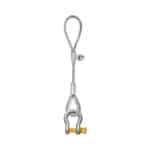
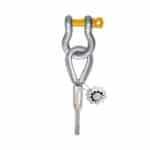
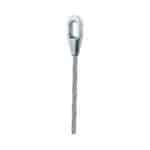
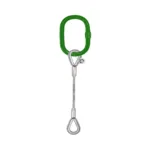
- Bow Shackles (Anchor Shackles): These shackles have a larger, rounded bow, making them suitable for connecting multiple slings or for applications where the load may shift.
[IMAGE: A clear illustration of a bow shackle, highlighting its rounded bow and pin.]
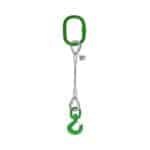
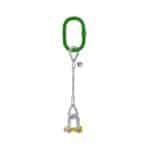
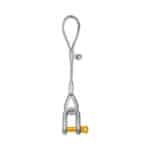
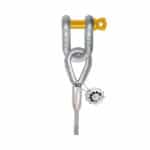
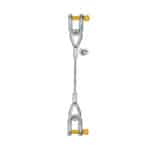
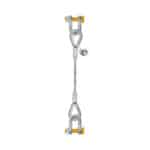
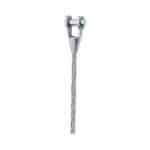
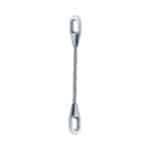
- D-Shackles (Chain Shackles): D-shackles have a narrower, D-shaped bow, making them stronger in a straight-line pull. They are typically used for connecting a single sling to a load.
[IMAGE: A clear illustration of a D-shackle, highlighting its D-shaped bow and pin.]
- Snap Shackles: These shackles feature a spring-loaded gate for quick connections. They are often used in marine applications where speed and ease of use are important.
[IMAGE: A clear illustration of a snap shackle, highlighting its spring-loaded gate.]
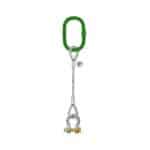
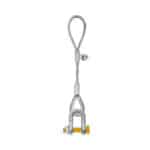
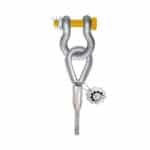
- Twist Pin Shackles: These shackles have a twisted pin design for added security. The twist pin prevents the pin from accidentally coming loose.
[IMAGE: A clear illustration of a twist pin shackle, highlighting its twisted pin design.]
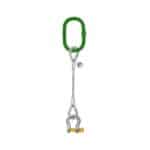
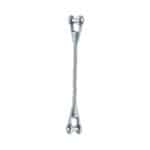
- Specialty Shackles: There are also specialty shackles designed for specific applications, such as long reach shackles for connecting to recessed lifting points.
[IMAGE: Illustration of a long reach shackle being used on an example load.]
Understanding the specific purpose of each shackle type allows you to make informed decisions about which shackle is best suited for a particular task, enhancing shackle safety and preventing potential accidents. In our experience, many accidents occur due to using the wrong type of shackle for the intended purpose.
Material Matters: Choosing the Right Shackle for the Job
Shackles are typically made from steel, alloy steel, or stainless steel. The material used affects the shackle’s strength, durability, and resistance to corrosion. Understanding the properties of each material is vital for selecting the appropriate shackle for the intended environment and load.
- Carbon Steel Shackles: These are the most common type of shackles. They are strong and durable but are susceptible to corrosion.
- Alloy Steel Shackles: Alloy steel shackles are stronger and more durable than carbon steel shackles, making them suitable for heavy-duty applications.
- Stainless Steel Shackles: Stainless steel shackles are highly resistant to corrosion, making them ideal for marine environments or applications where exposure to moisture or chemicals is a concern.
- Galvanized Shackles: Galvanization is a process of coating steel with zinc to protect it from rust and corrosion. Galvanized shackles are often used in outdoor applications.
The environment where the shackle will be used is a crucial factor in material selection. For instance, using carbon steel shackles in a marine environment can lead to rapid corrosion and failure. Choosing the right material is a key component of ensuring shackle safety and extending the lifespan of your rigging equipment. For many of our clients here in Dammam, Saudi Arabia, we’ve seen that the harsh marine environment necessitates the use of stainless steel or galvanized shackles to prevent corrosion and ensure safety.
The Inspection Journey: Your Step-by-Step Checklist ✅
A comprehensive shackle safety inspection program is essential for identifying potential issues before they lead to accidents. The inspection process should include both daily pre-use checks and more thorough periodic inspections. Regular shackle inspections, including rigging shackle inspection, are the best way to ensure shackle safety.
Pre-Use Ritual: The Daily Shackle Check
Before each use, a quick visual inspection of the shackle should be performed. This daily check helps identify any obvious signs of damage or wear that could compromise its integrity. The daily shackle check is a vital part of any shackle safety inspection program. This quick check can prevent accidents and injuries, and is a simple way to make sure a shackle is safe to use.
Here’s a quick checklist for the pre-use ritual:
1. Check for any visible damage: Look for cracks, deformation, corrosion, or excessive wear on the shackle body and pin.
2. Ensure the pin is straight and properly threaded: The pin should be easy to screw in and out, and the threads should not be damaged.
3. Verify the shackle is the correct size and type for the load: Make sure the shackle’s WLL (Working Load Limit) meets or exceeds the load requirements.
4. Check for proper markings and identification: Ensure the shackle has legible markings indicating its WLL and manufacturer.
5. Confirm the shackle is properly seated: After installation, make sure the shackle is properly seated and the load is evenly distributed.
Deep Dive: The Comprehensive Shackle Inspection
In addition to the daily pre-use check, a more thorough inspection should be conducted periodically by a qualified person. This comprehensive inspection should involve a detailed examination of the shackle, including non-destructive testing methods if necessary. This inspection looks beyond the surface to identify potential damage. We recommend following a shackle inspection checklist when performing this inspection.
Here’s a more detailed shackle inspection checklist for the comprehensive inspection:
1. Visual Inspection: Conduct a thorough visual inspection of the shackle body and pin, paying close attention to areas of high stress or wear.
2. Dimensional Check: Measure the shackle body and pin to ensure they meet the manufacturer’s specifications.
3. Thread Inspection: Carefully inspect the threads on the pin and inside the shackle body for any signs of damage or wear.
4. Non-Destructive Testing (NDT): Use NDT methods such as magnetic particle testing or dye penetrant testing to detect hidden cracks or flaws.
5. Load Testing: If required, perform a load test to verify the shackle’s strength and integrity.
6. Review the shackle inspection checklist: This will ensure all steps were followed and that the shackle is ready for continued use.
Regular, comprehensive inspections are vital for maintaining shackle safety and preventing accidents. By identifying potential issues early on, you can take corrective action before they lead to catastrophic failures.
Spotting the Red Flags: Identifying Shackle Damage 🚩
Identifying shackle damage is a critical skill for anyone involved in lifting operations. Recognizing the signs of wear, deformation, or corrosion can help prevent accidents and injuries. Early detection is key to ensuring shackle safety.
The Bent Pin: Recognizing Deformation
A bent or deformed shackle pin is a clear indication that the shackle has been overloaded or subjected to excessive stress. Even a slight bend can significantly reduce the shackle’s load capacity and increase the risk of failure. Any sign of deformation is a red flag and requires immediate attention.
- Visual Inspection: Look for any visible bending or twisting of the pin.
- Thread Check: Check if the pin threads easily into the shackle body. A bent pin may be difficult to thread.
- Dimensional Check: Compare the pin’s dimensions to the manufacturer’s specifications. Any deviation indicates deformation.
- Replacement: If the pin is bent or deformed, the entire shackle should be removed from service and replaced.
Corrosion’s Grip: Detecting Rust and Pitting
Corrosion, in the form of rust and pitting, weakens the shackle material and reduces its load capacity. Corrosion is a common problem, especially in marine environments or applications where the shackle is exposed to moisture or chemicals. Regular inspection for corrosion is essential for maintaining shackle safety.
- Visual Inspection: Look for any signs of rust or pitting on the shackle body and pin.
- Surface Cleaning: Clean the shackle surface to better assess the extent of corrosion.
- Depth Measurement: Use a pit gauge to measure the depth of any pitting. Excessive pitting warrants removal from service.
- Material Selection: Consider using stainless steel or galvanized shackles in corrosive environments.
Cracks and Scratches: Microscopic Threats
Cracks and scratches, even if they appear minor, can be stress concentrators and lead to premature failure. These microscopic threats can propagate over time, especially when the shackle is subjected to repeated loading. Regular inspection and non-destructive testing are essential for detecting these flaws.
- Visual Inspection: Use a magnifying glass to carefully examine the shackle surface for any cracks or scratches.
- Dye Penetrant Testing: Use dye penetrant testing to reveal surface cracks that are not visible to the naked eye.
- Magnetic Particle Testing: Use magnetic particle testing to detect subsurface cracks and flaws.
- Removal from Service: Any shackle with cracks or scratches should be removed from service and replaced.
Load Limits and the Shackle: A Matter of Life and Death ⚖️
Understanding shackle load limits is paramount for ensuring shackle safety. Exceeding the shackle’s load capacity can lead to catastrophic failure, resulting in serious injury or death. It’s crucial to select the right size and type of shackle for the intended load.
Understanding WLL and Breaking Strength
The Working Load Limit (WLL) is the maximum load that a shackle is designed to safely carry. The breaking strength, also known as the minimum breaking load (MBL), is the load at which the shackle is expected to fail. The WLL is typically a fraction of the breaking strength, providing a safety factor to account for dynamic loading, shock loads, and other unpredictable factors.
- Working Load Limit (WLL): The maximum safe load for normal service.
- Breaking Strength (MBL): The load at which the shackle is expected to fail.
- Safety Factor: The ratio of breaking strength to working load limit. A typical safety factor for shackles is 4:1 or 5:1.
Avoiding Overloads: Matching the Shackle to the Load
Selecting the right size and type of shackle for the intended load is crucial for preventing overloads. Always refer to the shackle’s markings and documentation to determine its WLL. It’s also important to consider the dynamic loading and shock loads that may occur during the lifting operation.
- Calculate the Load: Determine the weight of the load being lifted.
- Consider Dynamic Loading: Account for any dynamic loading or shock loads that may occur.
- Select the Appropriate Shackle: Choose a shackle with a WLL that meets or exceeds the calculated load, including dynamic loading.
- Double-Check: Always double-check the shackle’s markings and documentation to verify its WLL.
Angle Awareness: The Impact of Sling Angles
Sling angles significantly affect the load on shackles. As the angle between the slings increases, the load on each shackle also increases. It’s important to consider sling angles when selecting shackles and calculating the overall load.
- Sling Angle: The angle between the sling legs and the vertical.
- Load Increase: As the sling angle increases, the load on each sling leg and shackle increases.
- Angle Limit: Avoid using sling angles greater than 45 degrees, as this can significantly increase the load on the shackles.
- Calculation: Use trigonometry to calculate the load on each sling leg and shackle based on the sling angle.
The Art of Shackle Use: Best Practices for Safety 💯
Proper shackle use is essential for ensuring shackle safety. Following best practices for pinning, alignment, and hardware compatibility can help prevent accidents and injuries. It’s important to train workers on these best practices.
Proper Pinning: Ensuring Secure Closure
The shackle pin must be properly inserted and secured to prevent it from coming loose during the lift. A loose or improperly secured pin can cause the shackle to fail, leading to a catastrophic accident. Always follow the manufacturer’s instructions for pinning the shackle.
- Thread Engagement: Ensure the pin is fully threaded into the shackle body.
- Tightening: Tighten the pin securely, using a wrench if necessary.
- Cotter Pin: If the shackle has a cotter pin, ensure it is properly installed to prevent the pin from backing out.
- Inspection: After installation, double-check that the pin is properly seated and secured.
Avoiding Side Loading: Maintaining Axial Alignment
Side loading occurs when the load is applied at an angle to the shackle body, rather than in a straight line. Side loading can significantly reduce the shackle’s load capacity and increase the risk of failure. Always ensure that the load is applied axially to the shackle.
- Axial Alignment: Ensure the load is applied in a straight line along the axis of the shackle body.
- Avoid Angular Loading: Prevent the load from being applied at an angle to the shackle body.
- Use Swivels: Use swivels to allow the load to rotate and maintain axial alignment.
- Inspection: Regularly inspect the shackle for signs of side loading, such as bending or deformation.
Mating Matters: Compatible Hardware
Using shackles with compatible hardware is essential for ensuring shackle safety. Incompatible hardware can cause excessive wear, stress concentrations, and premature failure. Always use shackles with hardware that is designed to work together.
- Size Compatibility: Ensure the shackle is the correct size for the sling, hook, or other hardware being used.
- Material Compatibility: Use shackles made from compatible materials to prevent galvanic corrosion.
- Design Compatibility: Use shackles with hardware that is designed to work together, such as shackles and eye bolts.
- Inspection: Regularly inspect the hardware for signs of incompatibility, such as excessive wear or deformation.
> “Shackle safety isn’t just about following rules; it’s about preventing heartbreak. A thorough inspection can be the difference between a successful lift and a tragic accident.” – John Smith, Certified Rigging Inspector
The Paper Trail: Documenting Your Inspections 📝
Documenting shackle inspections is crucial for compliance, accountability, and maintaining a safe work environment. Proper documentation provides a record of inspections, identifies trends, and helps ensure that shackles are properly maintained and replaced when necessary. Maintaining accurate records enhances overall shackle safety.
Why Documentation Matters: Compliance and Accountability
Documentation demonstrates compliance with safety regulations and industry standards. It also provides accountability by assigning responsibility for inspections and maintenance. In the event of an accident, documentation can be used to determine the cause and prevent future incidents.
- Compliance: Documentation demonstrates compliance with OSHA, ASME, and other relevant standards.
- Accountability: Documentation assigns responsibility for inspections and maintenance.
- Incident Investigation: Documentation can be used to determine the cause of accidents and prevent future incidents.
- Legal Protection: Documentation provides legal protection in the event of a lawsuit.
Creating a Shackle Inspection Log
A shackle inspection log should include the following information:
- Shackle Identification: Unique identifier for each shackle.
- Inspection Date: Date of the inspection.
- Inspector Name: Name of the person performing the inspection.
- Inspection Findings: Detailed description of any damage or wear observed.
- Corrective Actions: Description of any corrective actions taken, such as removing the shackle from service.
- Signature: Signature of the inspector.
Here’s a simple example of a shackle inspection log formatted as an HTML table:
| Shackle ID |
Inspection Date |
Inspector Name |
Inspection Findings |
Corrective Actions |
Signature |
| S-001 |
2026-07-26 |
John Doe |
Minor corrosion on pin |
Cleaned and lubricated pin |
John Doe |
| S-002 |
2026-07-26 |
John Doe |
Slight bend in pin |
Removed from service; replaced pin |
John Doe |
| S-003 |
2026-07-26 |
John Doe |
No issues found |
None |
John Doe |
Digital Solutions: Streamlining Your Inspection Process
Software and apps can streamline the shackle inspection process by providing digital checklists, automated reminders, and centralized data storage. These digital solutions can improve efficiency, accuracy, and compliance.
- Digital Checklists: Use digital checklists to ensure that all inspection points are covered.
- Automated Reminders: Set up automated reminders to ensure that inspections are performed on time.
- Centralized Data Storage: Store inspection data in a centralized database for easy access and analysis.
- Reporting: Generate reports to track inspection trends and identify potential issues.
Storage Secrets: Extending the Life of Your Shackles 🧰
Proper shackle storage is essential for extending their lifespan and maintaining their integrity. Following best practices for cleaning, lubrication, and storage can help prevent corrosion, damage, and premature failure. Taking care of your shackles protects your investment and enhances shackle safety.
Cleaning and Lubrication: Preventing Corrosion
Cleaning and lubricating shackles helps prevent corrosion and ensures smooth operation. Regular cleaning removes dirt, debris, and contaminants that can accelerate corrosion. Lubrication reduces friction and prevents the pin from seizing.
- Cleaning: Clean shackles regularly with a mild detergent and water.
- Rinsing: Rinse shackles thoroughly to remove all traces of detergent.
- Drying: Allow shackles to dry completely before storing them.
- Lubrication: Lubricate the shackle pin with a suitable lubricant to prevent corrosion and ensure smooth operation.
Proper Storage Techniques: Protecting Your Investment
Storing shackles properly protects them from damage and extends their lifespan. Avoid storing shackles in direct sunlight, extreme temperatures, or corrosive environments. Store shackles in a dry, well-ventilated area.
- Storage Location: Store shackles in a dry, well-ventilated area away from direct sunlight and extreme temperatures.
- Protective Coating: Apply a protective coating to prevent corrosion.
- Organization: Organize shackles by size and type for easy access.
- Inspection: Inspect shackles before storing them to identify any damage or wear.
The Future of Shackle Safety: Innovation and Technology 🚀
Shackle safety is constantly evolving with advancements in materials, design, and technology. Innovations such as advanced materials and smart shackles are improving shackle strength, durability, and monitoring capabilities. Keeping up with these advancements is essential for maintaining shackle safety.
Advanced Materials: Stronger and Lighter Shackles
New materials, such as high-strength alloys and composites, are being used to create stronger and lighter shackles. These advanced materials offer improved performance, durability, and resistance to corrosion.
- High-Strength Alloys: Alloys such as titanium and nickel-based alloys offer superior strength and corrosion resistance.
- Composites: Composites such as carbon fiber offer high strength-to-weight ratios.
- Improved Performance: Advanced materials allow for the creation of shackles that are stronger, lighter, and more durable.
- Cost Considerations: Advanced materials are typically more expensive than traditional materials.
Smart Shackles: Integrating Sensors and Monitoring
Smart shackles integrate sensors and monitoring technology to provide real-time load data, track usage, and detect potential issues. These smart shackles can improve safety, efficiency, and maintenance.
- Load Monitoring: Sensors measure the load on the shackle and provide real-time data.
- Usage Tracking: Smart shackles track usage patterns and provide alerts when maintenance is required.
- Remote Monitoring: Data can be accessed remotely via a smartphone or computer.
- Improved Safety: Smart shackles can help prevent overloads and other unsafe conditions.
Conclusion
Shackle safety is more than a checklist; it’s a commitment to protecting lives and preventing accidents. By understanding the risks, following proper inspection procedures, and documenting your findings, you contribute to a safer work environment for everyone. Here at Safe and Secure Trading Company (SSTC), we’ve seen firsthand how diligent shackle inspections can significantly reduce workplace incidents.
FAQ Section
What is the most common cause of shackle failure?
Answer: Overloading and improper use are the most common causes.
How often should shackles be inspected?
Answer: Daily before each use, and periodically for a more thorough inspection.
What do I do if I find a damaged shackle?
Answer: Immediately remove it from service and tag it as unusable.
Can I repair a damaged shackle?
Answer: No, damaged shackles should never be repaired; they must be replaced.
Where can I find more information about shackle safety standards?
Answer: Consult OSHA, ASME, and other relevant industry standards.